In this Beat Dissected, we show you how to program a 5/4 drum ‘n’ bass groove in the style of Machinedrum, Nosaj Thing or Lone.
If your journey to dance music was via jazz, it’s likely you will have listened to Dave Brubeck’s “Take Five’. It’s an excellent example of how 5/4 started to make its way into popular music.
Our previous Beat Dissected covered Thavius Beck’s track “Coordinated Will” which is a beat in 6/4 time signature. Continuing our series on different time signatures in electronic music, we look at how to do 5/4 d’n’b. As we move through the steps, we’ll focus on a few tricks to help glue the beat together.
You can now also follow the Beat Dissected series on YouTube. Make sure to like and subscribe so we can keep bringing you great content!
Before we start
Don’t forget to click any image to enlarge. And if you want to download the MIDI file you can using the contact form below:
Here’s the beat we’re building today. We’ve added a bass line and chords to provide context:
Spec
Tempo
166 BPMSwing
ManualSounds
LoopcloudStep 1
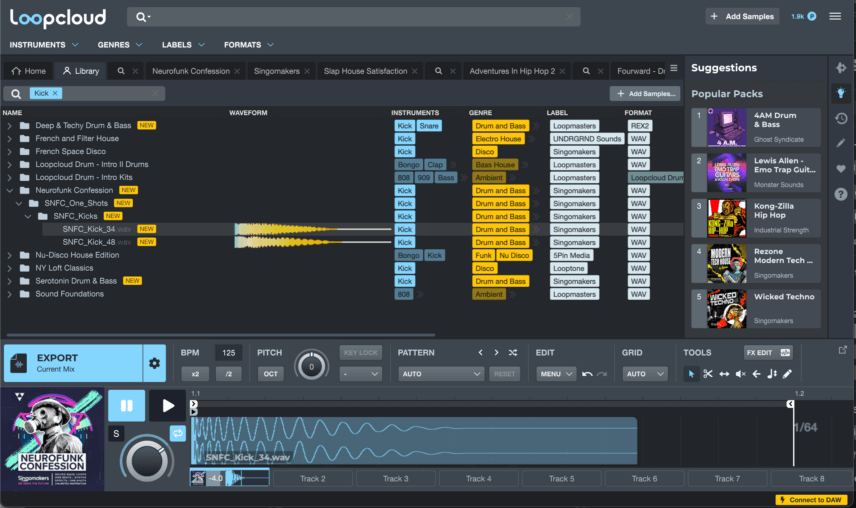
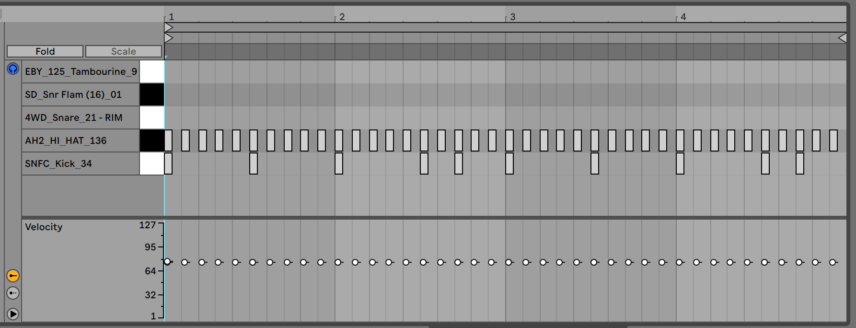
Let’s lay down the foundation of the beat with the kick and hi-hat. For the kick, we used ‘SNFC_Kick_34’ from Singomakers’ Neurofunk Confession pack and for the hat we used ‘AH2_HI_HAT_136’ from Push Button Bang’s Adventures in Hip Hop 2 Pack.
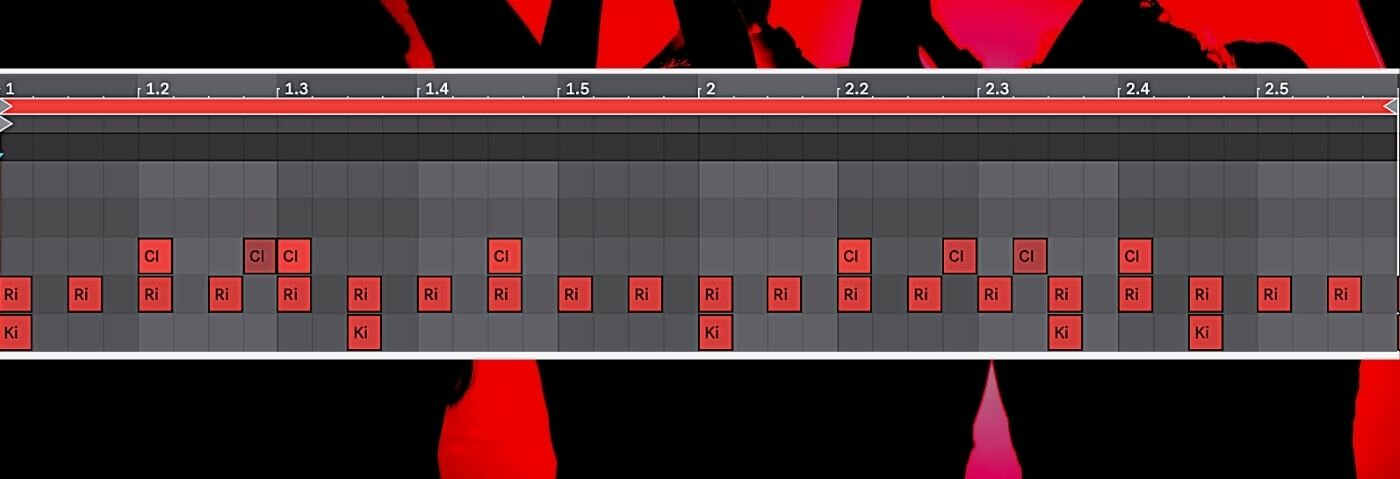
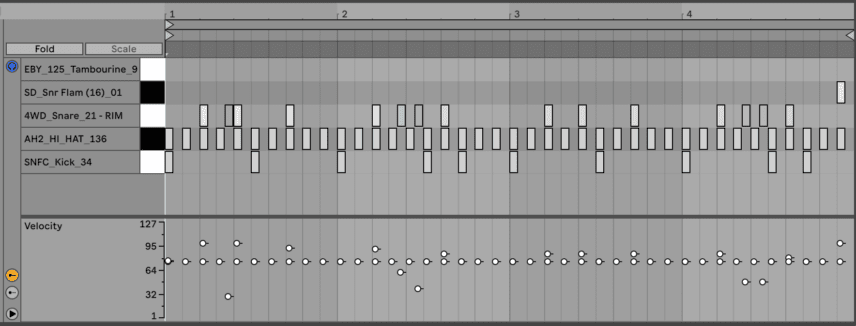
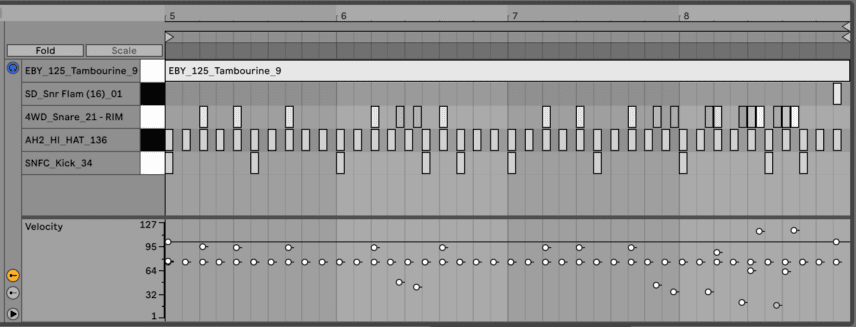
With the kick, eighth notes are key for the groove. The quarter notes are the five notes in the bar that hit at the same time as the metronome or 1-2-3-4-5 every bar. The eighth notes sit between these and you can count them “1 and 2 and 3 and 4 and 5 and”.
The kick is doing two things in this pattern. The first of these is hitting at the first beat of every bar. The second use of the kick is adding syncopation, via eighth-note hits. The pattern is a two-bar, loop and in the first bar, it plays on the “3 and“. In the second bar, it plays on 3-and as well as 4-and.
The hi-hat is also working to stabilise the rhythm by every single eighth note. Add Live’s Velocity MIDI device and increase Random to something between 15-20. It will make each note slightly different in volume and ultimately make it sound more “live”.
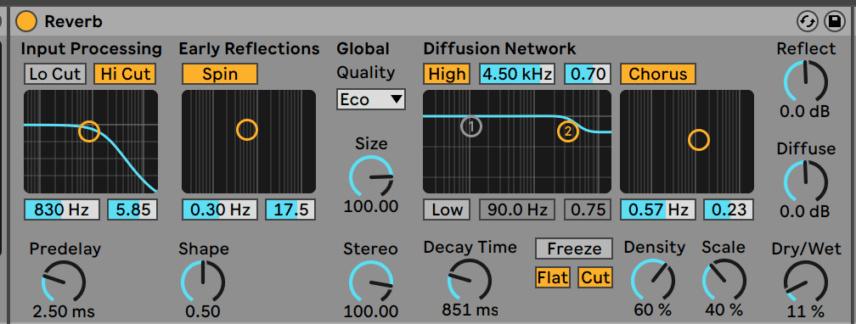
We’ve inserted a reverb on the hat to make the part wider. We used Live’s default Reverb with a 600 ms Decay Time, 24% Dry/Wet and some internal chorus. We’re not going to add reverb to the other drum parts but a little bit of reverb on hi-hats works for us..!
Here’s our progress so far. We’ve added a metronome for context:
STEP 2
For the snare parts we’re going to add one rim-like main hit and an acoustic-sounding flammed snare hit. For the rim we used ‘4WD_Snare_21’ from Loopmasters’ Fourward – Drum & Bass Pressure pack and for the acoustic snare we used ‘SD_Snr Flam (16)_01’ from Industrial Strength’s Lenny Dee – Snare pack.
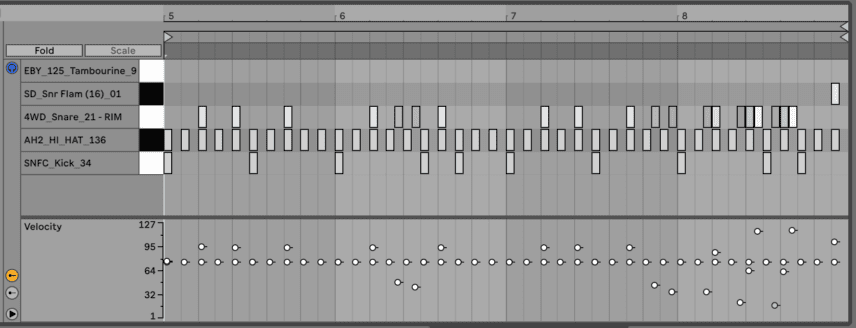
As with traditional d’n’b or even breakbeat, the snare needs to form a call and response relationship with the kick. It also needs to provide syncopation using fills to emphasize off-beat hits. Velocity is key here and using lower velocities for the fills makes it sound like a real drummer is playing. For example, in the first bar fill there’s a low-velocity hit followed by a high velocity hit.
The flammed snare comes in right at the end of the fourth and eight bars to add some suspense before the next downbeat. Something Machinedrum will do often is sprinkling organic acoustic-drum textures across his productions. If the drum hit is too dry you can always add some reverb with a short decay. We used Live’s Reverb with a decay time of 868 ms at 11% wet.
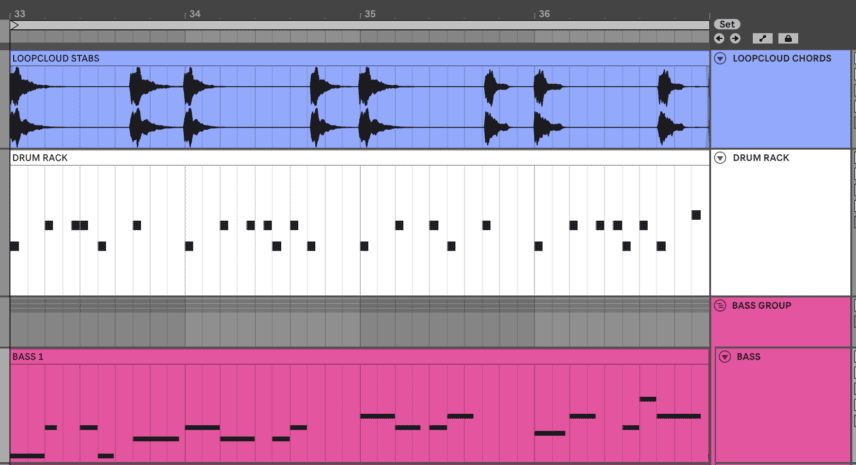
At this stage, it’s helpful to review the musical parts. Each chord plays at the same time as either a kick or a snare. The same applies to almost every single bass note. This relationship between these elements make the 5/4 groove sound far more natural.
Here’s our progress so far of the first four bars:
STEP 3
We’ve now increased our pattern from four to eight bars to accommodate some more variations with the snare:
Here’s our progress so far with the 5/4 metronome added in for context. We’ve removed the musical parts for now and we’ll add them back in later:
Step 4
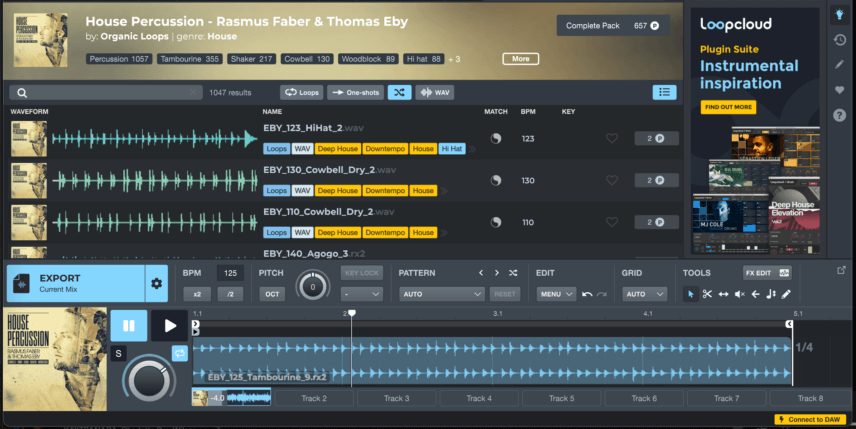
The last part we’re going to add to the beat is a 16th-note tambourine loop. We used ‘EBY_125_Tambourine_9’ from Organic Loops’ pack House Percussion – Rasmus Faber & Thomas Eby.
One of the best parts about working with Loopcloud is that it has a plug-in that syncs the app to your DAW, warping every loop to your tempo so you can test it in real-time. After going through a couple of percussion loop options we settled on this one, especially because it has some of its own internal swing that adds another level of rhythm.
Drag your loop onto a pad in the drum rack and extend the note in the piano roll so it continues to play while held.
Here’s how the tambourine sounds over four bars:
STEP 5
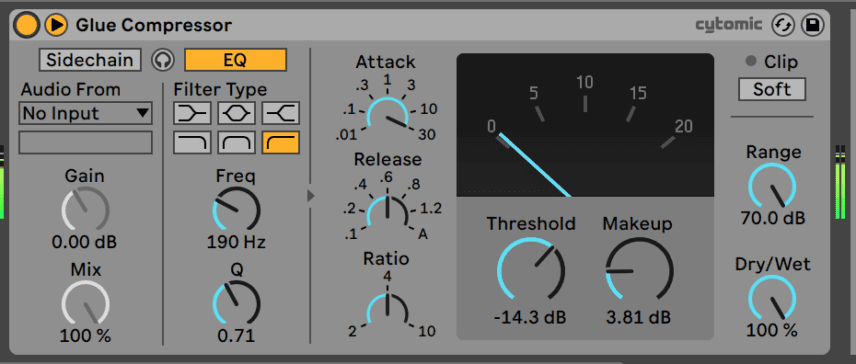
Finally, to add some general cohesion and punch, add a Glue Compressor to the whole Drum Rack. Enable EQ and roll up the frequency setting to 190 Hz so that the kick drum triggers the compressor less. Set the Attack its slowest value, lower the threshold until you get about 2-3 db’s of gain reduction and increase the Makeup knob to around 4 db.
Here’s the final drum pattern over eight bars:
Here’s the final beat with the musical parts for context:
STEP 6
Beat Dissected is not the place to focus on how to make the musical elements. You can visit our ‘Tutorials’ section for that.
However, while we’re here we made the bass part as three layers using Live’s Electric FM Wow Bass, Sub Stomach and Electric Nylon Guitar presets. For the chords, we used chord stab samples from Samplestate’s UK House, Garage and Bass pack.
This content is supported by Loopcloud. If you want to read more about content funding on Attack Magazine and how we can continue to provide content to you for free, visit our content funding page for a breakdown of our editorial policy.
