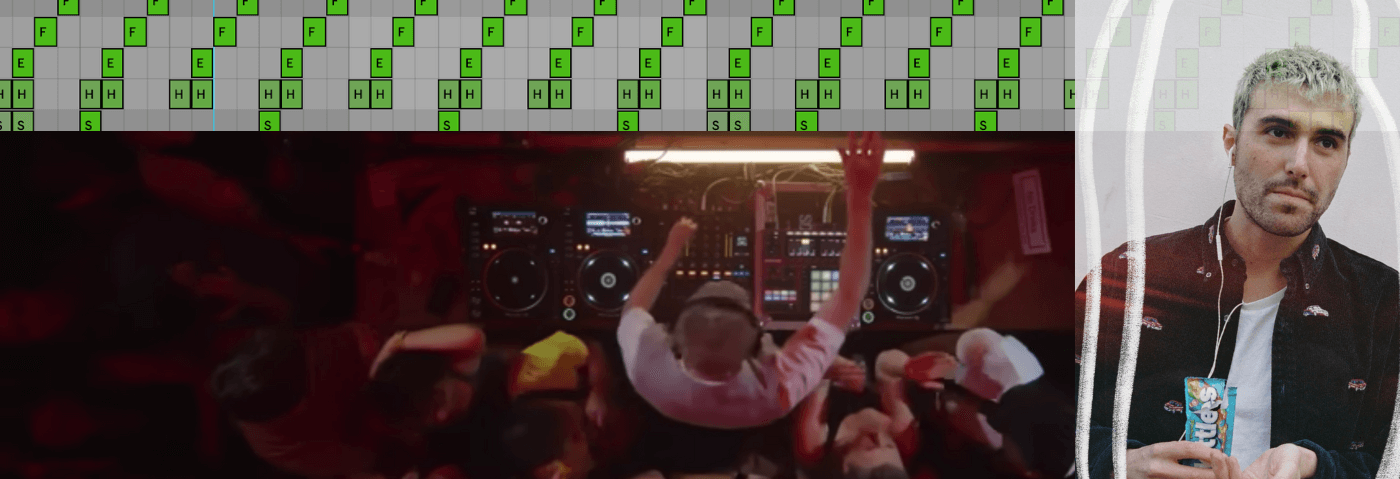
Inspired by his iconic Boiler Room set, we create a beat in the style of the UK’s most exciting producer Fred again… We’re going to use his recently release ‘Kammy (like i do) as the basis for a Beat Dissected.
Ever since Fred again.. dropped his then-unreleased track ‘Kammy (like i do)’ in his London Boiler Room set, his fans have been waiting with bated breath for an official release.
His set, which to date, has garnered over 8 million views had plenty of highlights, but his frenetic finger drumming over KAMILLE’s infectious vocal in the opening few minutes set the tone.
Kammy (like i do) was officially released on October 3rd and was followed by the release of Actual Life 3, Fred again..’s third LP in just 18 months. Forgive us, but surely he should be called Fred again, again, again, again…you get the point…
In this Beat Dissected we’re going to analyze the beat of Kammy (like i do) and construct a new beat inspired by Fred again..’s production on the track.
Here’s what we’re going to make:
And here’s the beat with some musical elements for context:
Download the session file to follow along! Successful submission will redirect you to the homepage (we know….trying to fix it!)
Step 1: Kick
In classic Fred again.. style, the kick programming in Kammy (like i do) is slightly unorthodox.
First, create a drum rack and load a 909 kick. ‘Kick 909 Tune 4’ from the Skitter and Step pack works well. It has a nice airy attack and a full tail which fits the Fred again.. aesthetic well.

Create a four bar MIDI clip on the Drum Rack channel by selecting the four bars and using the shortcut ‘Cmd + Shift + M‘ on Mac or ‘Ctrl + Shift + M’ on Windows. Program the below pattern for your kick.
Reduce the velocity of the first kick, whenever there are two sixteenth-note kicks in a row. Take a look at the velocity handles at the bottom of the below image for a visual illustration.

Step 2: Snare
For the snare sound we need a tight snappy rimshot – ‘Snare Noise Mangah’ from Glitch and Wash works well. To make it that little bit tighter, pitch it up an octave once you’ve loaded the sample in Drum Rack.

For the snare pattern, place a hit on every offbeat and a two-sixteenth-note snare roll at the beginning of every two bars. At the end of the four-bar loop program, a three note snare fill. Again, take note of the velocities of the snare hits – velocity variation is key for creating a human energy.

Step 3: 909 Hats
Next load a closed 909 hat sample from Ableton’s core library into your Drum Rack. remove some high and low frequencies with a 12 dB/oct band pass filter set at around 4.8 kHz.

Now program a repeating high hat pattern as shown below. Leave the final quarter bar free of any hi hats. Again, note the velocity of the notes in the pattern.

Step 4: Shakers
Next up, shakers. You could grab a shaker loop from a sample pack and chop it up, but we’re going to build the shaker pattern using one-shots.
Load three different shaker one shots into your Drum Rack. We’ve gone for ‘Cabasa Filtered Chekov’, ‘Cabasa Long Synth’ and ‘Cabasa Chelsea Short’ from the Drum Essentials pack. Pitch down ‘Cabasa Long Synth’.
Group the shakers together in the drum rack in Session view with ‘Cmd + G’ or Ctrl + G’. This way you can easily adjust the volume of the shakers together and treat them as one instrument.
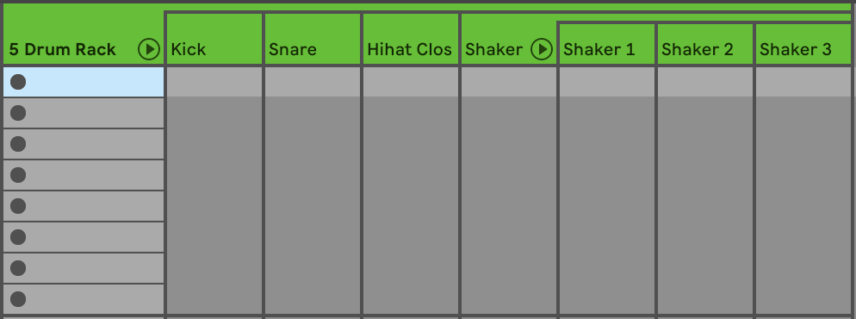
Program the below pattern and adjust the volume of the group so that it sits nicely with the other drum elements.

Step 5: Extra Tweaks
Time to balance the elements in your drum beat with the chain list in Drum Rack. You want your kick and snare to be the most prominent elements, and for your hats and shakers to feel as if they merge into one.

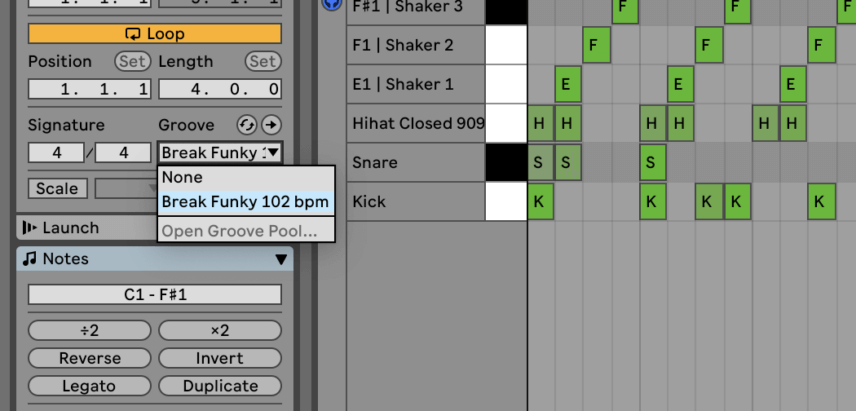
To add some swing to the beat we extracted the groove from the loop ‘Break Funky 102’ and applied it to the drum MIDI.
Step 6: Processing
Finally, load Ableton’s Drum Buss and Reverb on the Drum Rack channel.
Add compression, Soft Drive, Crunch and Dampening at around 9.2 kHz with Drum Buss.
The original track has quite a lot of reverb applied to the drums, but we have to be careful it doesn’t swamp them.
Set the Predelay to 13.6ms and the Decay to 1.4s. Filter out frequencies below 250 Hz with the input filter and tame the high ends using the Diffusion network. Add a little chorus, set Reflect and Diffuse to 3.7dB and 1.2dB respectively and balance the mix at around 13% Wet.

And here it is in context:
