
u-he are makers of award-winning software synthesisers and effects including Diva, Repro-1, Zebra2, Hive, Bazille, Presswerk and Satin.
Visit U-he

u-he are makers of award-winning software synthesisers and effects including Diva, Repro-1, Zebra2, Hive, Bazille, Presswerk and Satin.
Visit U-heUsing Synthmaster, we recreate the synth parts in a mid 90s classic – ‘Eutow’.
Looking back to the classics, Autechre’s 1995 album Tri Repetae is an absolute gem. Even decades later it’s worth the occasional relisten, and today we’re going to use KV331 Audio’s Synthmaster to recreate the album’s bass heavy electro-influenced Eutow. This is a two-for-one – we’ll rebuild both the strings patch and the bass patch because they’re relatively simple builds and are so much more combined than the sum of the parts.
We’ll start with the strings. Here’s a taste of where we’ll land and the MIDI we’re going to use on this part specifically – make sure to download the session to get the whole arrangement including percussion.
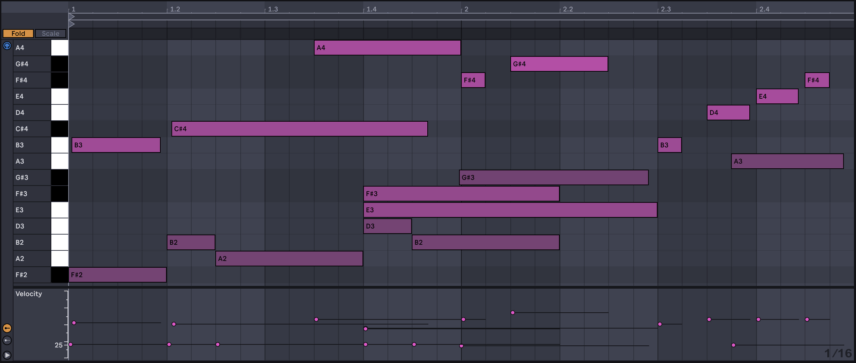
You can either download a demo of KV331’s deep and rich-sounding Synthmaster softsynth or try to follow along with your softsynth of choice. Set your DAW to 130 BPM and let’s begin!
Remember! Click any image to enlarge!
Click on the name of the current preset in Synthmaster and select “Init Preset” so we can start with a blank slate.
Then, just to the right, under the undo and redo buttons, you’ll find a place where you can select how many voices synthmaster will use. Click on it and select 48 voices.
Then we’ll choose our waveform for oscillator one by clicking on the waveform to open the waveform menu, selecting Single Cycle Waveforms, then choosing the Analog category, choosing Uno16, and selecting the Uno16 Sawtooth waveform.
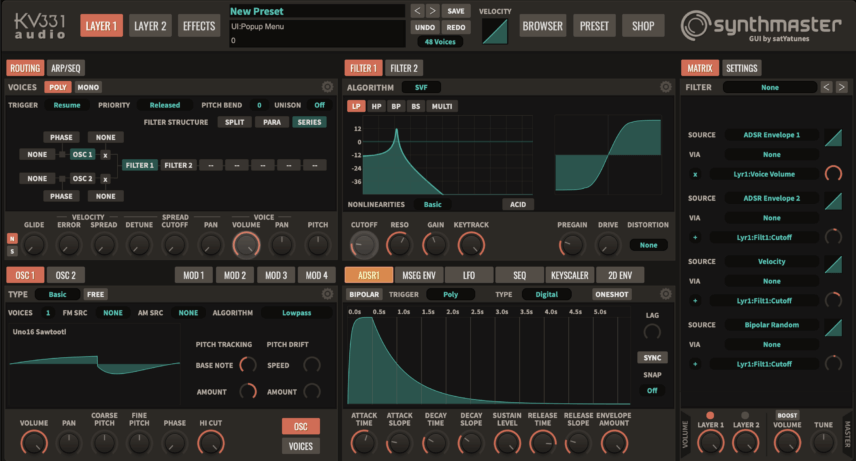
Then let’s move over to the ADSR1 envelope which is pre-routed to the amplifier. We’re going to increase the attack to about 1 o’clock and soften the attack slope just a touch by turning the slope knob to about 9 o’clock. We’ll do the same thing with the decay time and slope, then finally crank the release knob up to about 4 o’clock, giving us a nice and languid volume envelope.
That will give us a start.
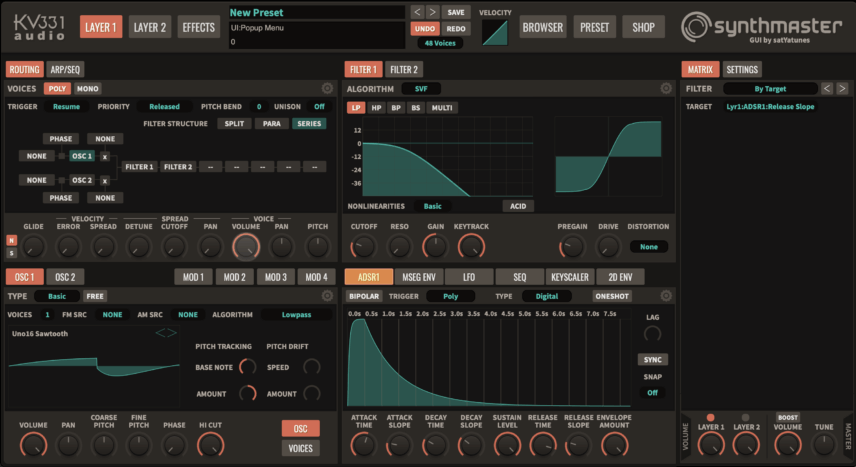
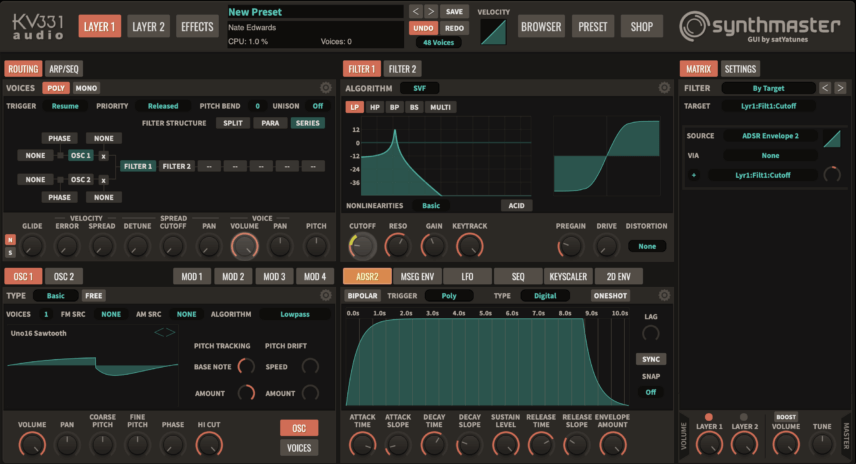
Now we’ll start to dial in the filter envelope. First things first – activate Filter 1 by clicking on it in the flow diagram on the top-left corner of Synthmaster’s interface. Then move over to the filter section, pull the cutoff down to about 9 o’clock, crank the resonance up a bit past halfway, and now it’s time for us to modulate that filter.
First, right-click on the cutoff knob and select Add Modulation, move to Envelopes and select ADSR Envelope 2. When you add the second envelope as a modulator, it should automatically show ADSR2 as selected in the envelope section on the bottom right. You can right click on the illuminated button reading ADSR2 to open up the menu for switching between envelopes.
Similar to the treatment we gave the volume envelope, we’re going to turn up the attack, decay, and release time. Make sure your settings match the image below.
Also notice that we can make changes to how exactly the envelope affects the filter in the mod matrix all the way to the right. Anytime you assign a modulator to a parameter, you can click on the knob for the modulated parameter and the modulators that alter that parameter will appear in the matrix.
Click on the filter cutoff knob and you’ll see ADSR Envelope 2 is modulating Lyr1:Filt1:Cutoff, or the cutoff of filter one in layer one. There’s also a small knob to the right where you can alter the amount of the modulation. Pull that knob down to about 2 o’clock which will make the effect fairly subtle.]
Let’s add more modulators to the filter cutoff. Right click again on the cutoff knob, this time selecting Add modulation, MIDI, and velocity. In the matrix, turn the intensity knob for this modulation down to about 2 o’clock. Add one more modulation to the filter by selecting Add modulation, other, and bipolar random. Turn the intensity of that modulation to almost nothing at all… it will add a subtle shifting character to the sound.
As much as it’s usually a cop out to lean too hard on effects, the effects really make so much of this sound what it is, starting with a rich, deep chorus. Let’s visit the effects section of synthmaster.
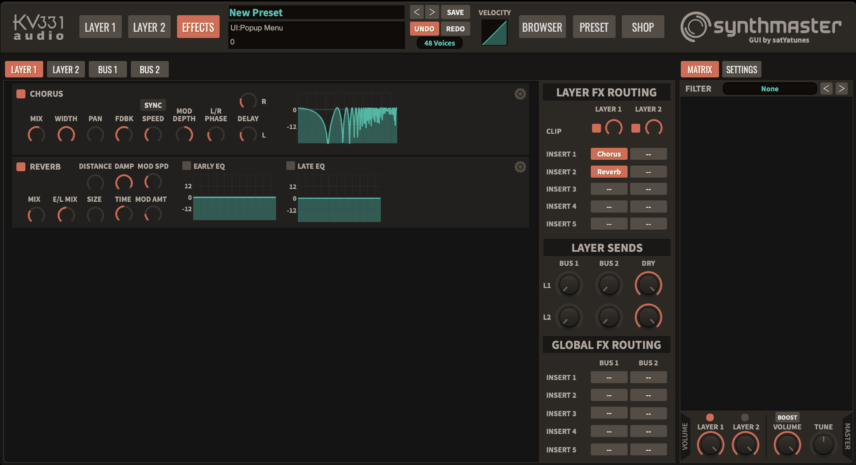
Click on the effects button in the top right corner of the interface, then move to the Layer FX routing section and right click on the first empty cell next to the words Insert 1. This will open up a menu of available effects and we can select a chorus. You don’t have to do much to the settings here besides increasing the time parameter a bit to really get a bit of a seasick warping feeling.
Now right click on the next empty effects cell and select a reverb effect. Add a touch of space with settings matched to the image below and you’ll hear that we came a long way pretty quickly.
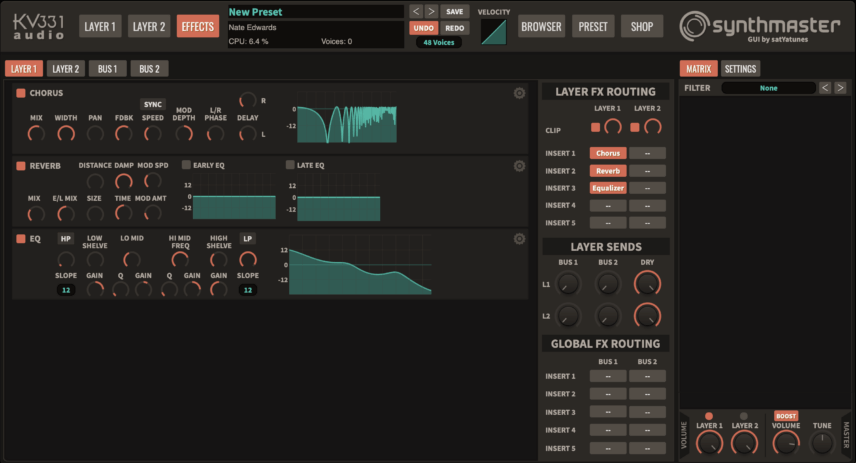
I’m not sure what synth Autechre used on Eutow or what front end they plugged into, but whatever it was, it had a lot of bottom end. In order to get that bass emphasis without it sounding forced, uneven, or distorted, we’re going to use an equalizer effect to significantly pull down the high frequencies and boost the lows with very broad EQ curves, giving the sound the guts we want without making it sound out of place.
That EQ move will significantly decrease the overall volume of the patch so we’ll have to compensate by activating the “boost” function on the master volume in the very bottom right of the interface and adjusting the gain as pictured.
Finally, we’re going to add some wild pitch bend modulation that really gives this piece a lot of its distinct flavor. In the top-left quadrant of Synthmaster just above the diagram of the synth’s signal flow you’ll see the Pitch Bend setting area, and we want to adjust that to a value of 12.
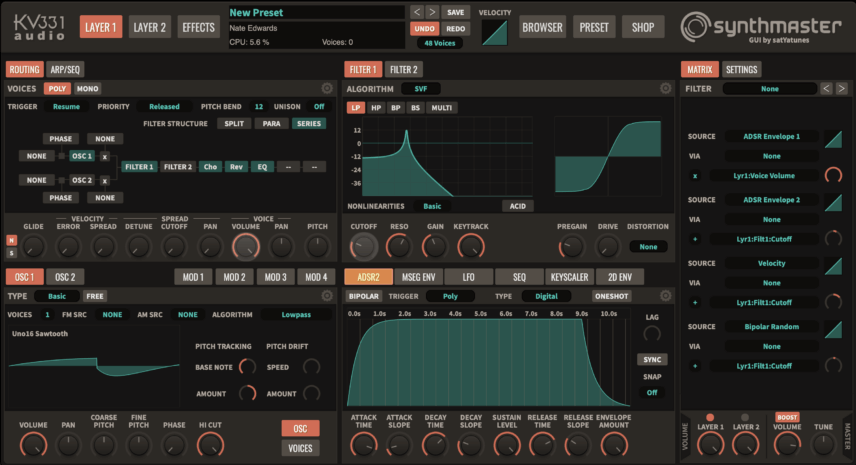
That means that we’ll get a full octave of bend up and down if we use the pitch bend wheel of our controller or automation in our DAW. Now we’re going to automate. Using Ableton Live, we can double click on the MIDI clip we’re working on to bring the clip up in the clip view at the bottom of the screen. Then, on the left side, we’re going to select the Envelopes tab for the clip, then select MIDI Ctrl and Pitch Bend, and we’ll draw in the automation pictured below
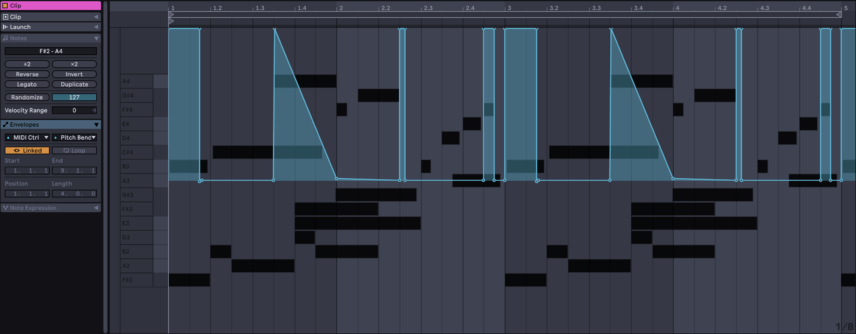
Now we can hear the effect on the strings alone:
And if we bring in the bass and percussion (drawn from the Balloon kit from ModeAudio’s Synthwave Ableton Pack) for context it sounds a bit like this:
Now we can all say a little prayer of gratitude for the fact that we can all do this on a modest computer with a couple instances of Synthmaster and didn’t have to build a sprawling MIDI studio like the guys of Autechre had to in the 90s to produce a similar result! Make sure to download the session to get the bass patch as well.
Author Nate Edwards
10th January, 2023

u-he are makers of award-winning software synthesisers and effects including Diva, Repro-1, Zebra2, Hive, Bazille, Presswerk and Satin.
Download the demos and try them for yourself at www.u-he.com
Attack Magazine is funded by advertising revenue. To help support our original content, please consider whitelisting Attack in your ad blocker software.
x