We show you how to make a rave-ready detuned synth lead using Ableton’s latest synth Drift.
One of the most epic moments of any set is when a powerful lead melody creates that extra touch of anticipation before a drop. An ideal way to achieve this is using an ambient and detuned lo-fi synth lead.
As festival season continues in full force, we wanted to show you how to make precisely this kind of patch using Ableton’s new synth Drift.
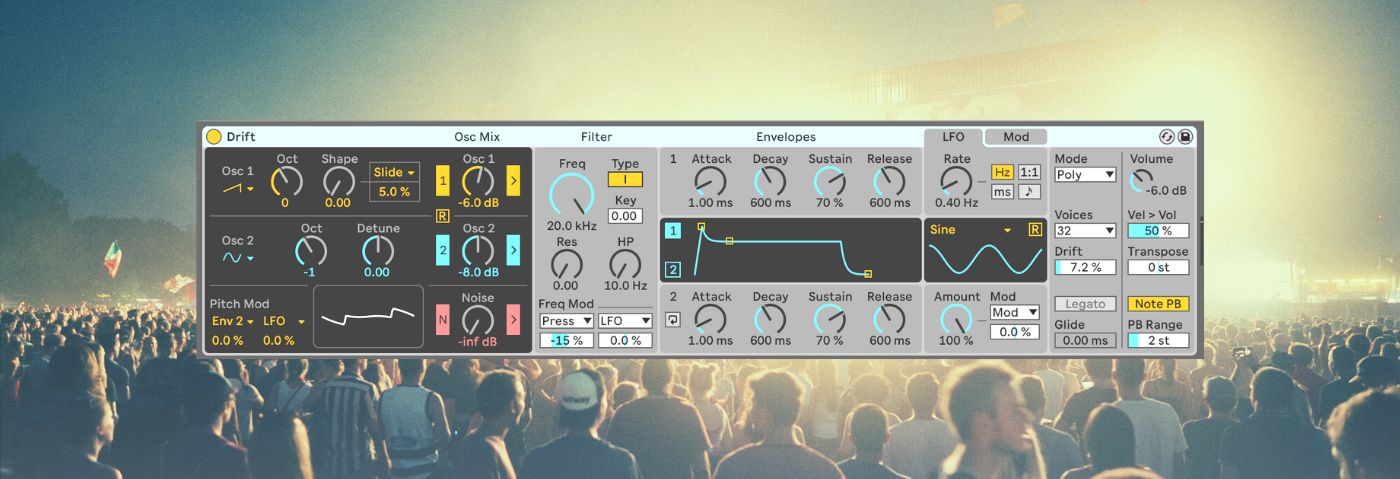
Drift is essentially a subtractive synthesizer that has two oscillators, a noise generator, one filter, an LFO, along with various modulation and effects options. Among these options is the Drift parameter, which introduces analog flavor and unique textures.
The synth has a minimal and straightforward design, but it sounds extremely powerful. What’s more, its workflow is perfect for creating lead sounds full of emotional and nostalgic character.
You can try Drift for free by downloading the Live Suite 11 for a 90 day free trial.
Here’s the sound we’ll be building:
And here it is in the context of a track:
Let’s head to the main stage! And remember, click any image to enlarge!
And you want to download the session you can do so below:
Step 1: Oscillators and Filter
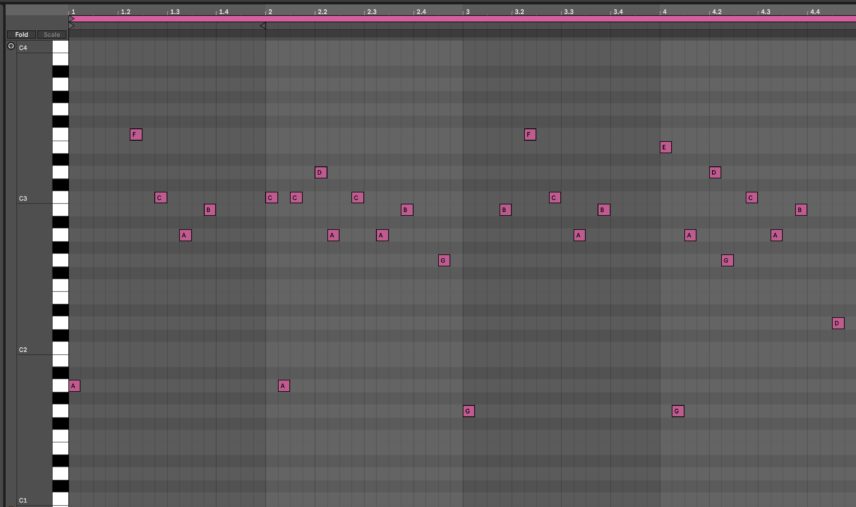
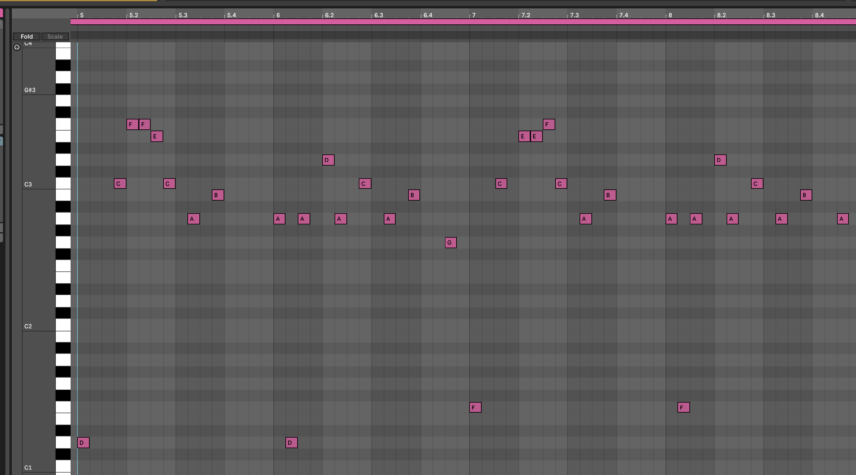
Before getting to the synth settings it’s worth talking about the MIDI notes we programmed in!
It’s good practice to use short 16th notes and arp-style melodies for something like this. It keeps the lead moving and furthers the anticipation.
Our chord progression is in the A Minor scale so we only used notes from this scale. The total progression is eight bars (two for each chord), but in the first examples, we’ll use only four bars to keep them shorter.
Here’s how our melody sounds with Drift’s default patch:
Boost the Osc 1 Mix to +6 dB. Change Osc 2 to triangle wave, increase its Oct to 0 and lower the detune to -0.11. Increase the Osc 2 Mix volume to +2.5 dB.
Increase the Noise oscillator to -10 dB, set the Filter Freq to 2 kHz and the Res to 0.38.
Right below the resonance, change the Press Frequency Modulation to zero. This is because we’re going to use the LFO and envelopes to modulate the filter instead!
Increase the Master volume at the very right to 0.0 dB for some more power.
Here’s how this sounds with our riff:
Step 2: Envelopes and LFO
The amp envelope is controlled via Envelope 1. Turn the Decay up to 2.37s while turning the Sustain down to 24% for a more plucky sound.
We’re going to use Envelope 2 for pitch modulation, in order to add an even stronger transient to the notes.
Head back to the Oscillator Section and increase the amount under Env 2 in the Pitch Mod to 8%.
Set Envelope 2’s Attack and Sustain to 0, the Release to its lowest amount 10 ms, and the Decay to around 79 ms.
This will create a very fast movement for the pitch envelope, which is essential for getting that transient!
To add even more of a pluck effect, head to the Mod Section and Map the LP Frequency to Env 1. A modulation amount of 10% should be enough. This will slightly open up the filter every time a note hits.
Here’s our progress so far:
Step 3: Effects and Automation
There aren’t that many effects in Drift but the namesake Drift parameter is very powerful for getting into more analog-sounding territory. Increase it all the way to 100% and it’ll introduce slight pitch modulations that add a lot of character.
Here’s how the Drift parameter sounds:
Now for some more effects! Insert Live’s Glue Compressor, Delay, Reverb, Chorus-Ensemble and EQ Eight plugins. This seems like a lot, but we’re only going to do some minimal tweaks to the default settings.
In Glue Compressor bring the Threshold all the way down to -21 and increase the Makeup to 11 db. This will create a more pumping sound. Set the Attack to 10 ms.
In Delay, unlink the Left and Right channels and use 3 for the Left and 4 for the Right. This will create a ‘running’ kind of effect. Lower the Feedback to around 40% and the Dry/Wet to 30%.
In Reverb, set the Decay to 3.6 seconds and the Dry/Wet to around 40 Seconds.
In Chorus-Ensemble simply bring the Dry/Wet down to around 20%.
Use EQ Eight to cut the lows until about 60 Hz with a steep Low-Cut band.
Here’s our full riff with all effects active:
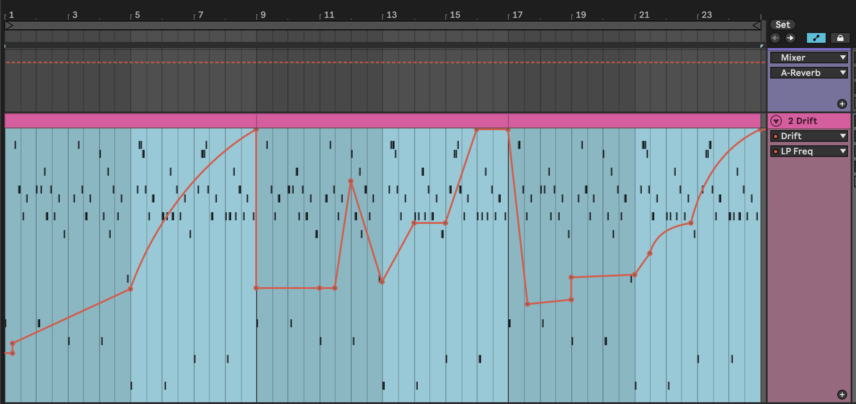
The final touch is some Filter Frequency automation so we’ll draw in some automation envelopes on the LP Freq on Drift.
Here’s our final Drift lead patch in solo:
And here it is once more in the context of a track:
Drift is a new synth that comes with all editions of Live 11.3. You can try it for free here.


