APU Software describes its new mastering plugin as a long overdue upgrade to compression technology. We explore their new approach and put it to the test.
Out of all the different skills that music producers have to acquire on our journeys, compression is always seen as one of the most challenging. The same is true of mastering. You may even hear them referred to as “the dark arts”.
When it comes time to process a whole mix, it is a scary notion to whack a compressor on the master channel, go through different presets, and adjust parameters without exactly knowing what they’re all affecting. After all, compression on the master channel will determine the entire dynamic range of your track.
This is one of the reasons why plugin developers have recently been focusing on new ways to ensure that their compressors assist with the process. The APU Loudness Compressor uses automatic dynamic range detection with target ranges tailored explicitly to modern streaming platforms. Furthermore, it uses the modern industry-standard LUFS unit of measurement as opposed to RMS and Peak units.
We’ll look at what all of this means, but in short, the process automatically corrects your dynamic range, compressing or expanding your mix as needed. It sounds superb for gluing a mix together, highlighting quieter elements, or adding punch, and we’ll be looking at all three scenarios.
If you want to follow along with the examples, you can download the demo for free.
LUFS, Dynamic Range, Source Range & Target Range
It pays to clarify some key terms.
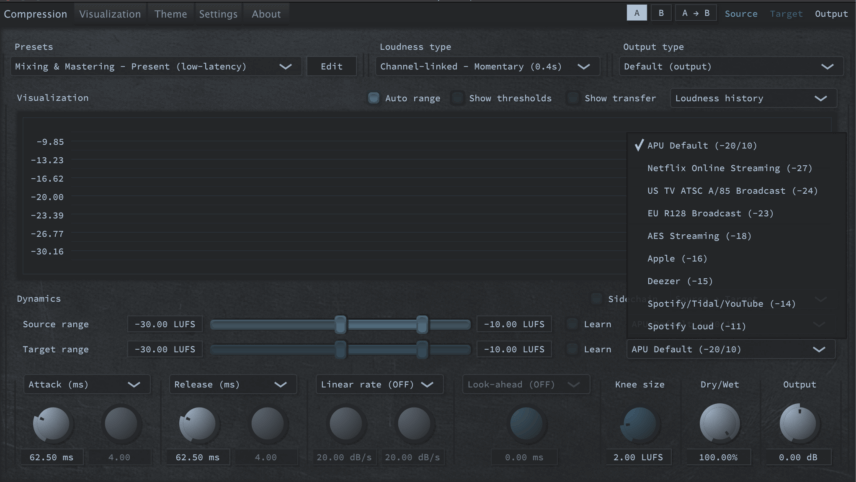
LUFS or ‘Loudness Units Full Scale’ measures the average volume of your track over time. It is the standard loudness measurement used by all modern streaming and listening platforms. For example in the picture below, you can see some examples of the upper limit for LUFS across various platforms like Spotify, Apple, and Deezer.
If you release a track and its loudness is above those limits, the streaming platforms will automatically attenuate the volume and this does not always sound good! That is why monitoring LUFS is crucial during mastering.
‘Dynamic Range’ is the loudness difference between the loudest and quietest moment in the audio. This can be measured in LUFS. For example, a track’s dynamic range could be -20 LUFS to – 4 LUFS. In APU’s terms this is called the ‘Source Range.’
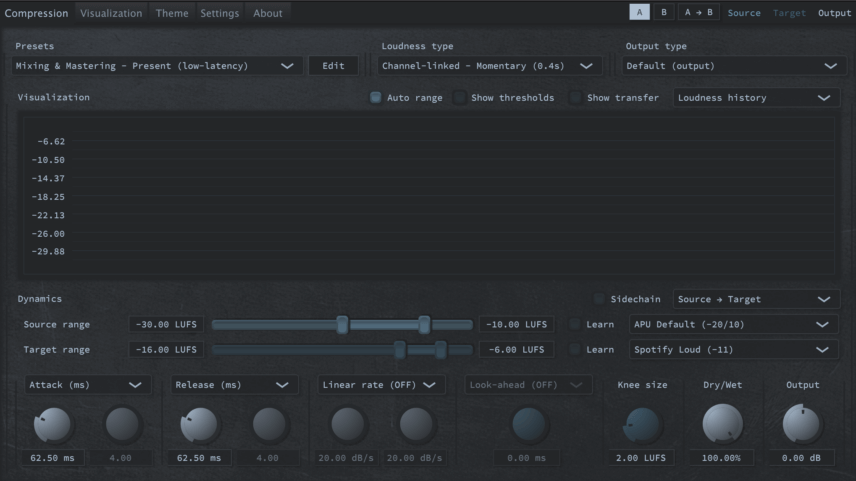
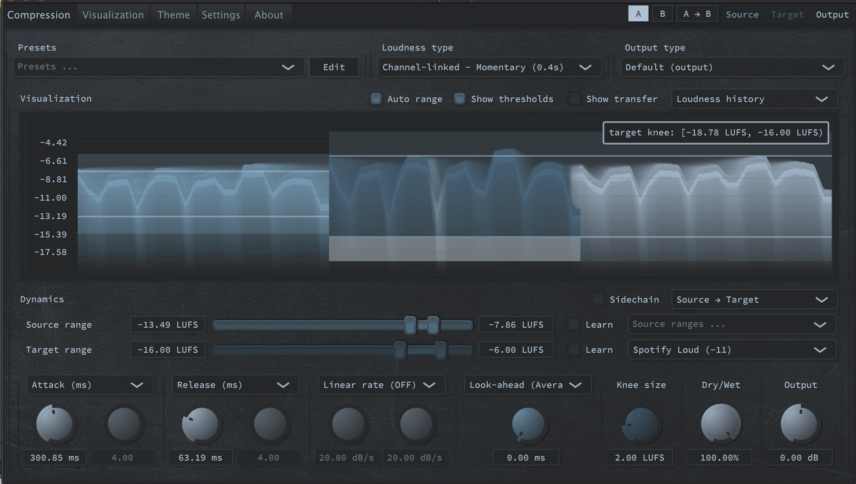
The ‘Target Range’ is what the ideal range would be. For example, if we select Spotify Loud as the Target Range in APU, you can see below that this range is -16 to -6 LUFS.
The Loudness Compression Revolution
The APU Loudness Meter takes your track’s source range and adapts it to the correct target range. In essence, it replaces setting threshold and ratio values with a standard compression device, software or hardware.
This means you only need to tweak Attack, Release, and Knee settings to experiment with your sound. You might be thinking, “Wait, so it only removes a couple of the four/five controls I have to worry about? How is that even helping me if I’m not an expert at compression?”
The answer is two-fold; firstly, threshold and ratio controls are way more important than you think. They determine how much compression is occurring, shaping the whole dynamic range of your track. Secondly, the plugin manipulates the amount of compression so that your dynamic range meets exact modern streaming or listening standards. The fact that it uses LUFS also adds a more transparent response, making the compression sound colorful and punchy.
Once this is set Attack, Release, and Knee don’t require any major expertise. Increasing the Attack lets more transients through, as with traditional compressors. The Release knob can be left as is unless you want to experiment and determine the best setting by ear. The Knee Size control is slightly more important and we’ll look at that later on with the examples.
The Interface
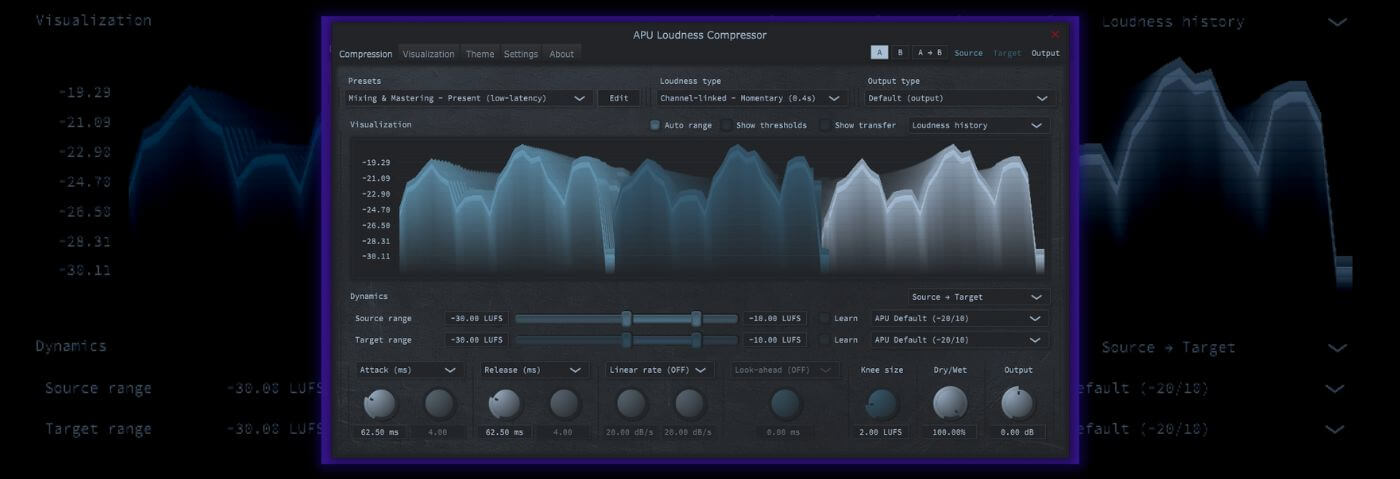
When you open up APU, you immediately see the Compression tab. At the top left, you can see the default preset. The compressor has a preset for each combination of loudness type (LUFS, RMS, True Peak, etc) and latency configuration. The low-latency presets introduce minimal delay, while the look-ahead presets introduce more delay in exchange for the ability to respond to the source signal preemptively.
Don’t worry too much about this, as the default preset is ideal because it doesn’t introduce latency, and it works with LUFS, which is the specialty of this compressor.
The visualizer below shows how much compression or expansion is occurring. It will also visualize your Source range and Target range.
The key section is Dynamics, where the range settings and compressor parameters live. Look-Ahead is greyed out and set to OFF, as you have to go to the Settings Tab and increase the Latency Budget to be able to use it. As mentioned before, using look-ahead adds more accuracy to the compression, but introduces delay and latency to your session. You’ll also notice there isn’t a Threshold parameter because the ranges are being set for you.
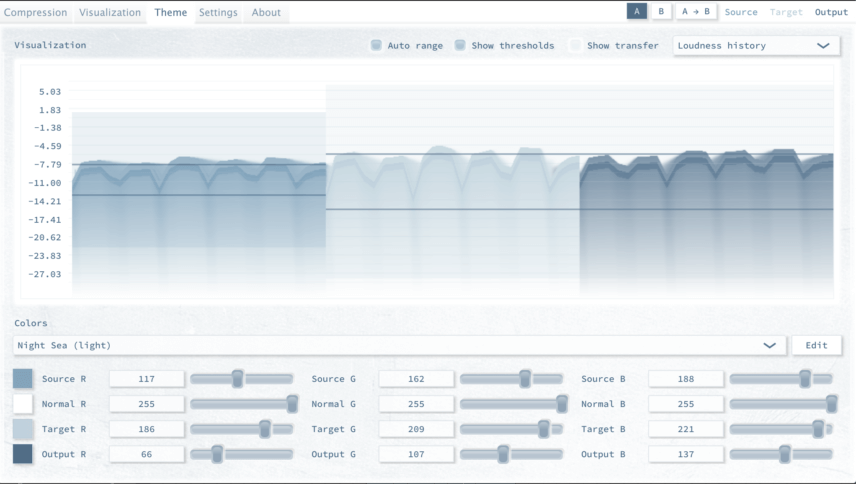
You can affect the skin and colors of the plugin in the Theme tab. For example, the below picture has the Night Sea (light) setting selected. The Visualization tab is where you can customize the information you see in the visualizer.
Mastering Example 1
It’s been a lot of talk and no action so far, so let’s load up a track and test the loudness compression!
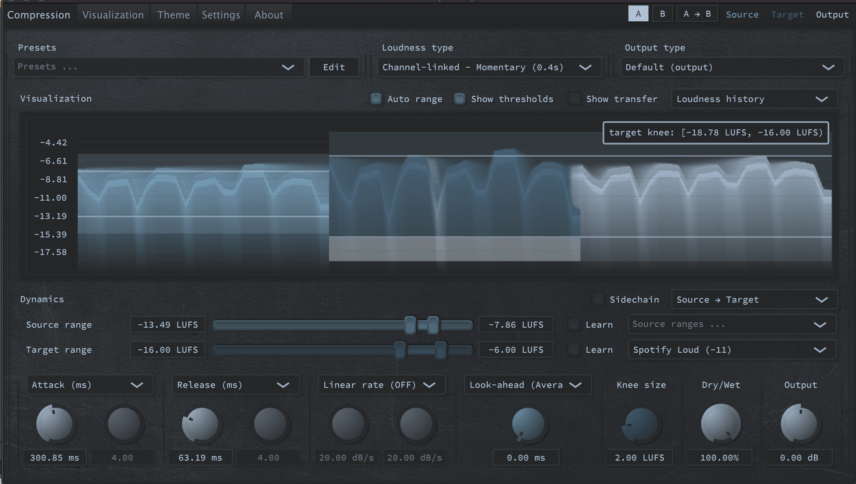
The first step is looping the loudest part of your track. This is key when working with dynamic range. Next, select a Target range in APU. We’ll go for Spotify Loud -11, which has a range of -16 LUFS to -6 LUFS.
Now, while the track is looping, we’ll click the Learn button for Source Range. APU will now figure out the track’s dynamic range, but it should only take 4-5 seconds. After clicking the Learn button again, we can see that the Source Range is -13.49 to -7.86 LUFS. This range is smaller than the Target range. This tells us that our track does not have enough dynamic range.
In this case expansion will occur, increasing the dynamic range and adding some more oomph to transients. We’ll also increase the Attack parameter to 300 ms to ensure our transients are getting through.
Make sure to use headphones or studio monitors to listen to the following examples, as a lot of the changes occur in the low end.
Here’s the loop with no compression:
And here it is with APU Loudness Compressor active:
With the compression, the low end of the bass becomes much more powerful, the kick and hi-hat hits are sharper, and elements like the percussion that were previously a little bit lost in the mix are more defined.
For this example, we used a Knee Size of 2 LUFS. This parameter controls how smoothly the gain reduction is transitioned from on to off (and vice versa) at the min and max LUFS ranges. This is actually similar to what Knee does in other compressors, which is to control how gradually the compression is introduced and phased out. Experimenting with this knob yields different results.
Here’s our example once more, but this time with a Knee Size of 9 LUFS:
It sounds similar, but to our ears, the low end sounds slightly less punchy than it did with a lower knee. This is because it’s taking longer for the compression to kick in and grab those transients.
Mastering Example 2
Let’s try another example with a more breakbeat-style track.
Here’s the track with no compression:
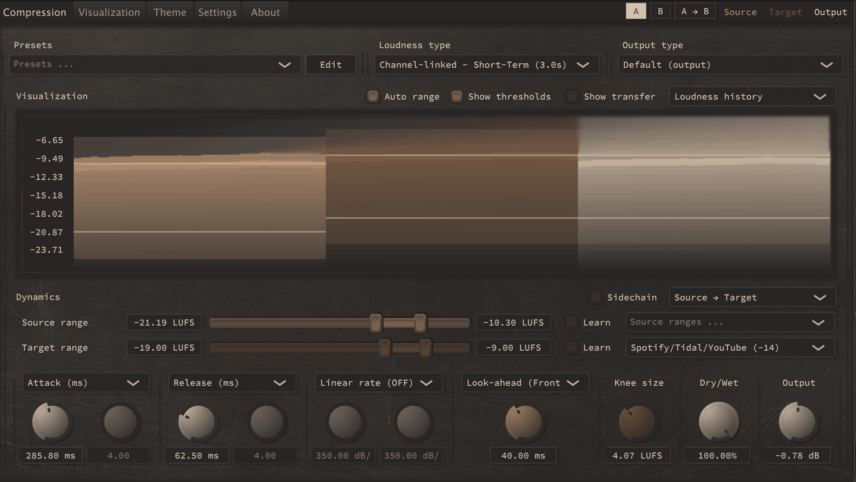
We’ve clicked learn on the source range, and APU has determined that our range is -21.19 to -10.30 LUFS. For the Target range, we’ve selected Spotify/Tidal/Youtube -14, which has a range of -19 to -9 LUFS. We’re not that far off from this range, so the character of the compression becomes more critical than hitting LUFS targets.
Here’s the track with APU Loudness Compressor active:
The difference is pretty clear in how punchy the snare is, how the synth melodies and stabs are more prominent, and how the kick and bass are more cohesive. There is a little volume boost, but this can be compensated with the Output knob.
The handy Dry/Wet can also mix in the compression to taste, bringing parallel (or New York-style) compression into play.
The Final Word
The APU Loudness Compressor is a powerful alternative to traditional compressors.
Though its interface isn’t the easiest on the eye, it is very suited to beginners looking to compress their full mixes without too much knowledge of how a compressor works. To that end, APU benefits producers in gettting their track release-ready for the plethora of different streaming platforms that now exist.
Tahat isn’t to say this isn’t a compressor for experienced mastering engineers also. The array of features and metering options, including True Peak, RMS and Peak monitoring in addition to the signature LUFS-based workflow of APU are all appealing. Additionally and more importantly, the quality and impact of the compression is above it’s affordable $29.99 price point. Plus it includes a lifetime of free updates.
In terms of similar products on the market, this is a new approach to compression, so there is no specific competitor. Sonible’s smartcomp2 comes to mind, as it uses AI to learn the dynamics of source material and sets compression parameters automatically. At 79 Euros however, it is more than double the price.
Other competitors could be online mastering sites like Landr, and now Waves, that are ‘click of a button’. We’ll let you judge on results, but at Attack, we lean more towards handling it oursevels and APU is a solid way to begin your journey.
Works With:
- macOS 10.14+, Windows 10+, OpenGL 3.2+
- VST, AU, AAX (Pro Tools 11+)
Find out more on the APU Software website.
