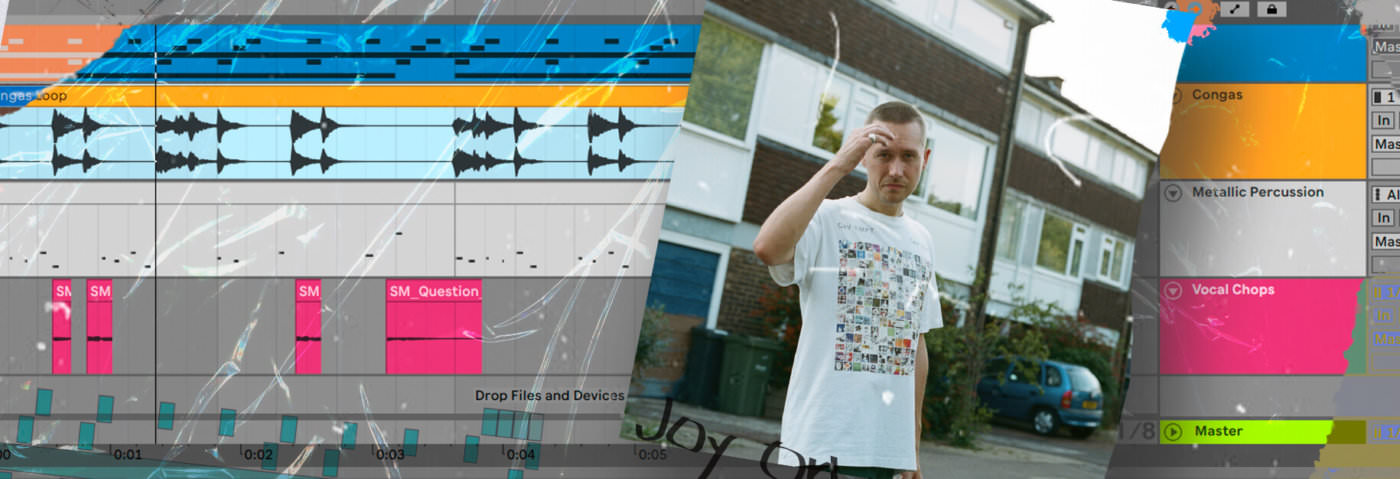
In this latest Beat Dissected, we’re going to create a beat inspired by the percussion-heavy techno of Joy Orbison.
Beat Dissected is a regular series in which we deconstruct drum patterns, showing you how to program them in any DAW. Just copy our grid in your own software to recreate the loop. To enlarge any photo, just click on the image.
Whereas typically we would build a Drum Rack that you can recreate, this time we’re going a little further including chopping some loops and applying them to our beat. We’ve also added some musical elements just for context. Here’s the beat we’re building today:
Spec
Tempo
132 BPMSwing
50%Sounds
SpliceIf you find this tutorial helpful you might also enjoy our book “The Secrets of Dance Music Production“.
Step 1
We begin with the kick. The pattern is similar to a half-time or breakbeat rhythm, where we leave enough space for the sub bass to ring out beneath the kick.
Create a new MIDI track and insert a drum rack. You can use the same samples we have as they are from Splice. Start building up the drum kit with the 105_BPM_Kick from Splice’s Tropical House Vocals & Kits pack. Draw in this pattern below:

Step 2
Add a sub-bass sample to the Drum Rack. We used the 3_subba_F#1 sample from Ableton’s Factory Skitter and Step pack.
Duplicate the sample and pitch it up by 12 semitones (an octave). You can do this easily within Ableton’s Simpler with the “Transp” knob in the Controls section. You now have the sub bass spread onto two channels in the Drum Rack. It should look like the below:

Now, program this simple MIDI pattern below:

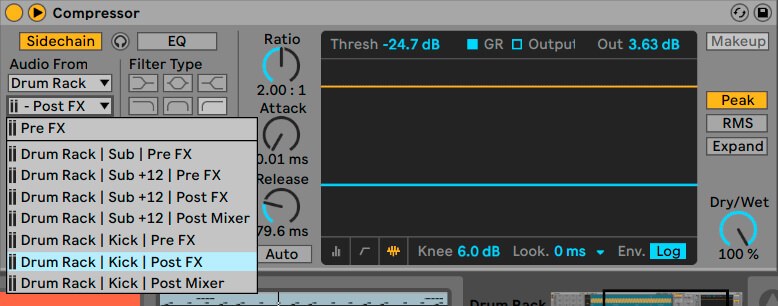
Finally, sidechain the sub bass to the kick using Live’s Compressor. This will prevent the lows from getting too muddy while allowing the kick to punch harder. Select the Sidechain function and use the Audio From the dropdown menu to select the kick as our sidechain trigger.

Here’s our progress so far:
Step 3
As we said in the intro, we’re going to apply some musical elements to this beat dissected. Let’s start with a drone!
Drones can be an effective solution for instant vibe or context. They are often subtle. In this example, add “006_Drone_F#” from Splice’s Cinematic Sound 2 pack. Note that the sub bass and drones are both in the same key to avoid dissonance. Add an EQ with a high pass filter to reduce any unnecessary low end from the drone. We don’t want it to compete with the sub bass in the lower frequencies.
Notice we removed the beginning of the drone sample to make sure our sample was audible from the beginning of the loop. The sample has a long attack time and to deal with this, editing the start point of the sample does the trick.

Here’s our progress so far:
Step 4
Grab the sample “ESM_Iconic_Dance_Hi_Hat_Light_3_Club_Electronic_Perc_FX” from Splice’s Iconic Dance pack. Drop it into the Drum Rack and draw in a closed hat on every second 16th-note. Keep it simple.
To give the hi-hat pattern more life, add Live’s Delay audio effect to the part and reduce the Feedback and Dry/Wet to around 21% and 13% respectively.
To add more syncopation, add a shaker sample. Grab “Shaker10” from Splice’s Master of Funky House pack and program it on the second 16th-notes of the first and fourth beats of each bar.

Here’s our progress so far:
Step 5
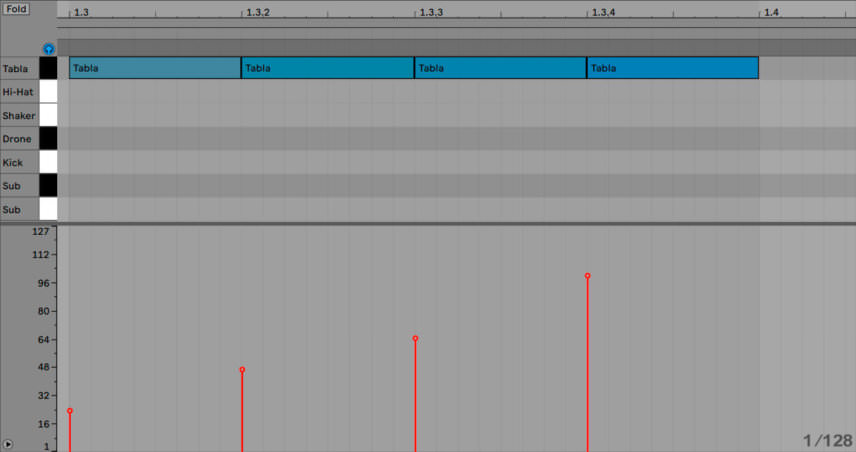
A good beat is not complete without a pitch-shifting tabla drum! We’ve chosen RT_Tabla_Violin_Tabla_17 from Splice’s HUBweek – Tabla and Violin pack.
Sequence it like the below to play in fills of four consecutive 16th-notes.

We want to give it life and ambience so we are going to add delay and random pitch automation. For the delay, Live’s Echo works great. Try its “Analog Collapse” preset, with an EQ afterwards to remove the low frequencies.

For the random pitch automation, insert Max For Live’s LFO and map it to the Tabla’s Simpler’s “Transp” knob. This is a handy device that can modulate any parameter within Live. Modify the Rate and Depth parameters to taste.
Lastly, change the velocities of your tabla part within the piano roll. This always helps to give any part a human feel.

Here’s our progress so far:
Step 6
A defining quality in Orbison’s productions is percussion such as congas. Sometimes these even replace the snare in his tracks! While it would be easy to find a conga loop and leave it as it is, we are going to get a bit more creative and try to give the congas a new sound.
Create an audio track and drag in a conga loop. We’ve used WPE_110_-_Congas_Loop_03 from World Percussion Ensemble by Black Octopus on Splice. Upon import we made it match the tempo of the track by selecting WARP in clip view. We sliced the transients and rearranged the loop to taste. Try new patterns simply by dragging the slices around the timeline. You can try any percussion loop. Experiment!
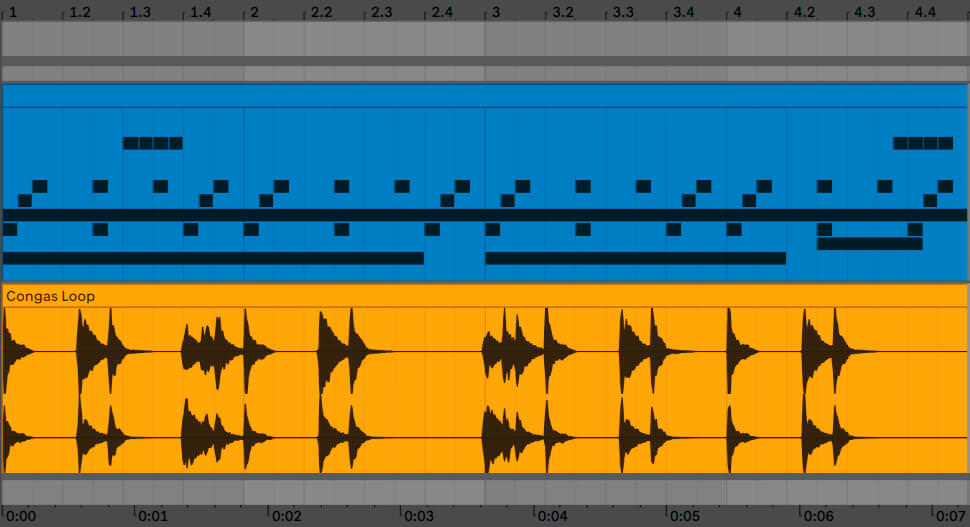
First add an EQ to bring out the high frequencies. Then insert Live’s Corpus audio effect. This works wonders with percussion and can entirely transform a sound by adding layers. The key parameters are the algorithm (we went with Tube for this example), the “Tune” knob and the Dry/Wet.

Add Live’s Reverb’s “Drum Room” preset, Live’s Saturator on the “Medium Curve” setting for some bite and Live’s Compressor with a long Release time to add sustain.

Chorus brings some fatness to the sound, Echo with short feedback creates a nice slapback delay, a Flanger makes the sound a bit more lo-fi and the “Bass” parameter on Live’s Pedal effect is a great way to add some subtle low-end.
Here’s our progress so far:
Step 7
Joy Orbison tends to use metallic or industrial sounds to add character. Many top producers tend to throw a curveball sound into their tracks to help give them a unique sound and provide identity. We used a loop from“RARE_percussion_metalic_HiHat_sticks_various_sounds_dope_130_loop8” from Splice’s Culture Alchemy Vol. 3 pack.
Firstly, turn this sample into a drum kit. To do this, create a new audio track and drag the loop onto it. Then right-click and select “Slice to New MIDI Track.”
A pop-up box will show asking how to slice the loop. The best way is “creating once slice per transient.” With this algorithm, you ensure that each slice will be a one shot drum hit. Click “OK” and a new MIDI track with your sample sliced will be created. Note that you might get some useless or very quiet slices but the key is finding the gems!! The more you experiment with it the more you’ll get familiar with it.
Reverb sounds great on these kinds of loops and Live’s Convolution Reverb is a good choice. We’ve also used the slices to re-program them into a different pattern that suits our beat.

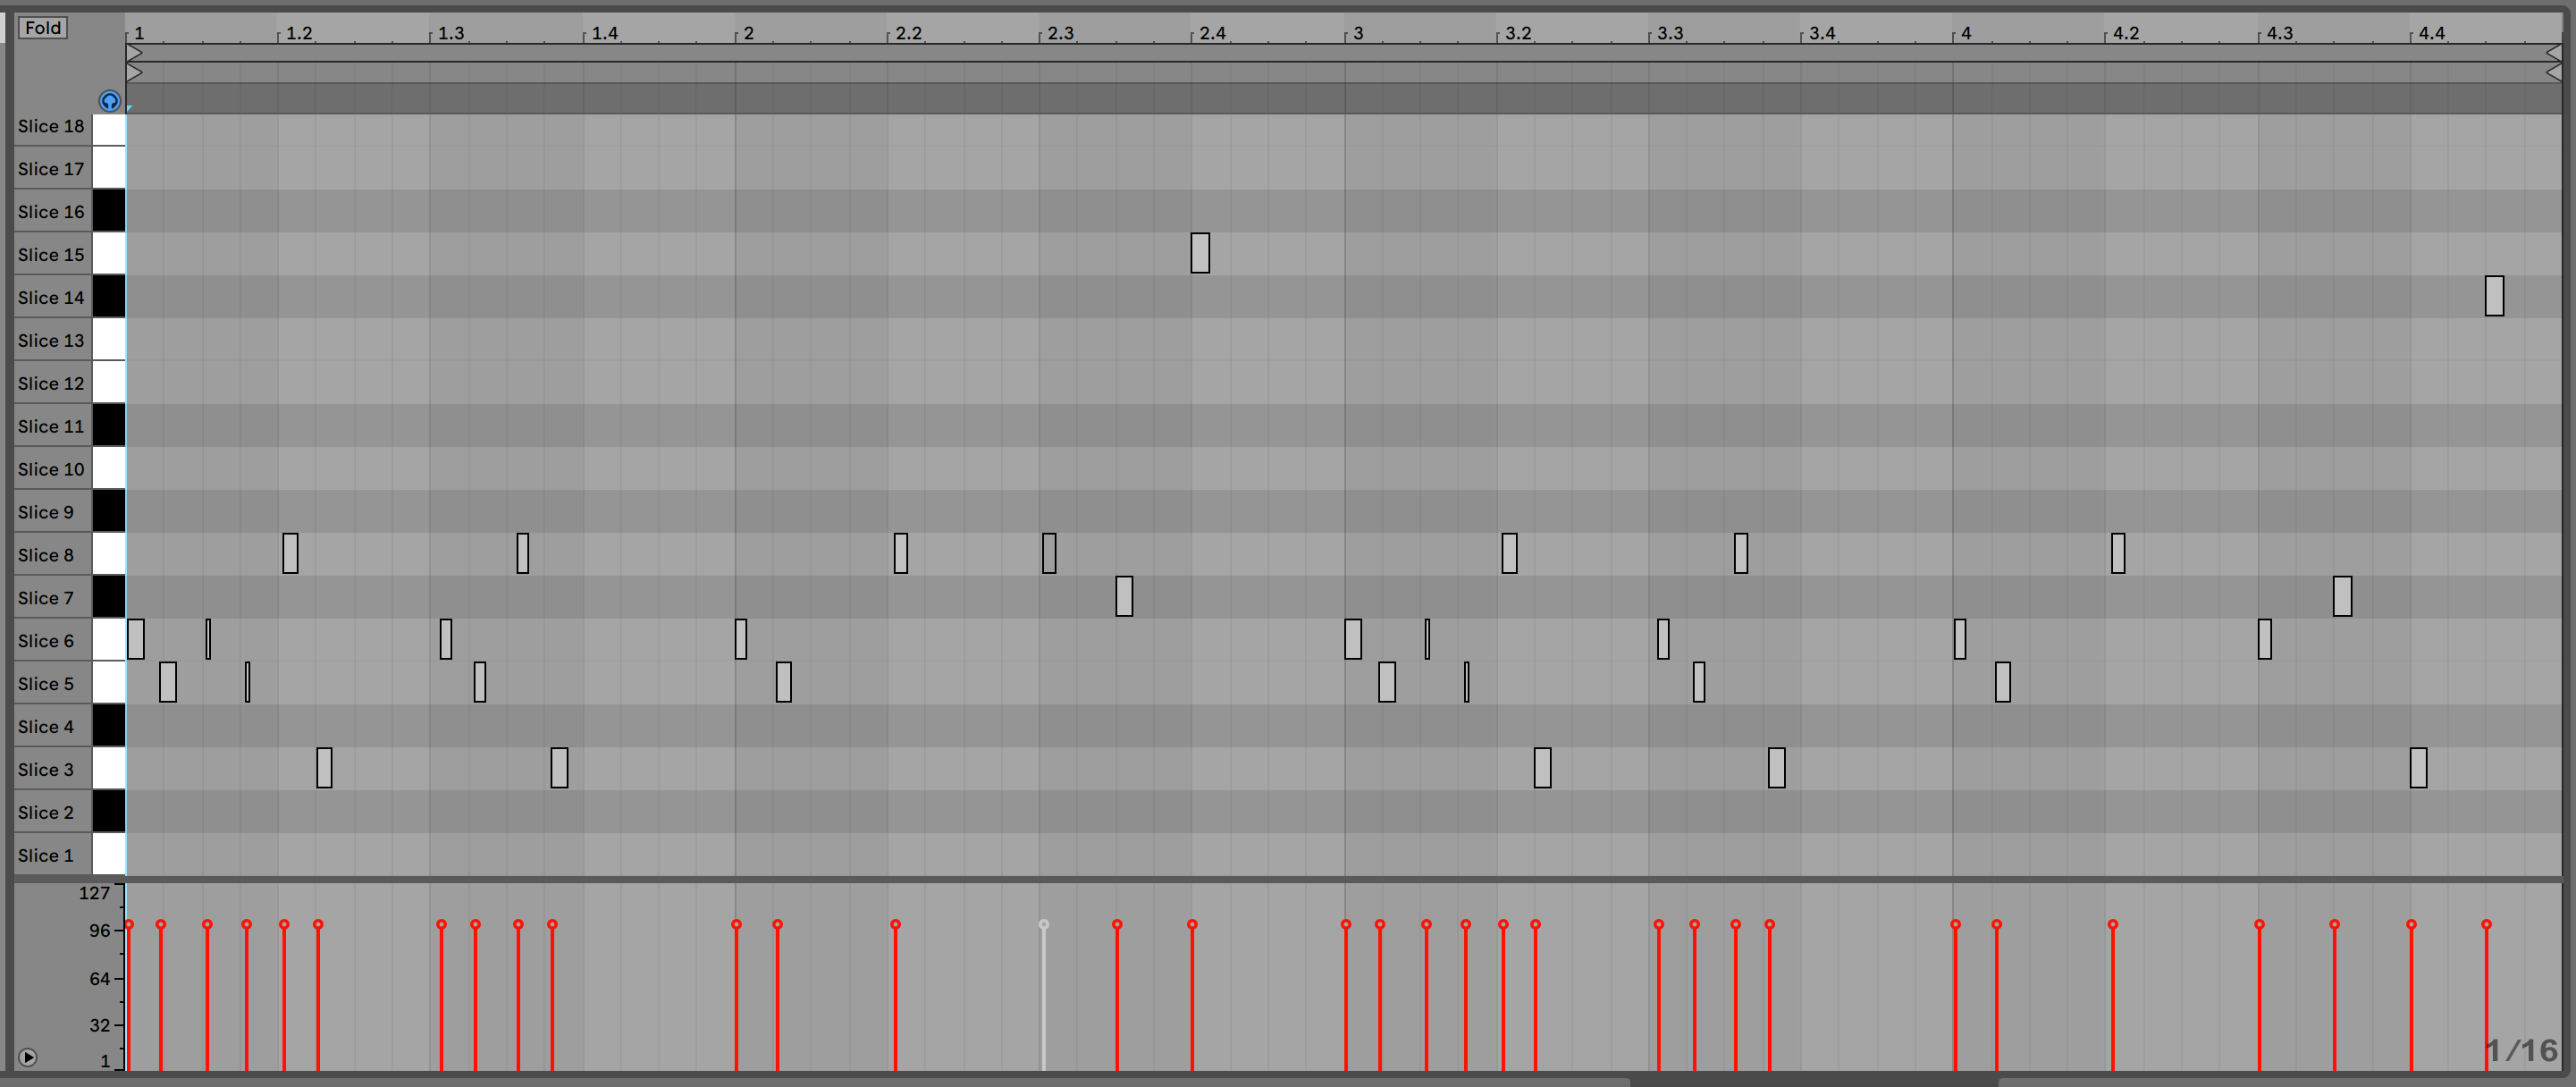
Here’s our progress so far:
Step 8
For the last step, create a new audio track for the vocal chops. In our example, we used the phrase “But it Feels So Right,” which is “Spokenword6” from Splice’s Soulful Vocals 3 pack.
To give the vocal some character, add Live’s Amp Audio Effect on the Blues Setting and reduce the Dry/Wet to taste. Insert an EQ to boost the high frequencies and Reverb’s “Large Factory” preset for ambience.

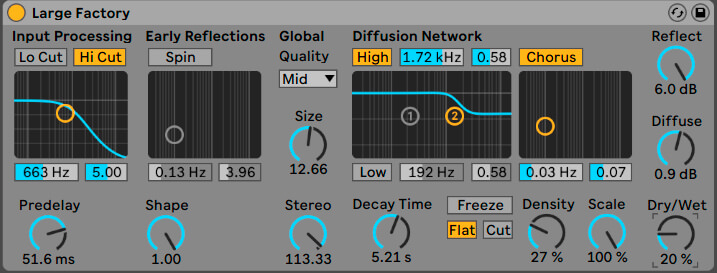
The trick here is chopping up the audio sample separating certain syllables or words. This allows you to move them around freely and duplicate them.
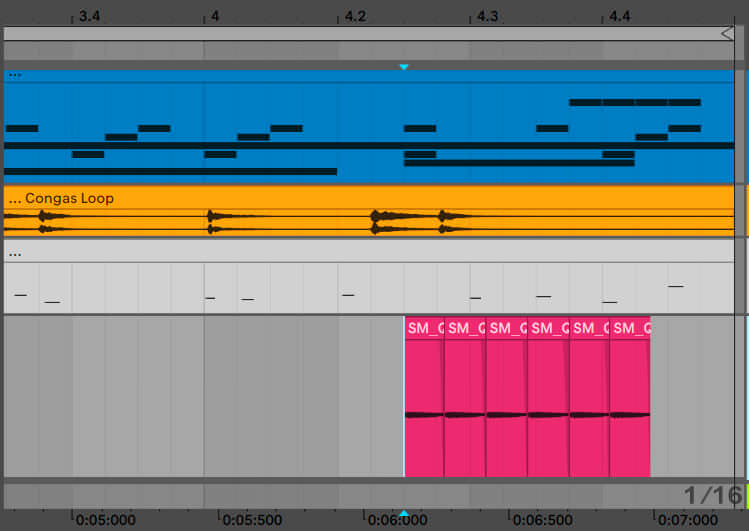
Some useful Live shortcuts for this kind of audio editing are ⌘/Ctrl+E to cut clips at the selected point and ⌘/Ctrl+D to duplicate clips.

In the below part of the beat, for example, we took the word “feel” and duplicated it six times in a row, in a sense creating a fill before the next downbeat.
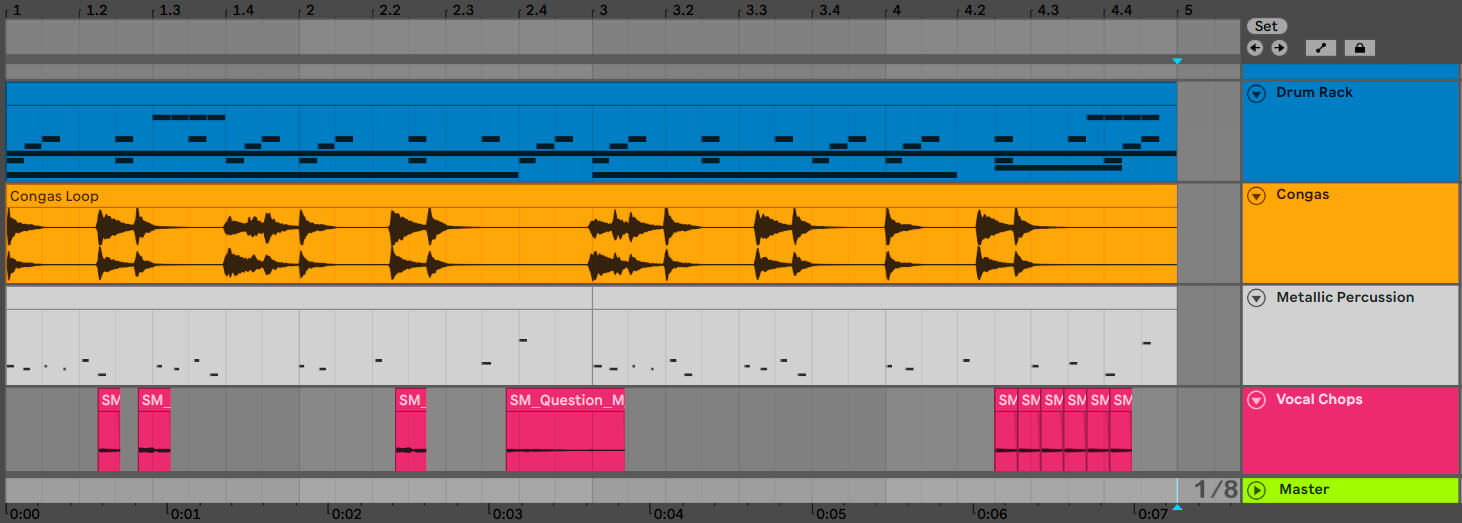
Here is the end result:
