Having previously delivered one of our favourite My Studio features, Kevin McHugh (aka Ambivalent and LA-4A) returns to discuss the process of mastering a record. From the most fundamental questions of what mastering really involves, all the way through to the specific techniques used on his most recent release, it’s a revealing insight into a fascinatingly nuanced subject.
“Gather round the campfire, kids. I’m going to tell you how we survived the Loudness Wars.”
I’ve rehearsed the story in my mind, but I don’t have kids and my nephews just roll their eyes and walk away when I try to lecture them about dynamic range and harmonic distortion. But I think about it a lot: how music is being heard differently, how that pushes artists, labels and mastering engineers to adapt, and what it means for quality and value in music.
I have two record labels, Delft and Valence. Both of them release on vinyl and digitally as well. The mechanics and hurdles of financing and distributing these two paths will be another long, scary campfire story, but I figured I’d share some of the things I do in the technical process before it’s released. Attack have allowed me to discuss some of the things I do with the crew at Manmade Mastering to get an optimal balance of ‘loud’ and ‘good’ for my labels.
First, let’s start with a few things as background. Shortcuts are everywhere: magic underwear to help you lose weight, new apps on your phone to help you get pregnant via the Cloud… If a shortcut is something you feel you need, go for it. Just remember that snake oil was once a real thing that was sold – just because it’s for sale doesn’t mean it’s good, or even real. There are shortcuts, and there are ‘long cuts’, too. I can spend €400 on imported gold Corinthian-leather-lined audio cables, but it’s not likely to sound €400 better. And what comes out of my synth is still only as good as my ideas.
I feel strongly that shortcuts are a crime against music. Letting an algorithm alter your music is dangerous and self-defeating.
What I’ll describe here is certainly not a shortcut. One could argue that there are long cuts included here, and I’ll agree that the deluxe package I’ll describe is not a necessity. But I also feel strongly that shortcuts are a crime against music. Letting an algorithm alter your music is dangerous and self-defeating. Whatever you use to make it, music is made with human ears, to be enjoyed by other human ears, and sharing music with the public is about offering what you feel is the best you can give, not what’s “good enough”.
The basics
Skip over this if you’re familiar already, but I think it helps to outline some of the basics before going deeper. The mastering process has a lot of different kinks and quirks, but the constants are normally a first stage of EQ, then some form of compression including a finalising process of hard limiting or maximisation. Once tracks are mastered, those files destined for a vinyl pressing plant are prepared for cutting to a lacquer disc, from which the metal plating is made to stamp the black gold.
If it were as easy as slapping an EQ and a limiter on a piece of music, we would not need mastering engineers, but mastering is both a science and an art, equally important as mixing, and equally powerful with a skilled professional. I’ve learned a lot about mastering in the 10 years I’ve been making records, and I absolutely don’t believe I am as good as the people I pay to optimise and master my tracks. I also know how to cook, but I would never dream of selling that to the public.
The Process
When I’ve got a release that’s ready to go to mastering, I prepare digital files for the engineers. I prefer to use 24-bit, 44.1 kHz files, as there is significantly more headroom available in 24-bit than 16-bit, and as you’ll see here, headroom is the main play in the loudness game: use it up too early and you’ll lose the game before you hit the field. With that in mind, I do not use any compression on the master bus of my mixdown. This is important, because a compressed file can not be processed any further. When there is zero headroom to use, you have eliminated all your options, and the mastering engineer can not help you. Short answer: send 24-bit, uncompressed files, peaking somewhere between -6 and -3 dB.
I prefer to mix my music via an analogue mixing unit, because the additional gain-staging, as well as the extra per-channel headroom, is an advantage. It’s not necessary, but I find it gives me a few extra bits of fuel to hand the mastering engineers.
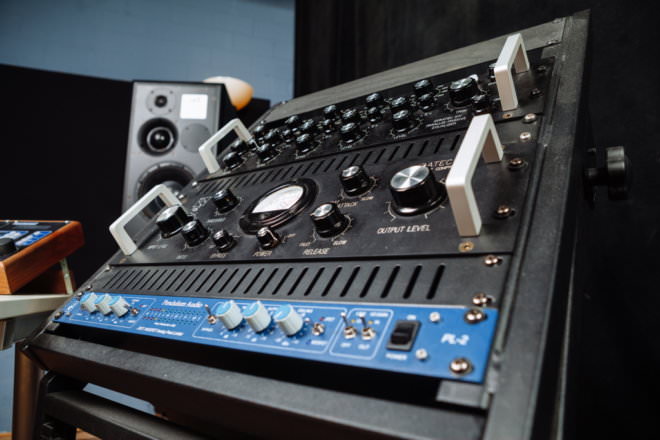
Gyraf Audio Gyratec XIV and Gyratec X, Pendulum Audio PL-2
The Engineer
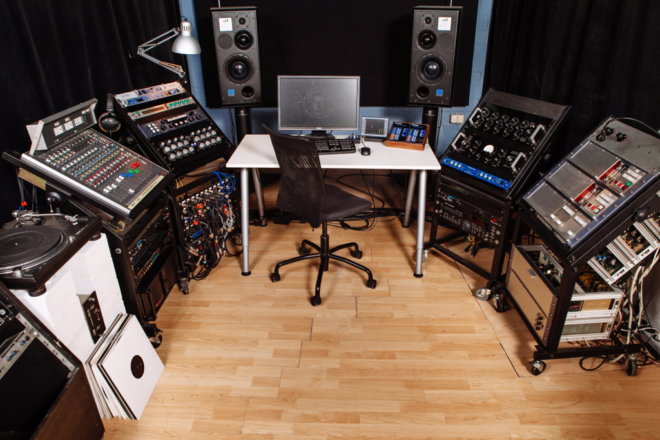
We’re going to turn now to the expert here: Tim Xavier of Manmade Mastering. He mastered the very first records I ever made, and nearly every one since when I’ve had a choice (listen to his tracks – he’s also a great techno producer). Tim has a phenomenal mastering studio in Berlin with his partner Mike, and they have a fleet of gorgeous analogue EQs, compressors as well as high-end A/D-D/A converters and their record lathe.
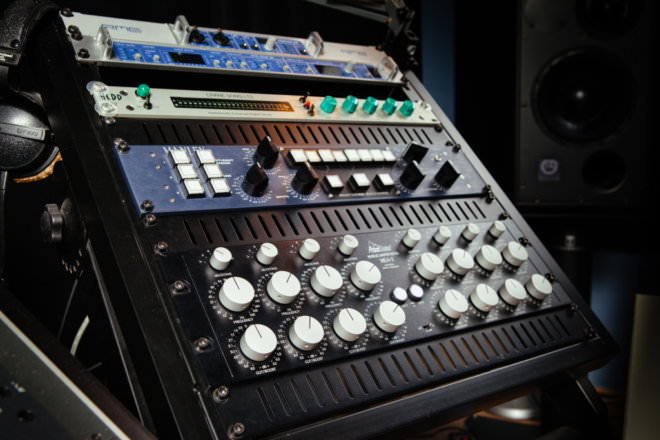
Tim takes my 24-bit premaster with plenty of headroom, and sends it through the converters to an analogue EQ, cleaning out any resonance, imbalances, or frequencies outside the spectrum which can translate onto vinyl. Sounds above 20 kHz or below 25 Hz will not function on a turntable, and could damage the cutting needle on the lathe. Tim and his partner Mike have mastered thousands of tracks, so their ears are extremely well tuned to hear the small differences in frequency balance to make sure a track has enough in one band, not too much in another, and the relationship of all the frequencies together.
From the EQ, the analogue signal is sent to a compressor, softening peaks and gradually raising the overall signal while adding the ‘glue’ that drives so many people to seek analogue compressors.
Finally it will go into the last piece of hardware, the limiter, where the overall gain is brought to its limit (more on that later). Without giving away Tim’s secrets, I’ll say that the stages between EQ, compression and limiting are where mastering engineers can add their own unique gear choices, techniques and adjustments to the signal. Depending on the job, some may add a bit of saturation, distortion, stereo widening or other processing to accentuate or reduce certain aspects of the mix.
Nothing is less exciting or danceable than a beat that’s been crushed to the point of a flat-lined airhorn.
When the signal chain gets to the limiter, we’re facing the major challenge in today’s listening environment: the loudness war. This has a unique set of circumstances in electronic music, particularly dance music. Because my labels are mostly aimed at DJs who will play the records and files in clubs, they are subject to the pressure to be as loud as all the other tracks in a DJ’s set. Drums and stripped-down club music can often handle a bit more compression, as they already tend to have a high dynamic range (the difference between the the loudest and quietest moments in a recording). However, they are also the most vulnerable to being completely destroyed by an indelicate approach to limiting. Nothing is less exciting or danceable than a beat that’s been crushed to the point of a flat-lined airhorn. This is particularly bad in dance music where a listener might hear hours upon hours of music this way. We’re going to talk about this more in the later sections with regard to vinyl and digital approaches, and the chasm that’s opening up there.
The Product
So the final result of the typical mastering session should be a clean, crisp, balanced track with nicely honed stereo imaging, a bit more loudness and some dynamic punch left in the spaces between sounds.
Every engineer will handle these aspects differently, but only experienced engineers are able to deliver a product that is neither overcooked nor undercooked. Every engineer will also have a threshold to which they will push the dynamic range of a track. Many years ago, some engineers were daring to push their tracks to -13 dB RMS of headroom, in order to get a loud, impressive sound. Now, it is entirely common to find mastered files for sale on digital sites with a staggeringly small -6 dB RMS of headroom. To many seasoned producers and engineers, this is profoundly saddening. Imagine if the standard ceiling level in available houses was shrunk to be just above your head. The result is uncomfortable and worse, it pushes more people to do the same in order to compete. As a matter of record, I have to say my label actively resists the pressure for louder files, and Manmade has always done respectful and good work, shooting for an average of -10 to -9 dB RMS headroom.
Because it’s a physical medium, vinyl has limitations as to how loud it can be. Analogue media has, by necessity, more dynamic range and headroom than digital media
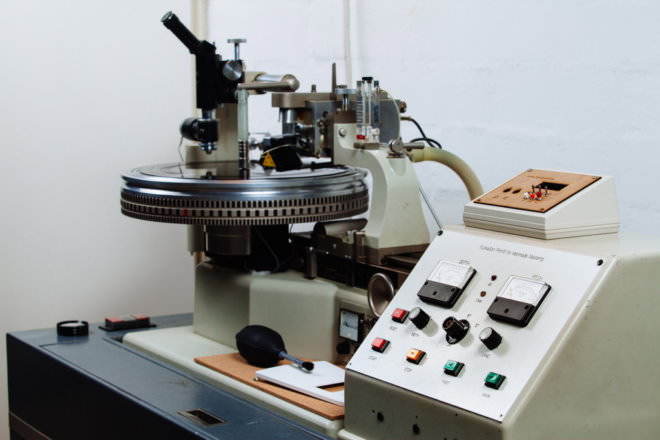
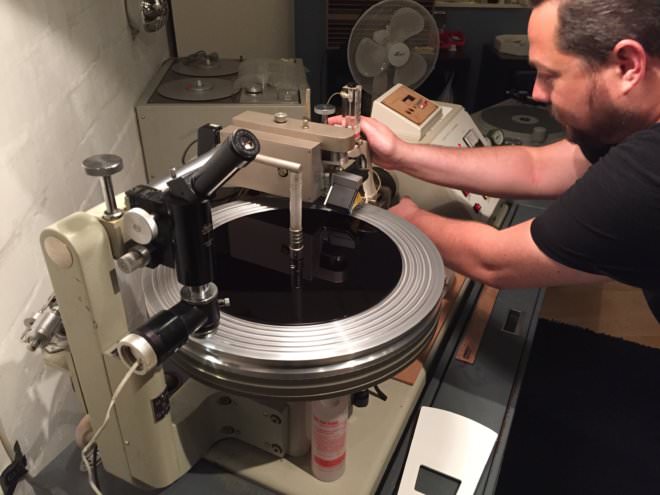
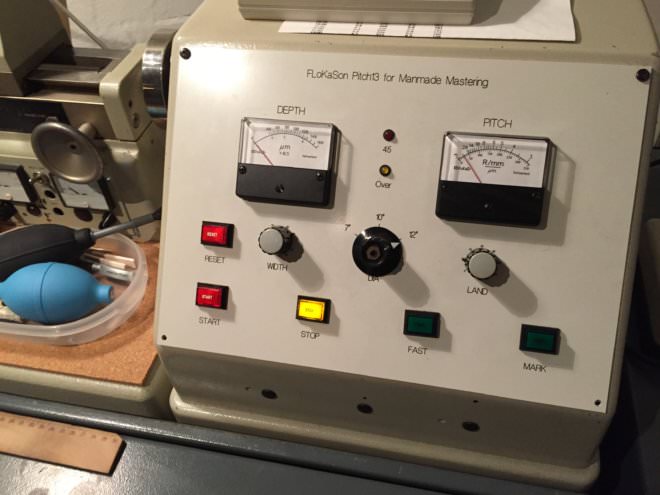
Vinyl mastering requires a slightly different approach to the final step in the mastering chain. Because it’s a physical medium, vinyl has limitations as to how loud it can be. Analogue media has, by necessity, more dynamic range and headroom than digital media, so when preparing the mastered file for cutting to a lacquer, it will have more depth in a number of areas. The finalised file is sent back out through the D/A converter, and into the signal path for the cutting head. This needle etches the signal into a microscopic pattern on the lacquer at an extremely precise speed, depth and width determined by the mastering engineer. The lacquer is then sent to the pressing plant to be plated with metal, which will then be converted to a positive to be stamped into vinyl.
But there’s another option at this stage of the process, and this is something that we’ve started to do for some of the releases on my labels. To my knowledge, this process is only done at Manmade Mastering, and not available anywhere else.
The Extras
Before I go further, I want to say that this process is what I identified earlier as a “long cut”. It is an extra stage meant to achieve a small jump in certain qualities. This is the opposite of a shortcut; it is sacrificing efficiency in favour of quality. If you want to sacrifice quality for efficiency, then enjoy Burger King. I would not advocate, however, that everyone spend €90 on an artisanal cheeseburger for every meal. There’s an ideal middle path that I’ve outlined above, and now I’m going to detail the deluxe package.
The same cutting lathe that etches a lacquer disc for vinyl manufacturing will also etch what’s known as a dubplate. Most people who are familiar with DJ culture have heard of a dubplate, even if they do not know what it is. They are increasingly rare in the era of digital DJing, where a mastered file can be played in a club immediately following a mastering session, but as recently as 13 or 14 years ago this was still rare, as digital DJ technology had yet to crest into its current ubiquity. Until then, if a DJ wanted to play a track that was not manufactured on vinyl, he or she was only able to do so by creating a dubplate.
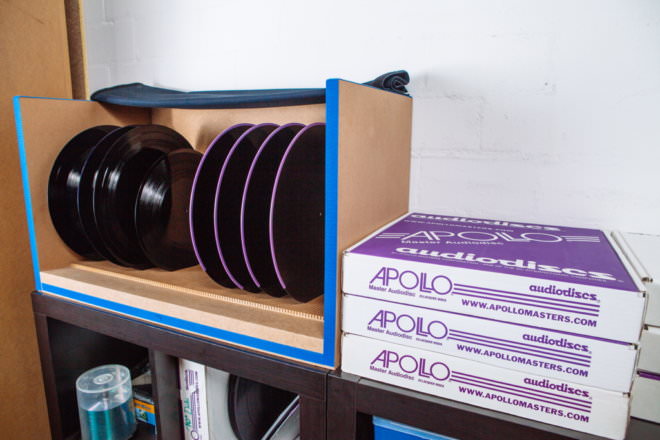
Dubplates are cut on the same lathe machine that cuts a lacquer, but are made of a slightly different material than the lacquer, and are therefore playable on a standard turntable. (Lacquers are extremely fragile and would be destroyed by a phono needle.) Dubplates are playable, though not as sturdy as manufactured vinyl record. All vinyl records will eventually degrade in sound quality after enough plays, but dubplates deteriorate even faster from needle friction and age quicker even just sitting on a shelf. They are also expensive. Dubplates are not cheap material, and the extra time and effort required for an engineer to cut them is prohibitively expensive.
What dubplates offer is an excellent window into the final sonic qualities of a piece of music transferred to vinyl. The subtle nuances of vinyl’s unique sound profile will come out through a dubplate
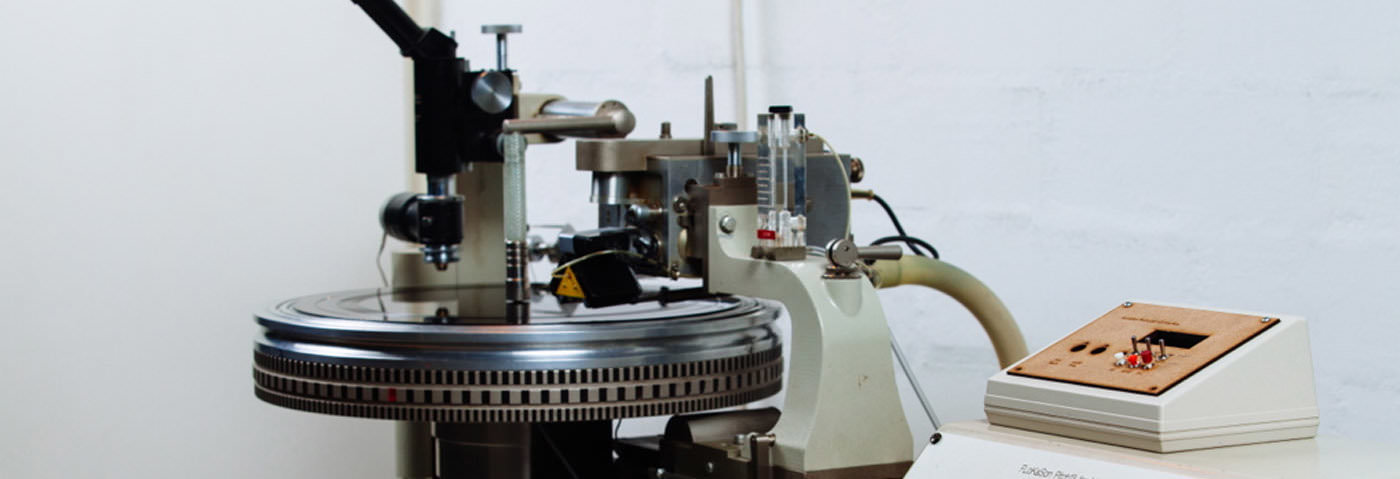
What dubplates offer is an excellent window into the final sonic qualities of a piece of music transferred to vinyl. The subtle nuances of vinyl’s unique sound profile will come out through a dubplate, and this is why a lot of cutting and mastering engineers will use them to verify that a cutter head is transferring properly. To save money, engineers will normally cut just a short sample of a track to a dubplate, and verify from this. They will often cut many samples into the same plate, as it’s just a testing tool. This is where Tim comes in. He had the brilliant idea to cut a mastered track to dubplate, and then record that back to digital. As soon as he told me about the results, I was hooked. This is a holy grail for digital files: a mastered track with all the warmth and depth of a vinyl record, but available months before the laborious process of test-pressing and manufacturing.
What is the result? Why would it matter, and is it worth the effort, time and cost? I’ve got some examples below to illustrate the differences between each option, and you can decide if it matters. In these four clips you can hear the progress of how a track goes from mixed down premaster to mastered digital file, to dubplate recorded master.
The first clip is simply my recorded mixdown of ‘Triad’, normalised. This file would be delivered to the mastering engineer with more headroom, but that gain difference wouldn’t allow you to notice the other changes being made in the process.
Audio PlayerThe next example is the identical file with a -3 dB threshold set on a limiter. This is simply to keep the contest fair. A louder file will always seem ‘better’, and so to even the race, we’re just taking that advantage off the table. This clip will show you some of the flaws in the mix: a bit of mud in the low end, slightly dull on the top frequencies and a relatively narrow stereo field.
Audio PlayerThe next step – the mastered digital file – is where we get to see the advantage of a good set of ears, and some high-end processing on a digital master. The low end has power and tightness, letting the 808 kick boom nicely. The Moog bass has a balance of roar and weight, but less mud. The transients still pop very nicely so that the kick and the snare hits don’t get lost in the compression. The high end has more sparkle and air, and there is a bit more smoothness in the stereo field.
Audio PlayerFinally, this is the cherry on top: cutting the digital master to a dubplate and then processing it lightly to match current loudness standards gives us this result. Like I’ve said, this is not a necessary step; the digital master works perfectly on big sound systems, and translates nicely onto vinyl. The first thing you’ll notice with the dub plate version is how the low end bumps harder, and the stereo field fills out. There is more ‘cream’ in the mids, making it softer and pleasant; the transients feel dynamic and punchy but still natural and unforced. There is separation between the different elements of the mix, but still a cohesion and plenty of space. The stereo field wraps around more comfortably and adds a bit of dimension to parts of the first file that weren’t standing out properly. It is louder and somehow still dynamic.
Audio PlayerI’ll cut right to it: the difference between the mastered digital file and the version recorded from a dubplate is a matter of nuance. It is not a night and day change in results. However, this is where a philosophical boundary shows up. Some musicians are constantly seeking every small advance possible in tone, warmth, depth and character in their sound. Others are satisfied with what’s easily available, and I can’t criticise that. But if you have experienced the rich differences between analogue processing and recording, you will know that it is the extra 10% improvement that hooks some people. It is the difference between fresh mozzarella on a handmade crust made by an old man with a stained shirt, and a delivery from Pizza Shack.
The differences between analogue signal and digital are often debated, and I’m not here to convince anyone of the superiority of one approach or another. The approach of seeking slight improvements is a choice, maybe even an indulgence. But what I can say is that every small advance of tone, nuance and quality adds to another. If one process adds a 2% incremental advance, and the next adds 5% more, and another adds 10%, the improvement is not just additive, it’s compounded. The nature of striving for better results is the heart of great creativity.
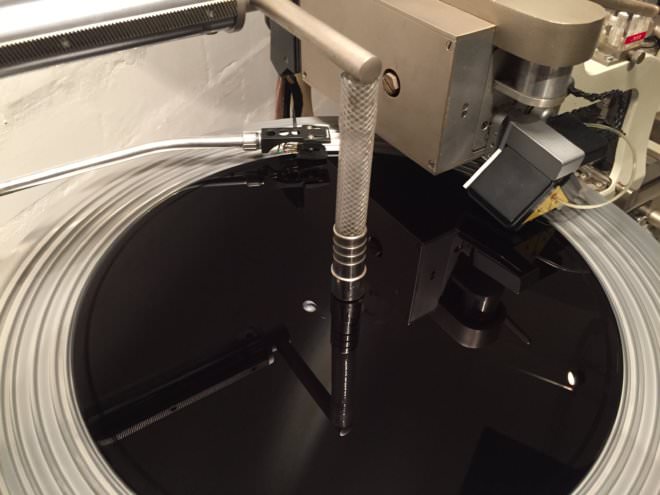
Here’s how it’s done. A fresh dubplate is set on the lathe, maintaining the same exact settings as those used to cut the track onto the lacquer. When the lathe is started, and the plate is spinning at the proper speed, the cutter head (the needle which etches the frequencies into the material) is set down on to the dubplate and the mastered signal is sent from the D/A converter. As the cutter begins to etch into the dubplate, another phonographic needle is laid on the dubplate, several rotations behind the position of the cutter head. Varying anywhere from 3 to 6 rotations, the second phono needle is picking up the cut signal several seconds after it’s been etched by the cutter head. This signal is then sent back to the A/D converter and recorded into the mastering station’s computer. Remember that dubplates deteriorate from age and playing, so this needle is capturing the sound mere seconds after it’s etched into the plate. This process captures it in the freshest state possible.
Back to the results. What’s different? First, there is a noticeable widening of stereo imaging in the mid and high frequencies. That frequency range also becomes what I often describe as ‘creamy’ – a softening of harsh tones and a smoothing out of the sonic profile in the mid-to-upper sounds. The low end has a thicker punch and clarity; low sounds are pronounced and separate out against each other more. Transients are simultaneously denser, and less sharp. There is an openness to the sounds in a mix, after being glued together through the compressor; they stand just slightly more clearly against each other now.
There is one final key difference to address, and it leads us to the last step: dynamics. Because the signal to the cutter head is not as compressed as the digital master, there is more dynamic headroom, or less ‘loudness’. This is where the final advantage presents itself. Having attained all the sonic richness of the vinyl head, and the unblemished fresh cut of an otherwise unplayed vinyl groove, now we have a digital file with ample headroom.
If you’ve ever played digital files in the same DJ set as vinyl records, you’ve noticed that records need to be ‘pushed’ louder to maintain the same levels as the digital files. This is a result of the loudness war I mentioned earlier. Digital files allow for greater compression than a physical medium can handle, allowing mastering engineers to reduce dynamic range between the peaks and averages of a signal. The result is a higher average sound level (RMS) than is possible in vinyl. The unfortunate result is that very often a good DJ is forced to overdrive a vinyl channel to match perceived loudness of a CDJ or laptop, eventually clipping the turntable’s signal into the mixer, and distorting all the sonic richness of the record. This is tragic. Yes, in an ideal world, all of us should be reducing gain at the mixer in order to achieve balance. But unfortunately, in nightclubs, varying factors can often make the ideal choice impossible.
With the dubplate process I’ve described above, there is another option: increasing the loudness (RMS) of a file that’s been recorded with all the sonic richness of vinyl. By treating the dubplate recording with the same level of compression as the digital masters, the result becomes as rich as a vinyl record, giving a DJ the ability to match levels without compromising quality. I’m aware that digitally compressing a dynamic analogue source may seem silly to some, sacrilegious to others. Some DJs will only play on vinyl, and it’s an excellent strategy; the gain issues are solved by the consistency of the medium. But if you are willing to play a digital file with -6 dB RMS, you’ve already offset the balance, and somewhere along the way there will be a compromise.
Trying to have the best of analogue and digital is probably naive or at least wasteful. But it’s an indulgence to try to find the best possible result for the music I want to share with my audience. A lot of seemingly foolish things done in that pursuit have eventually proved worthy.
LA-4A’s Triad EP is out now on vinyl via Delft and released digitally on January 22nd. Find Ambivalent on Facebook, Twitter and SoundCloud
.

03.38 PM
Great read, I really appreciated that!
I don’t think the difference between the digital master and the dub plate is subtle at all. The dub plates sounds amazing!
03.54 PM
Very nice read thanks a lot !
09.35 PM
Great read!! I wonder what would happen if Kevin McHugh and Gregory Scott got together and had a conversation? Maybe a future article from Attack could get these two together for that conversation?
03.18 AM
I agree with Jacob’s comment above. I don’t think the difference between the digital master and the dub plate is subtle. And this is coming from someone who is still quite a novice in the producing/engineering world. This was a FANTASTIC read!!! I recommend anyone serious about their craft in the music industry to read this. All the examples you shared were great to learn from as well. Thanks for posting!!!
02.26 AM
Just a thought — since the dubplate master is being played back at the same time it’s being cut, is it possible that vibrations from the cutting process are also being conducted to the playback arm, resulting in basically the opposite of reverb — a very faint, but several seconds advanced, version of the track? Not sure what this would do to the perception of it, but an effect to consider. Does a dubplate played back while being cut sound different than one played back immediately after being cut?
03.41 PM
“Analogue media has, by necessity, more dynamic range and headroom than digital media…”. This is incorrect.
03.25 AM
A lovely read from one of the most lovely guys in the business, and lovely break down of how to make your tunes sound as lovely as possible with two of the most capable and … Well lovely engineers out there! Deadbeat
10.01 PM
Haha @Scott, that was lovely!