In this Beat Dissected we turn our attention to Machinedrum and Holly’s collaborative EP.
Machinedrum and Holly’s new collaborative EP 天の川 (River of Heaven) was released on VISION on August 31st this year.
The 18-minute 6-track EP is a frenetic exploration of drum and bass, dubstep and bass music. It’s an exciting – and slightly unexpected – project from the two artists, but Holly and Machinedrum’s sounds collide brilliantly to create one of the most exciting EPs of the year.
In this Beat Dissected we’ll be analysing the beat of the EP’s title track: 天の川 (River of Heaven) and making a beat inspired by it in Ableton Live.
Remember to click any image to enlarge!
Here’s what we’ll be making:
.
And here’s how that beat sounds with some music for context:
Spec
Tempo
130 BPMSwing
50%Sounds
AbletonStep 1: Kicks
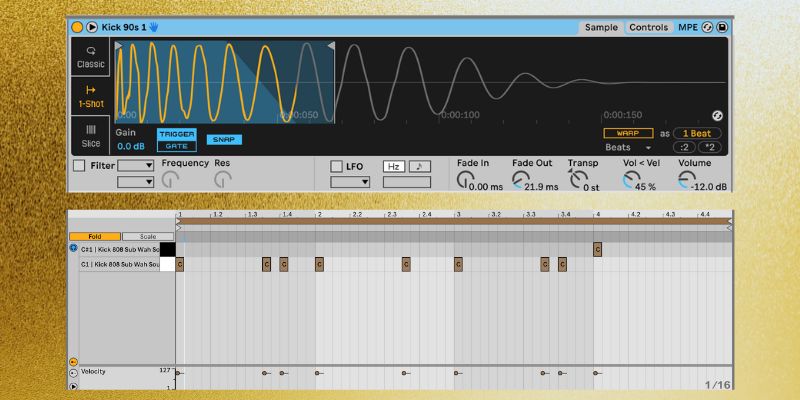
The kick pattern in this beat is a little more complex than in most of our Beat Dissected series. That’s because, in this case, the kick drum is acting as the bass component of the track.
We’ll start with the main, bassy kick sound. This is a classic, distorted Roland TR-808 kick.
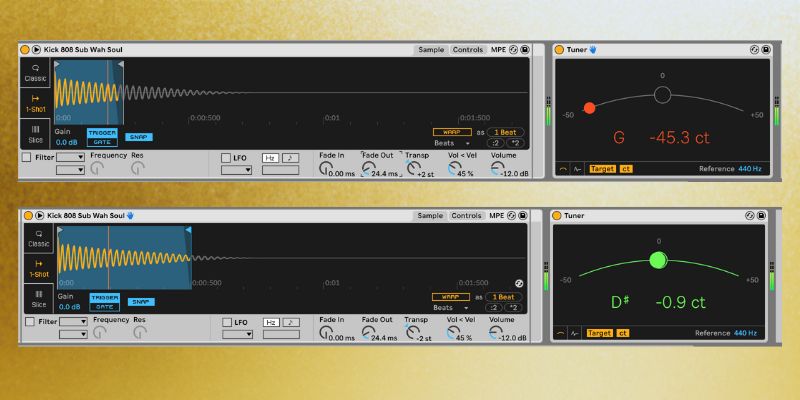
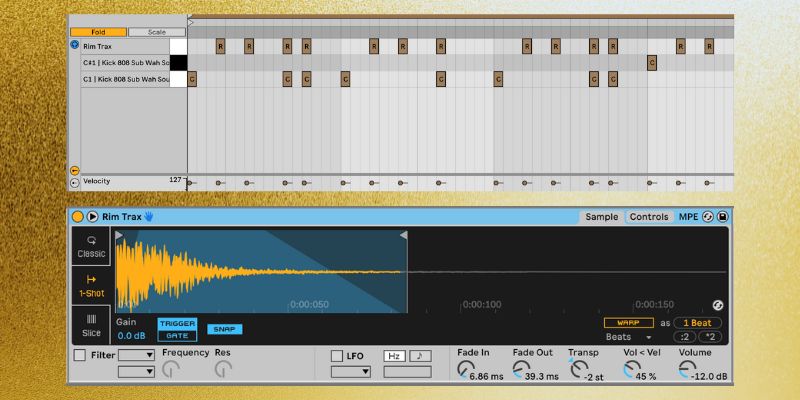
Load Drum Rack on an empty MIDI channel and drag two instances of ‘Kick 808 Sub Wah Soul’ onto two separate drum pads.
Tune one of the kicks so it is tuned to play a G and trim the sample in Drum Rack so it is about .25 seconds long. Roll off all frequencies above 4kHz.
Step 2: Rim
Next, we’ll add in a rim shot. The sample ‘Rim Trax’ works well here – load it in Drum Rack.
Program the below pattern.
Add a slight fade-in at the sample’s start, trim out the tail, and add a fade-out.
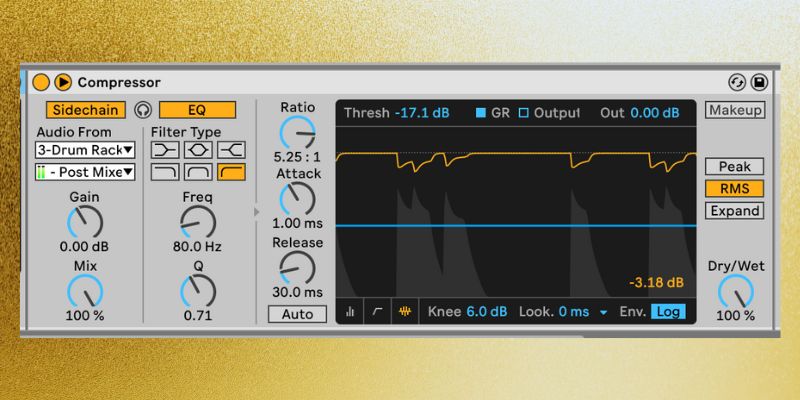
To add some movement to the part, load Compressor on the rim shot and route the G tuned kick from the last step to be the sidechain trigger.
Set the compressor so the kick creates about 3.5 dB of gain reduction.
Here’s how the beat sounds now.
Step 3: Fill
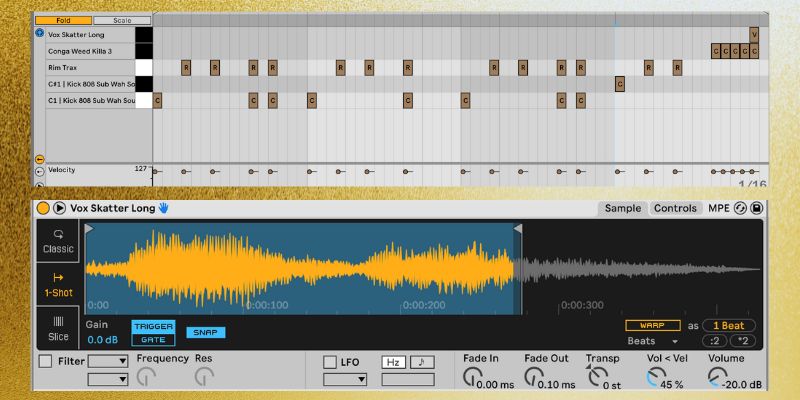
At the end of the bar we’ll round it off by adding a tom-like fill and a vocal sample.
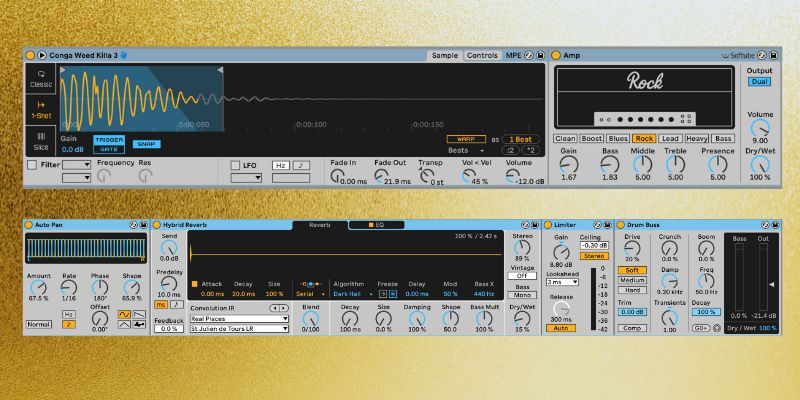
Load the sample ‘Conga Weed Killa 3’ In Drum Rack.
Trim the sample to just over half a second and add a fade out.
Load Amp, select the Rock mode and reduce Bass to 1.83.
Step 4: Hi-hats
We now have the main elements of the beat down. The original track has some extra subtle elements in the background that give the beat a human feeling. To replicate this we’re going to add a hi-hat loop at a low volume.
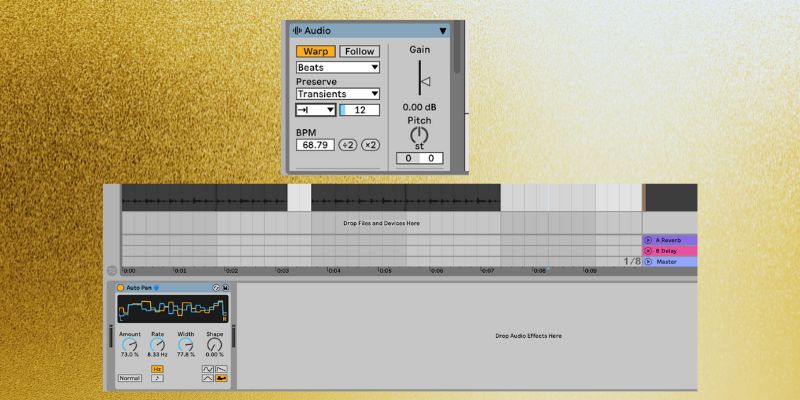
Drag the loop ‘Swanky Hats 69bpm’ onto an empty audio track. Set the warp mode to Transients and the transient loop mode to off. Set the transient envelope to 12.
Now duplicate the loop four times and turn the track volume down to around -15dB. Delete the final quarter of the second bar.
Load Auto Pan on the track and set it to random mode. Set Amount to 73%, Rate to 8.33 Hz, and Width to 78%.
Step 5: Group Processing
Finally, we’ll add some group processing to bring the beat together.
Group the Drum Rack track and the hi-hat track together.
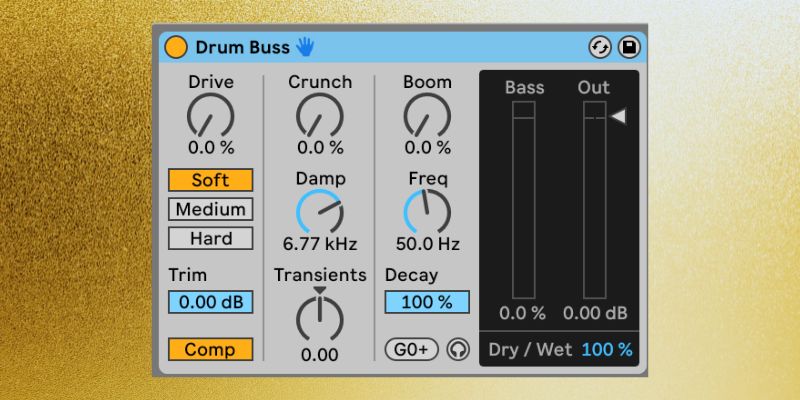
First load Drum Buss, set mode to Soft and activate Comp. Make sure no Drive or Crunch is being applied.
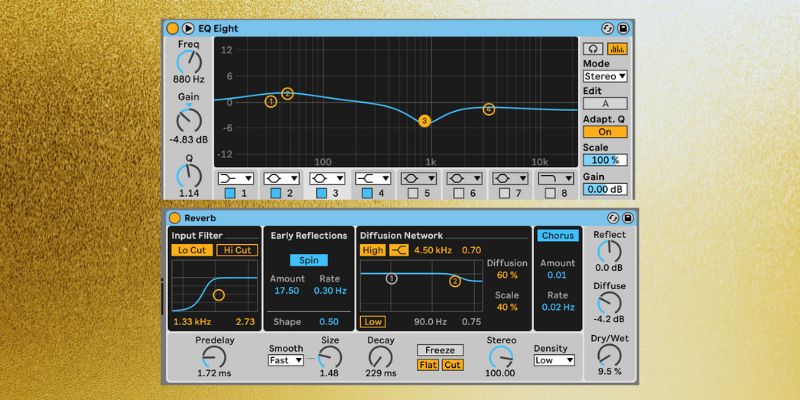
Next, add Reverb. Set the decay to a short 230 ms, predelay to 1.7 ms and set Dry/Wet to around 10%.
Finally, with EQ Eight, boost the bass by 2dB at around 45 Hz, and soften the rim by cutting by 4dB at 880Hz.
And now, here’s our finished beat:
And here’s how that beat sounds with some music for context:

