In this instalment of Beat Dissected we’re going to create a punchy house beat with a generous amount of saturation and drive.
Beat Dissected is a regular series in which we deconstruct drum patterns, showing you how to program them in any DAW. Just copy our grid in your own software to recreate the loop and to use the same one-shots you can download the samples that we used.
Here’s the beat we’re building today:
Spec
Tempo
126-132 BPMSwing
Maschine 10%Sounds
Drum Machines - 909, 808, MPCStep 1
We begin with the bass drum, loading Kick Drum 1 (from the accompanying one shot downloads) into a drum rack, we programme a 4×4 pattern with a syncopated hit and an off beat hit in each bar, for variation. We shorten the tail of the kick using the amplitude envelope in Simpler, and then distort the kick drum using the Saturator plugin, pushing the Drive up to 15db.

Step 2
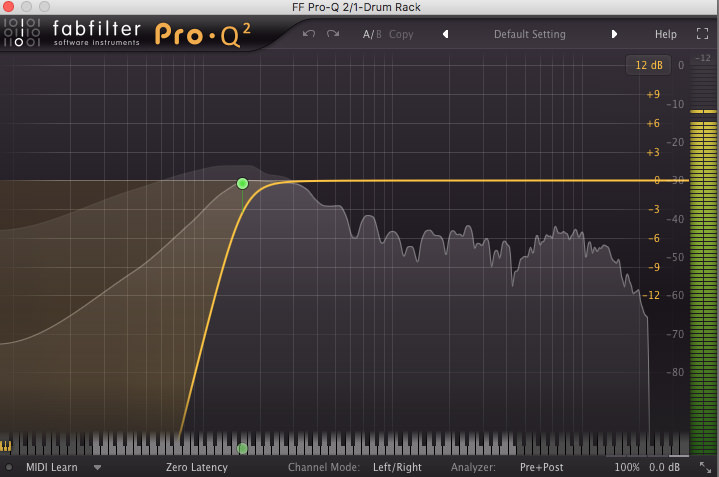
Next, we add Kick Drum 2, copying the same pattern as the previous step. Running the sample into another Saturator plugin for some more attitude, using similar settings, we follow this with an EQ plugin, sweeping away everything below 160Hz. This creates a nice top end for our kick drum.


Step 3
Next up we add a Rim shot to proceedings, placing the Rim shot 1 sample in a syncopated position in the first bar, and then in the second bar adding both an offbeat and syncopated hit. We take the transient away by pushing back the Attack, and also shorten the Decay and Sustain for a tighter hit.

Step 4
Now we add four 909 Tom samples to the beat to give it some energy. We use a combination of low, mid and high Tom’s to create a nice groove and trigger the different pitches of the Tom samples. The trick here is to experiment with the different samples, placing them in both offbeat and syncopated positions.

Step 5
Now for the Snare. We add hits to the upbeats, pitching the sample down -8 semitones for a deeper tone that works well with the kick. We use another Saturator plugin, setting the Drive to around 9db and selecting the Hard Curve mode. We also add a Cowbell sample at this stage, placing a syncopated hit in the first bar and a longer offbeat note in the second bar, once again providing a nice variation between the 2 bars. All the percussion sounds are working as a ‘talk and response’ effect between sections, the beat has plenty of energy and we haven’t reached for a single hi-hat sound!

Step 6
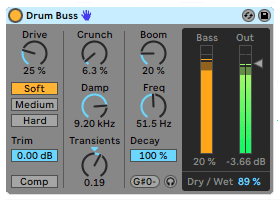
For Group processing, we add the Drum Buss plugin. with a Drive setting of up to 25%. We also push up the Transients a little for more punch, and dial in some Boom also, to boost the low-frequency harmonics.


09.45 AM
Any chance of including more than just one screenshot of the sequence itself? Thanks.