In this edition of Beat Dissected, we up the tempo and build a jungle beat inspired by Nia Archives.
Forbidden Feelingz was the first introduction for many to Nia Archives, the highly lauded English jungle producer. Since its release, Archives has received an NME Award, DJ Mag ward and a MOBO, and has collaborated with and remixed, the likes of Jorja Smith, Pink Pantheress and Skin On Skin.
Forbidden Feelingz is a high-tempo jungle cut featuring Archive’s vocals and a sample from the 70s detective show Colombo. However, as ever in Beat Dissected, we will focus on the drums, recreating the high octane and, at times, hectic central drum beat at the centre of Forbidden Feelingz.
Here’s what we’re creating:
And here’s the beat with music for context:
Spec
Tempo
86 BPMSwing
50%Sounds
AbletonRemember to click any image to enlarge.
Step 1: Kick
Most of this beat’s drum and groove elements will come from a chopped-up breakbeat. However, it’s essential that we layer a nice solid kick sample underneath the break to give the beat a bassy backbone.
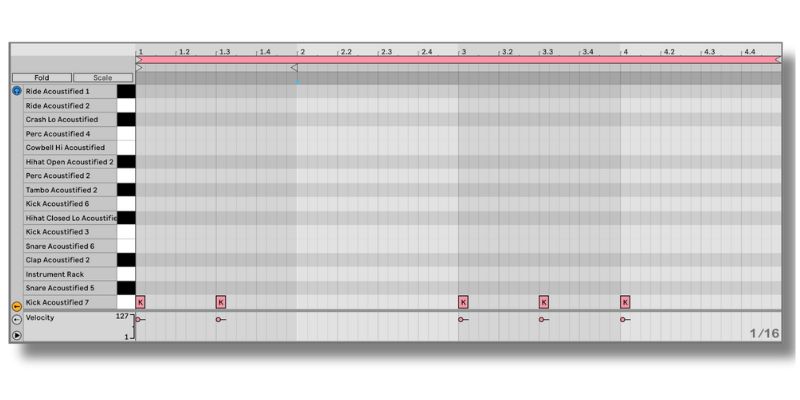
Load Ableton’s 24_7 Kit on an empty MIDI channel. We’ll only be using the kick from this kit. Program the below four-bar pattern.
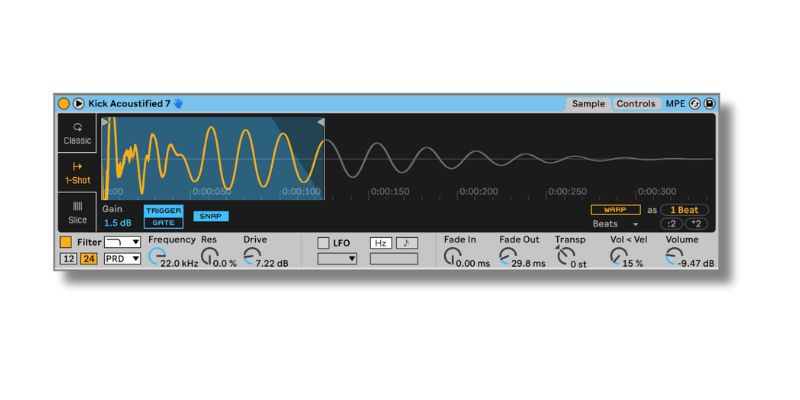
Now tighten the kick up by trimming it in Drum Rack and adding a short fade out. In addition, bring the track gain down to -4.8dB.
Step 2: Breakbeat
As with most jungle and drum and bass tracks, the beat in Forbidden Feelingz is primarily made up of a chopped-up breakbeat.
You could recreate the sound of this track with many different breaks. In our example, we’ll be working with Funk 112 bpm, which is a part of the Ableton Core Library pack.
Because we’re working with a live drum recording, slicing the break to be identical to Nia Archives’ beat will be impossible. However, we’ll aim to get as close as we can.
Load Funk 112 on an empty audio track. In the clip editor, half the tempo of the sample so that it will play back at 2x speed.
To build our break beat, we will use two sections of the Funk 112 bpm sample. In the below image, we have coloured the two sections red and green.
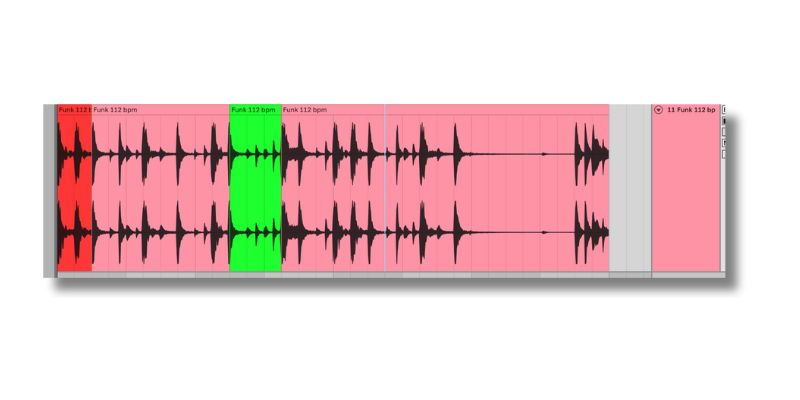
Now arrange the two sections in the below four-bar sequence. The blue section is simply the green section reversed.
Notice the snare rolls at the end of the sequence.
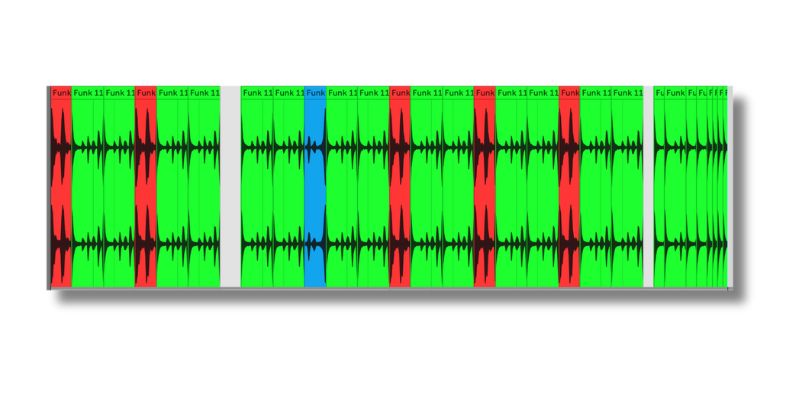
The red section has two concurrent kick hits where we only want one. Cut it in half and then – whilst holding shift – drag it back to its original length to stretch the first kick hit.
Next, select the entire four-bar pattern and pitch it up by three semitones.
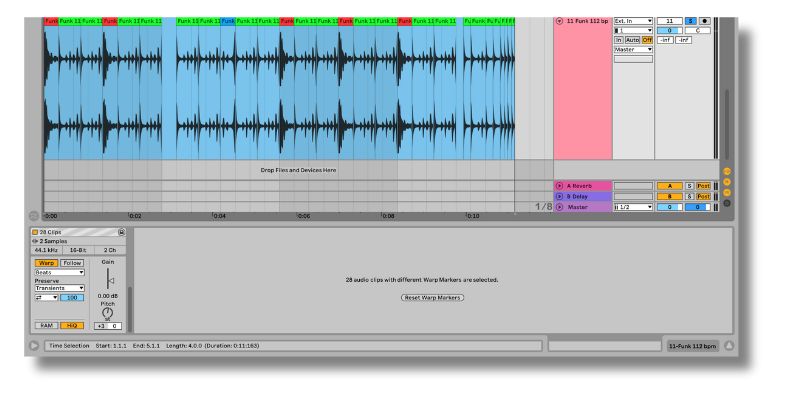
Here’s how the break and kick sound together.
Step 3: Shaker
The final element to add is a hi-hat or shaker loop. We’ll use the Ableton loop Shaker Ambient 80 bpm.
Drag it onto an empty audio track, pitch the loop up by three semitones and half its tempo so it plays back at twice the speed. Delete any section of the loop where the break stops playing, and reverse the shaker loop when the break is reversed (highlighted in blue below).
Select the entire four-bar pattern and set the clip’s warp mode to Beats, Transient Loop Mode to Off and Transient Envelope to 32.
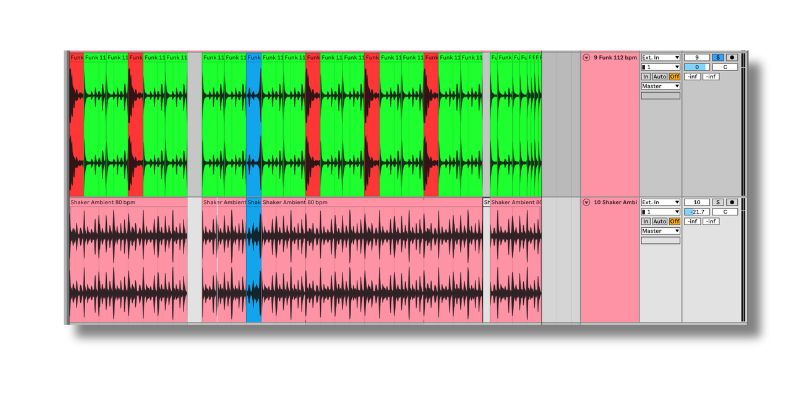
Here’s how the loop sounds with the shaker.
Step 4: Processing
We have all of the elements in place for our beat. Now let’s apply some processing to finish it off.
We will apply some EQ and sidechain compression to the breakbeat.
First, use Auto Filter to cut all frequencies below 214 Hz. Then use EQ Eight to reduce the snare’s body and tame the drums’ high end by cutting at 303 Hz and low pass filtering at 4.84 kHz.
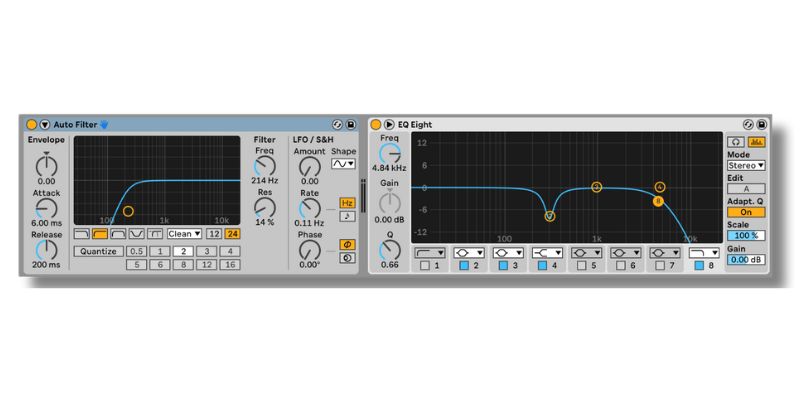
Now load Compressor. Set the sidechain input as the kick channel with an instant attack, Auto release, ratio of 4.85 : 1 and a gain reduction of around 8 dB. This allows the kick sample to punch through the mix.
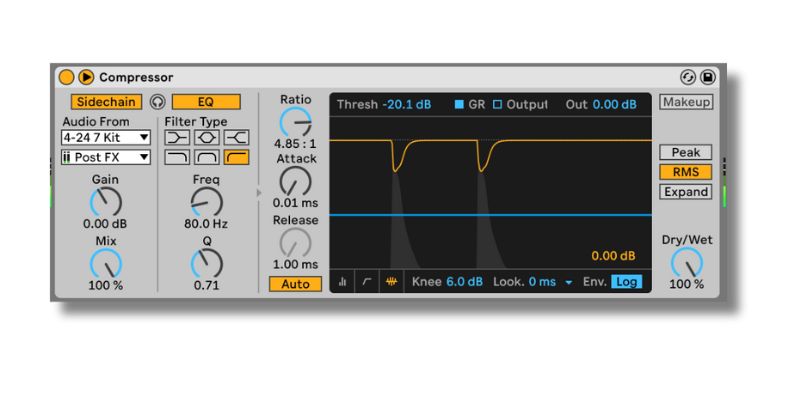
In addition, if the end of the red section of your break has a click sound, fade it out using the clip envelope.
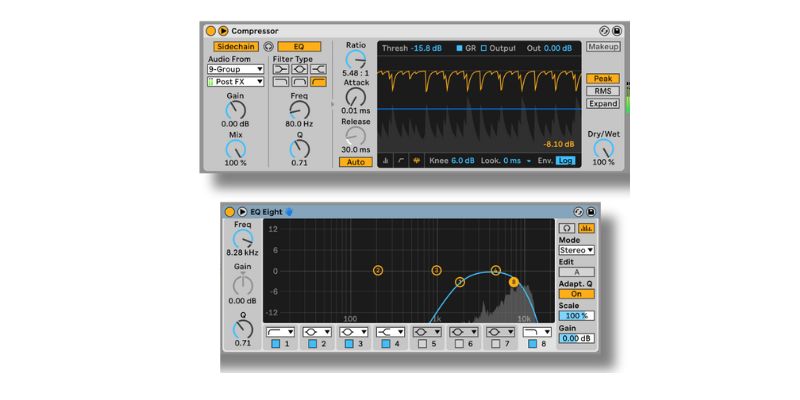
Now for the shaker loop. We want the shaker to feel like it’s a part of the breakbeat. To achieve this group the kick and breakbeat channels together and then load a compressor on the shaker channel with the kick and breakbeat group set as the sidechain input.
Set the Attack to instant, Release to Auto, Ratio of 5.5 : 1, and aim for a gain reduction of 7 dB.
Then, with EQ Eight, set a high pass at 1.91 kHz and a low pass of 8.28 kHz.
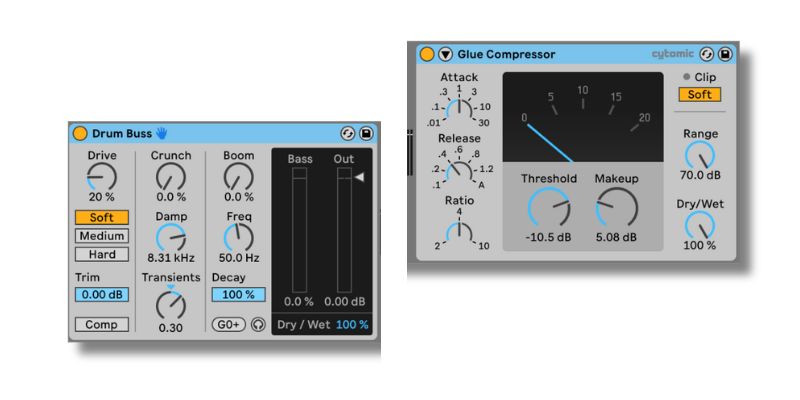
Group all of the tracks together. Load Drum Buss on the group and boost the transients of the loop to 0.30. Set the Dampen dial to 8.3 kHz.
Next, add Glue Compressor to the chain. Set the attack to 1, the release to .4 ratio to 4, and the threshold to achieve -5dB of gain reduction. Apply 5dB of Makeup gain.
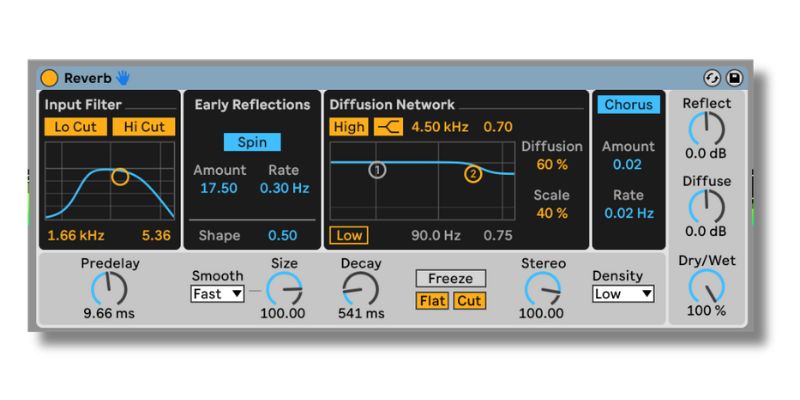
Finally, send the group to an auxiliary channel and load Reverb on the aux channel. Dial in a reverb with a 540 ms Decay and 9.66 ms Predelay. Filter out the high and low frequencies.
Here is the final beat.
If you like breakbeat, you might enjoy this Bicep breakbeat Beat Dissected.

