In this instalment of Beat Dissected we’re going to create a classic UK Garage beat.
Beat Dissected is a regular series in which we deconstruct drum patterns, showing you how to program them in any DAW. Just copy our grid in your own software to recreate the loop and to use the same one shots you can download them below.
All samples come courtesy of our sample pack partner Samples From Mars. To get an idea of UK Garage you can check our My Studio feature with one of the pioneers of the genre: MJ Cole.
Here’s the beat we’re building today:
Audio PlayerSpec
Tempo
124-132 BPMSwing
MPC16 - Swing 68/69Sounds
Drum Machines - MPC, Drumtrax, LinndrumStep 1
We’ll begin with the kick drum. We load the kick drum sample into the Drum Rack, placing a hit on the first downbeat of each bar and the offbeat of beat 3 in each bar. We do a double hit at the start of bar 2 for some variation and raise the velocities slightly of the first hit in each bar.
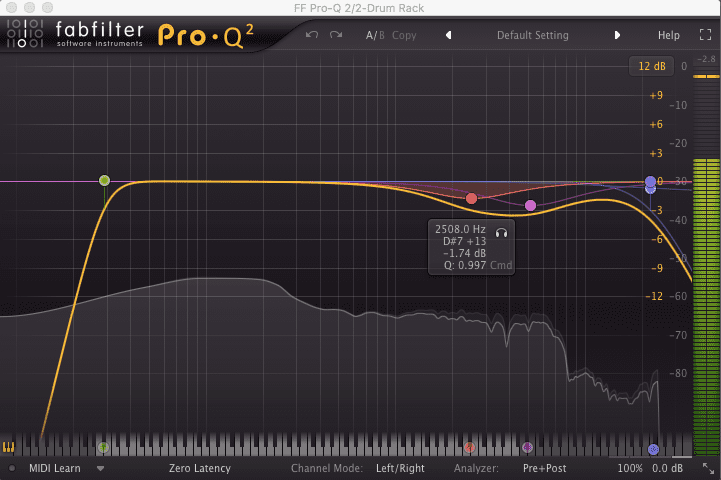
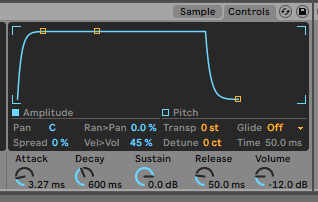
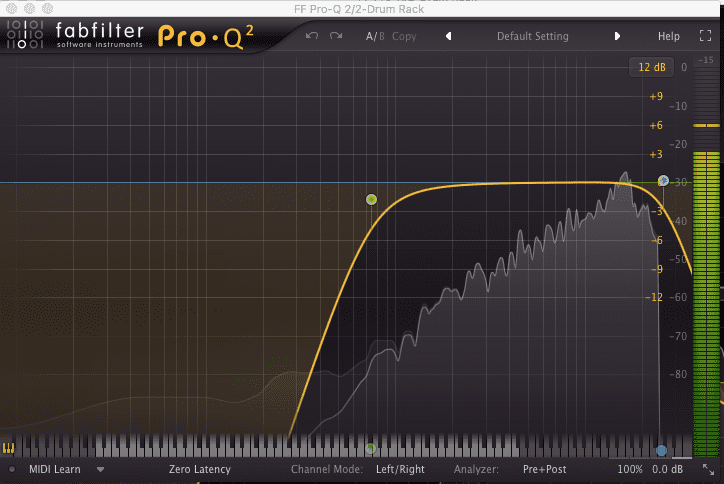
We pitch the kick up +3 semitones (higher pitched drum sounds will work well for this type of beat, providing a more upbeat feel). We shorten the sample slightly using the Decay and Sustain on the Simpler amplitude envelope. Then add an EQ, rolling off any mud below 30Hz, and tone down the transient slightly by dipping some frequencies around 2.5k and 5k.
Audio Player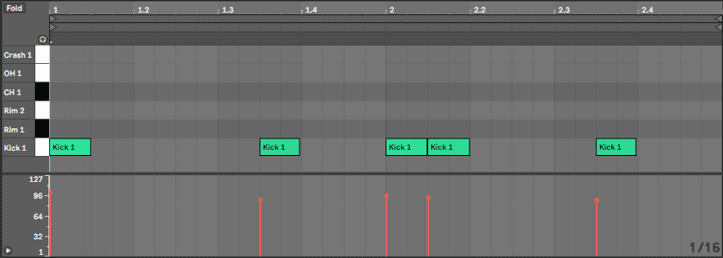

Step 2
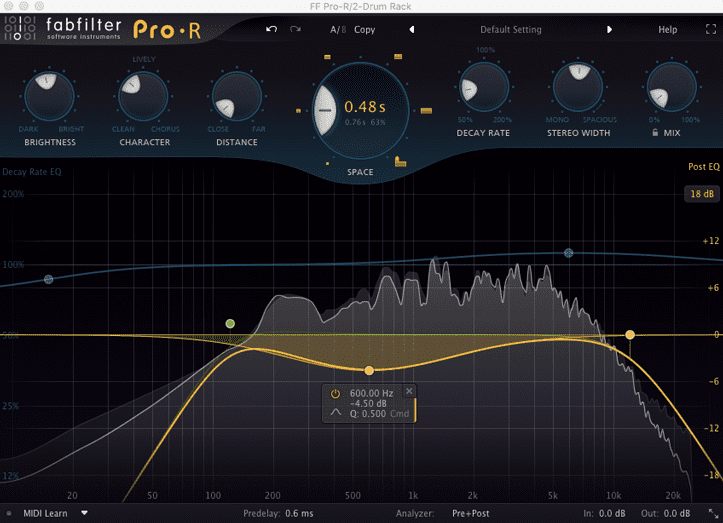
Next up the snare, but rather than use a snare or clap sample we opt for a combination of rim shot samples, for a lighter feel. We use the first rim shot for the upbeats, and both rim shot’s for the syncopated hits (take not of the looseness of these). We also pitch the 2nd Rm Shot up +2 semitones.
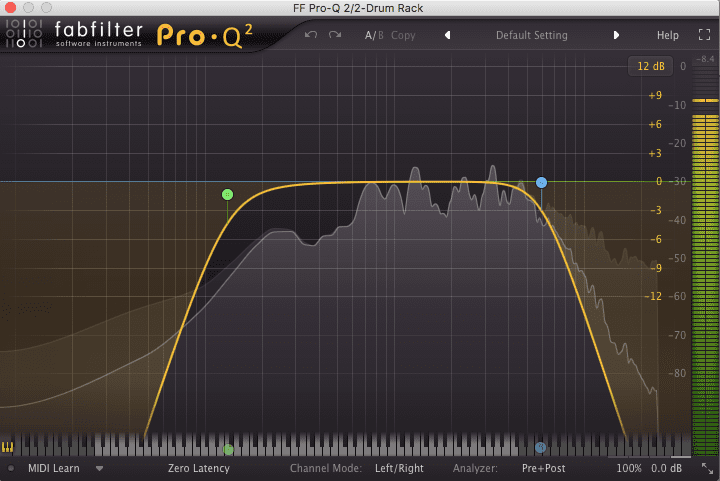
We tweak the velocities of each hit to create a different sound, so the listener will hear two different rim shot samples, creating a talk and response effect with each other. We add identical EQ’s to each rim shot, sweeping away the low frequency up to 170Hz and rolling off the high’s down to 6k. We also add reverb to the first rim shot, adding a just a very small amount. We want to keep the sounds dry and relatively unprocessed for this beat, but adding a tiny amount of reverb helps bed the sound in the mix.
Audio Player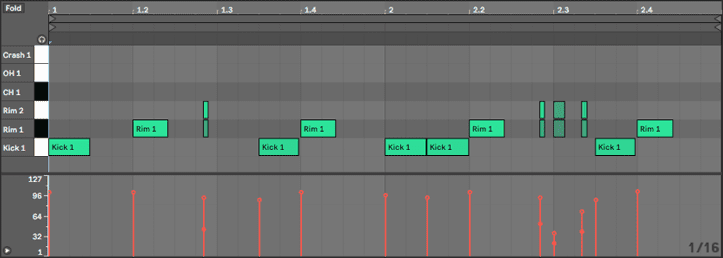
Step 3
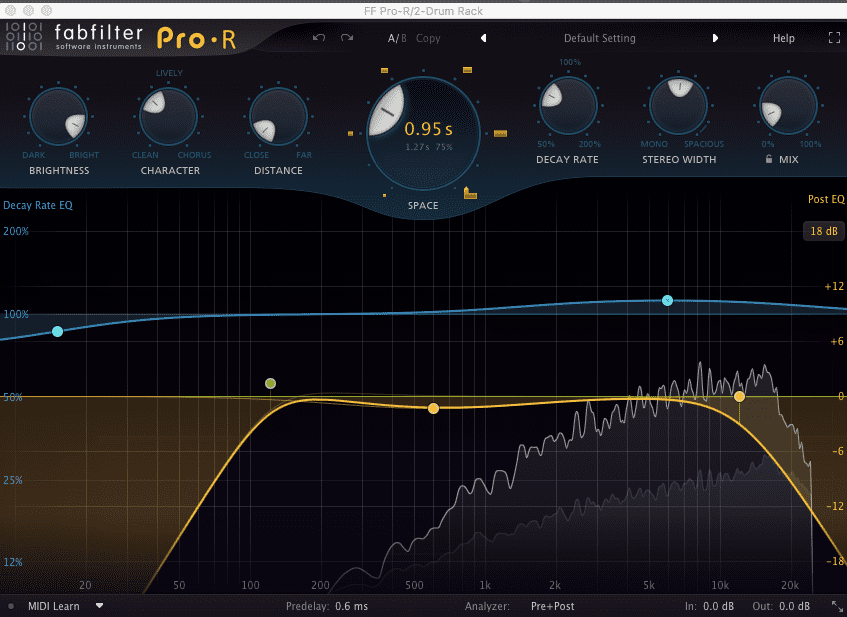
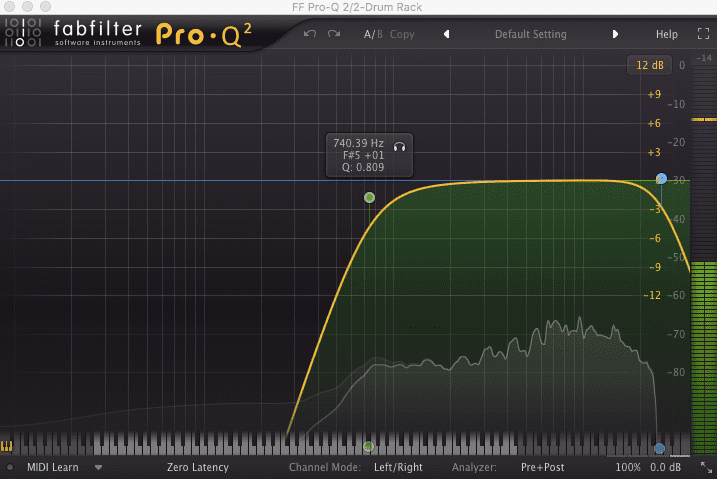
Next up we add a closed hat sample. We want to avoid a sharp offbeat here, as that will create more of a classic house music feel. The hat sample is soft in any case, but we enhance this by backing off the attack. We also add an EQ and sweep away everything below 750Hz.
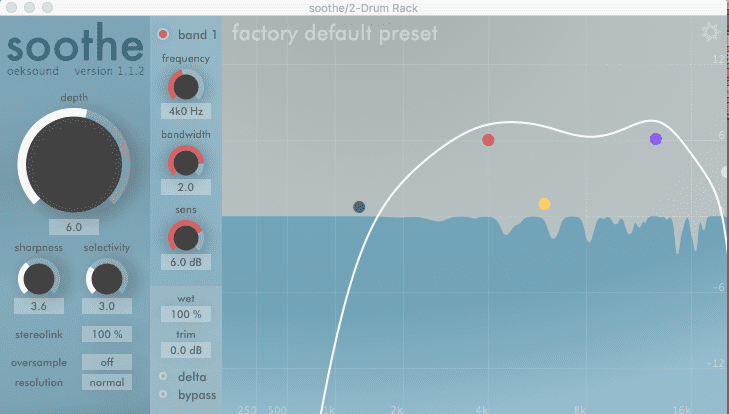
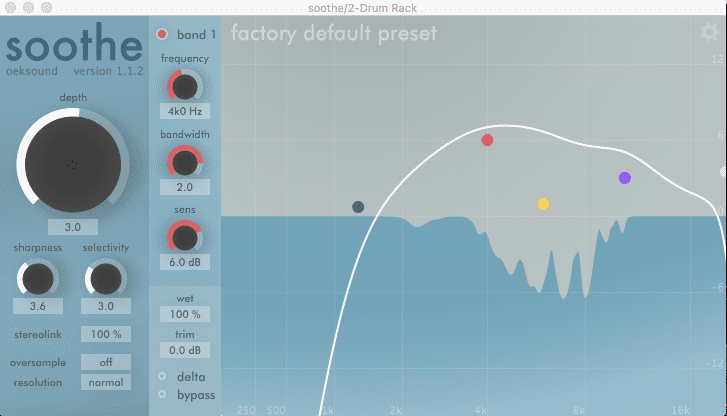
We add reverb to the closed hat, once again using very subtle settings. You know it’s the right amount of reverb when you hardly notice it’s there until you mute the effect. We also add an Instance of Oeksound’s Sooth, this will automatically notch out harsh resonant frequencies in the high’s, which will lead to a smoother and more pleasant top end in the mix.
Audio Player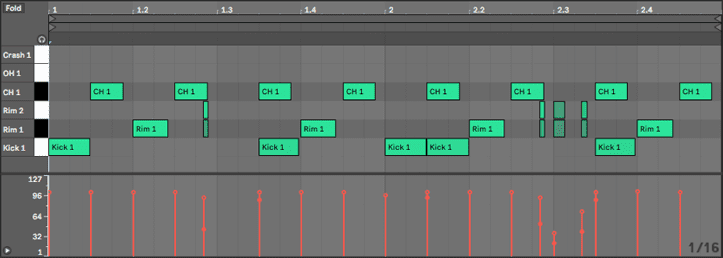
Step 4
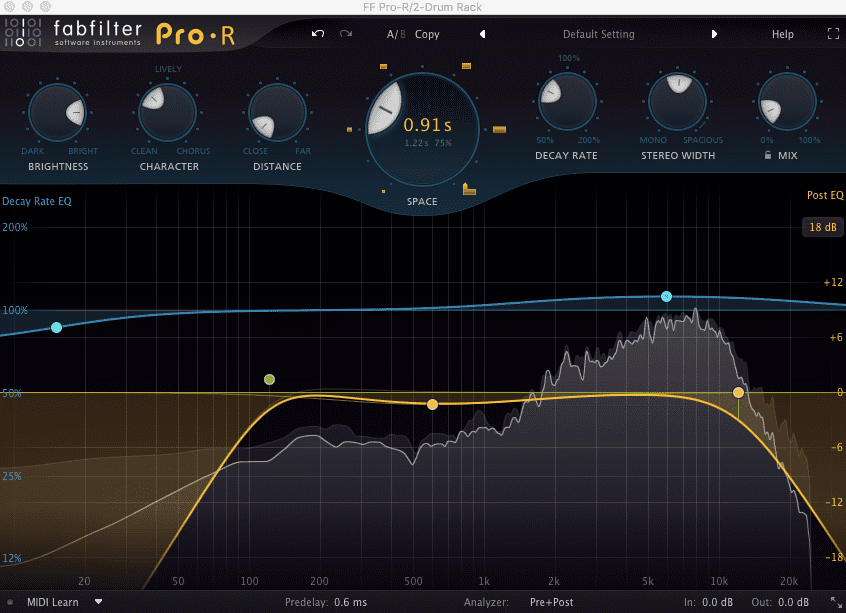
Now we add another hi-hat sound, to add a little more energy to the drums. But rather than use an open hat sample, we use a cabasa, these tend to be very bright but not as harsh or sharp sounding as open hats can be at times. We place hits in the offbeat, add another reverb with similar settings to the previous reverb effects we’ve added, and then we add another instance of Soothe to notch out some of the more resonant frequencies in the sample.
We then add a crash sample at the start of the first bar, a very simple but effective technique, that will indicate the beginning of different sections within the arrangement. We copy over all the plugins we added to the cabasa (EQ, Reverb, Soothe) and also add an EQ sweeping up to 700Hz.
Audio Player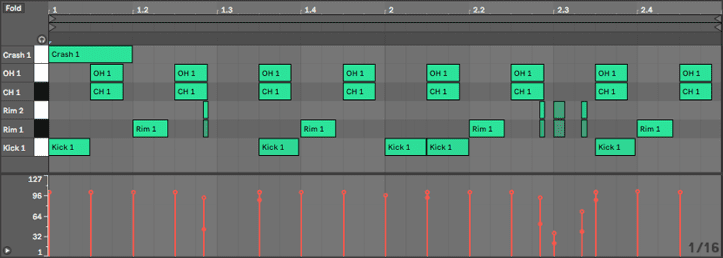
Step 5
Finally a bit of group processing to bring the sounds together. We load Ableton’s Drum Buss plugin, which is excellent for adding character to your drum tracks by providing some simple controls for boosting or reducing certain elements. We turn the Drive up to 25%, which increases the amount of drive added to the input signal.
We then turn up the Crunch to 27%, which adds a touch of distortion to the higher mid frequencies.
The third column in the device controls the Low Frequency Enhancer. By boosting the Boom, we increase the low frequency, we can control this further by adjusting the Freq (frequency) and Decay of the low frequency enhancement.
We dial back the Dry/Wet to 80% to reduce the amount of processing applied, and also level compensate by dropping the Out to -4.41dB.
Audio Player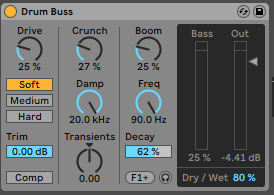

04.04 AM
Why are the audio examples not there anymore ? You can click on them but they won’t load. The whole tutorial doesn’t make much sense without them. Was this supposed to be read/listened to only for a limited time ? Sloppy maintenance of the site like this really decreases its usefulness to your readers, just sayin.
09.41 PM
And when they are there, the file names in the folder have completely different names to the ones in the Drum Rack screenshots. There are two rimshot samples in the screenshots but the folder has a rim and a sidestick. It’s also not the first time. These tutorials are fairly good but sloppy is exactly the right word.
10.13 PM
Hi Frank & Overcurrent.
We’ve tried to recreate the audio files not being there issue however for us, in multiple, browsers it seems to work fine? They appear to be working fine but would love to see a screengrab of them not working for example so we can look into it for you.
I’ve also checked the naming of the files and absolutely you are 100% right and I hold my hands up here. That’s my own fault for being, as you say, very sloppy when formatting the article.
Check back over coming days to re-download as the download will be fixed to make it correct. The same applies for future articles – we won’t let it slip through the net again!
Thanks for reading and for the feedback – Tom (Attack Team)
10.36 PM
Much appreciated reply. Thank you!
11.06 PM
You’re welcome. Loop back over coming days and this will be amended. Thanks! Tom
09.16 PM
Hi, Tom again…this should now have been updated and working as it should be!
05.26 AM
i waste my time reading this bs