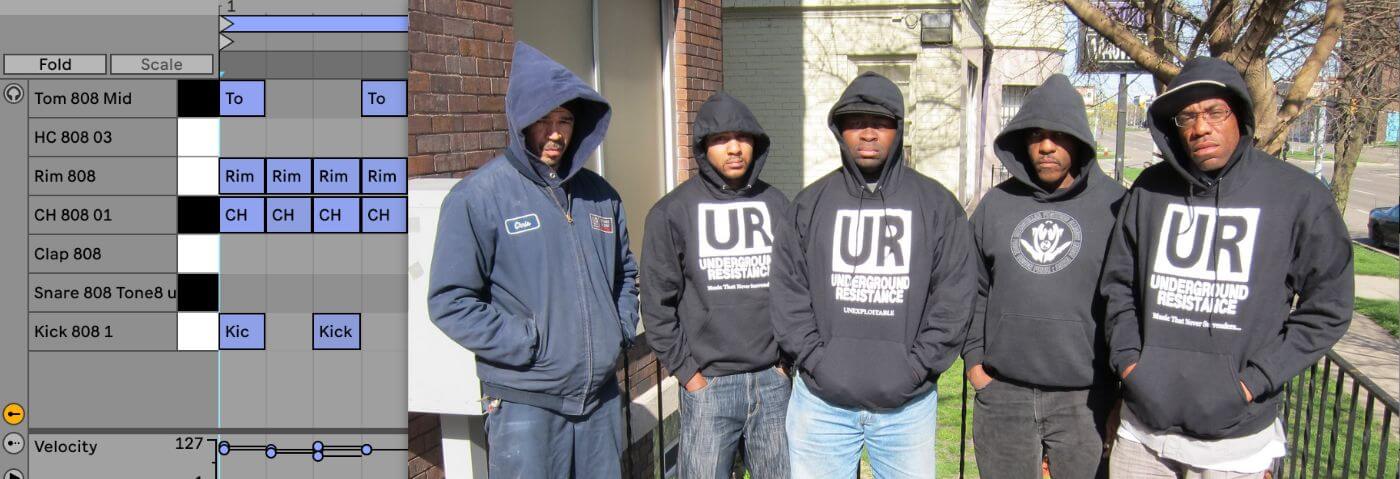
In this instalment of Beat Dissected, we’re going to be building a hard-hitting techno beat inspired by Underground Resistance’s ‘The Final Frontier’.
First formed in Detroit in 1989 by “Mad” Mike Banks and Jeff Mills, Underground Resistance played a pivotal role in the second wave of Detroit techno.
Known for its militant political and anti-corporate ethos, the group consistently crafted dark and introspective hits. Many of their tunes are some of the most loved techno tunes of all time, with their legacy assured.
‘The Final Frontier’ is a hauntingly atmospheric track with moody string pads and squelchy 303 lines all anchored by a slamming techno beat. In this Beat Dissected, we will be creating a beat inspired by the sound of ‘The Final Frontier’ using only Ableton’s stock sounds and effects.
Here’s what the final beat will sound like:
Here’s the beat with some music for context:
Spec
Tempo
138 BPMSwing
50%Sounds
AbletonWant to follow along? Download the session below.
As ever click any image to enlarge!
Step 1: Kick
To build this beat we are going to be using Drum Rack with Ableton’s stock 808 samples. First, load an instance of Drum Rack onto an empty midi channel. Then select ‘Kick 808 1’, add it to the Drum Rack, and program the pattern you see below.
Apply some gentle saturation to the kick with Ableton’s Saturator to give it a bit of punch and help it cut through the mix. Increase the Drive of the Saturator to around 7dbs and set the Base to around 2. To avoid too much volume being added lower the Output by 6dbs. Finally, decrease the Dry/Wet to around 20%.
Step 2: Clap and Snare
The next step is to add a clap and a snare. For the clap, select ‘Clap 808’, add it to the Drum Rack and program the pattern shown below.
When listening to ‘The Final Frontier’, you will notice that the clap has quite a lot of reverb on it. To recreate this add Ableton’s Reverb to the channel the clap is on. Use the Input Filter on the Reverb to cut out everything below 100hz. Set the Predelay to around 17ms, lower the Decay to around 850ms, and increase the Stereo control to around 115 to add some more width to the clap. Adjust the Dry/Wet to taste, here it is at 17%.
For the snare, find the sample ‘Snare 808 Tone8 u’, add it to the Drum Rack, and program the pattern shown below. Put the Simpler into Classic mode and decrease the Release of the snare to around 350ms. Slightly lower the Velocity of the snare fills in the Midi Clip so they don’t hit as hard as the snares on the two and four.
Step 3: Hi-hats
Add ‘CH 808 01’ to the Drum Rack and program the pattern you see below. Make sure to slightly adjust the Velocity of every other hi-hat to make them less static.
Use Simpler’s built-in High-Pass Filter to cut out everything below 350hz and then pan the hats slightly to the left.
Step 4: Tom
The tom is an important element in this beat because of the way it interplays with the kick to add even more groove. Select ‘Tom 808 Mid’, add it to the Drum Rack, and program the pattern shown below. Use Simpler’s High-Pass Filter to cut everything below 40hz. This will help give a bit more room in the mix for the kick.

Step 5: Percussion
To help fill out the groove we will be using a rimshot and conga sample.
For the rimshot select ‘Rim 808’ and program the two-bar pattern shown below. Use Simpler’s High-Pass Filter to cut out everything below 100hz then pan the sample slightly to the right.
For the conga, we are going to use ‘HC 808 3.’ Cut everything below 100hz using Simpler’s High-Pass Filter and then pan the sample to the left. Add Ableton’s Echo to the sample using a dotted 1/8th note Delay with around 70% Feedback, and around 20% Dry/Wet.
Step 6: Bus Processing
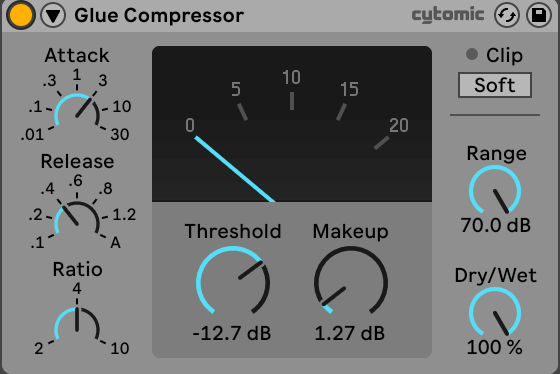
For the final step, we are going to apply some bus processing. First, add a Glue Compressor to the Drum Rack. Use a slower Attack to avoid squashing the transients and a faster Release to add punch. Adjust the Threshold till you get around 4dbs of gain reduction and then increase the Makeup gain to around 1.2dbs. This will help to glue the drums together.
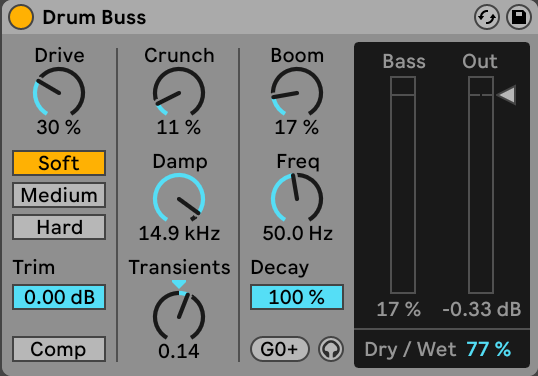
After the Glue Compressor, add an instance of Ableton’s Drum Buss to the Drum Rack. Set the Drive to 30%, Crunch to 11%, and Boom to 17%. Increase the Damp setting to 14.9khz and then set the Transient dial to .14. This will help to bring out the transients of the drums more. Finally, adjust the Dry/Wet to taste, here it is set to 77%.
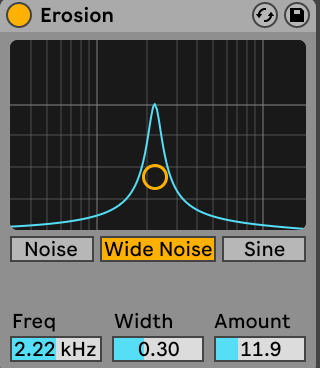
The next two effects will help us achieve the slight lo-fi quality ‘The Final Frontier’s’ drums have. First, we are going to use Ableton’s Erosion to help distort the drums. Apply the effect to the Drum Rack and then using the Wide Noise mode adjust the Frequency to 2.22khz, Width to 0.30 and Amount to 11.9.
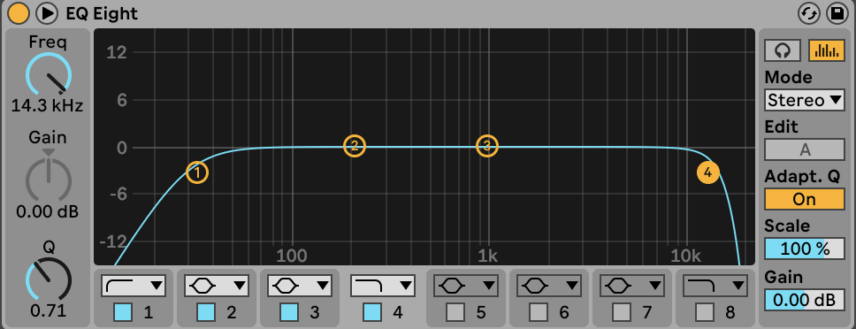
Next, add EQ 8 to the drum bus and cut off everything below 30hz and everything above 14.3khz. This will help add even more of a lo-fi quality to the drums.
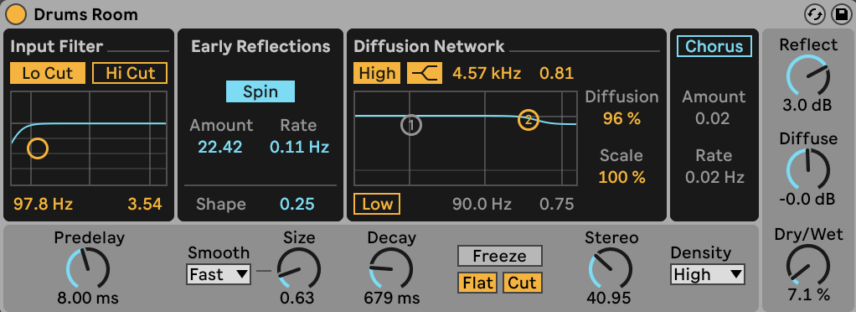
Finally, apply a reverb to the drum rack using the ‘Drums Room’ preset. Use the input filter to cut off everything below 100hz. Adjust the Size to 0.63, Decay to 0.679ms, Stereo to 40.95 and Dry/Wet to around 7%.
Here’s our final beat:
Here’s the beat with some music for context:
