
Polyrhythms in dance music are a simple yet effective technique for adding a sense of complexity to your tracks. In this tutorial, we’re going to take a look at how dissonant polyrhythm basslines can sound good layered together.
Starting from the top, what is dissonance? Dissonance is defined as tension or disharmony. An example of dissonance is when two musical notes are not in harmony. Play a C on a keyboard together with a C# and you’ll hear dissonance. The opposite is “consonance” where two musical notes sound pleasant and agreeable together. Play a C on a keyboard together with a G and you’ll hear consonance i.e they sound harmonious.
What is polyrhythm? A polyrhythm is created out of two or more different rhythms simultaneously. The rhythms or patterns are not readily perceived as deriving from one another, or as simple manifestations of the same meter. They can form the basis of a whole track or the context of a single part.
In this tutorial we are going to combine polyrhythms and dissonance. The low-end frequencies are not where you might typically expect to use dissonance. Traditional teachings suggest basslines do no more than stick to the root of the chord being played. Except, with a few simple tricks, you’ll find dissonance and polyrhythms to be your friend.
To follow along set your DAW to 130bpm. Click any image to enlarge.
STEP 1
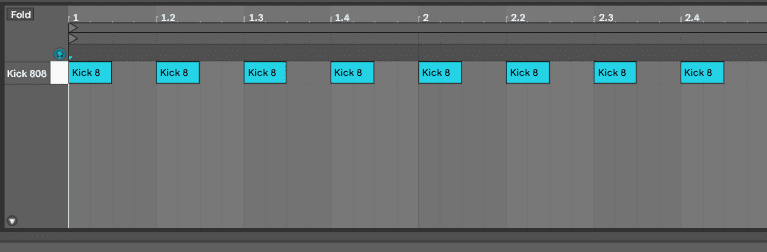
We’re going to program a four-to-the-floor kick drum to be used as a reference. We’ve used a classic Roland TR-909 kick drum.
STEP 2
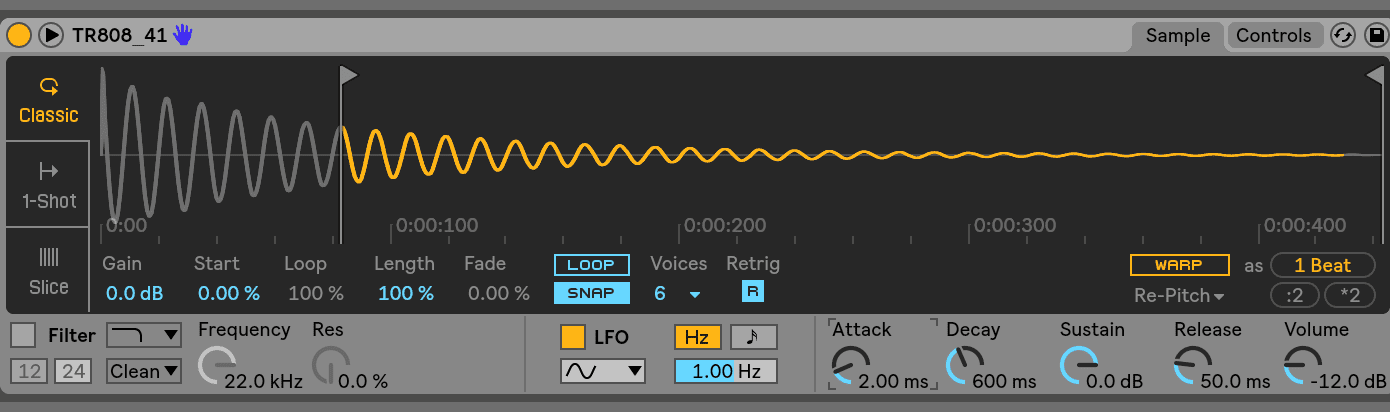
Create a new track and grab your sound. We’ve chosen a Roland TR-808 tom drum and loaded it into Ableton’s Simpler plug-in. It’s a classic one-shot and has the required harmonics to cut through a busy mix.
Remove the main transient and turn the Attack clockwise. Even a few milliseconds will suffice to remove the “click” from the main body which we don’t want.
In our example, we’ve set the Attack to 2.00ms which does the job.
Step 3
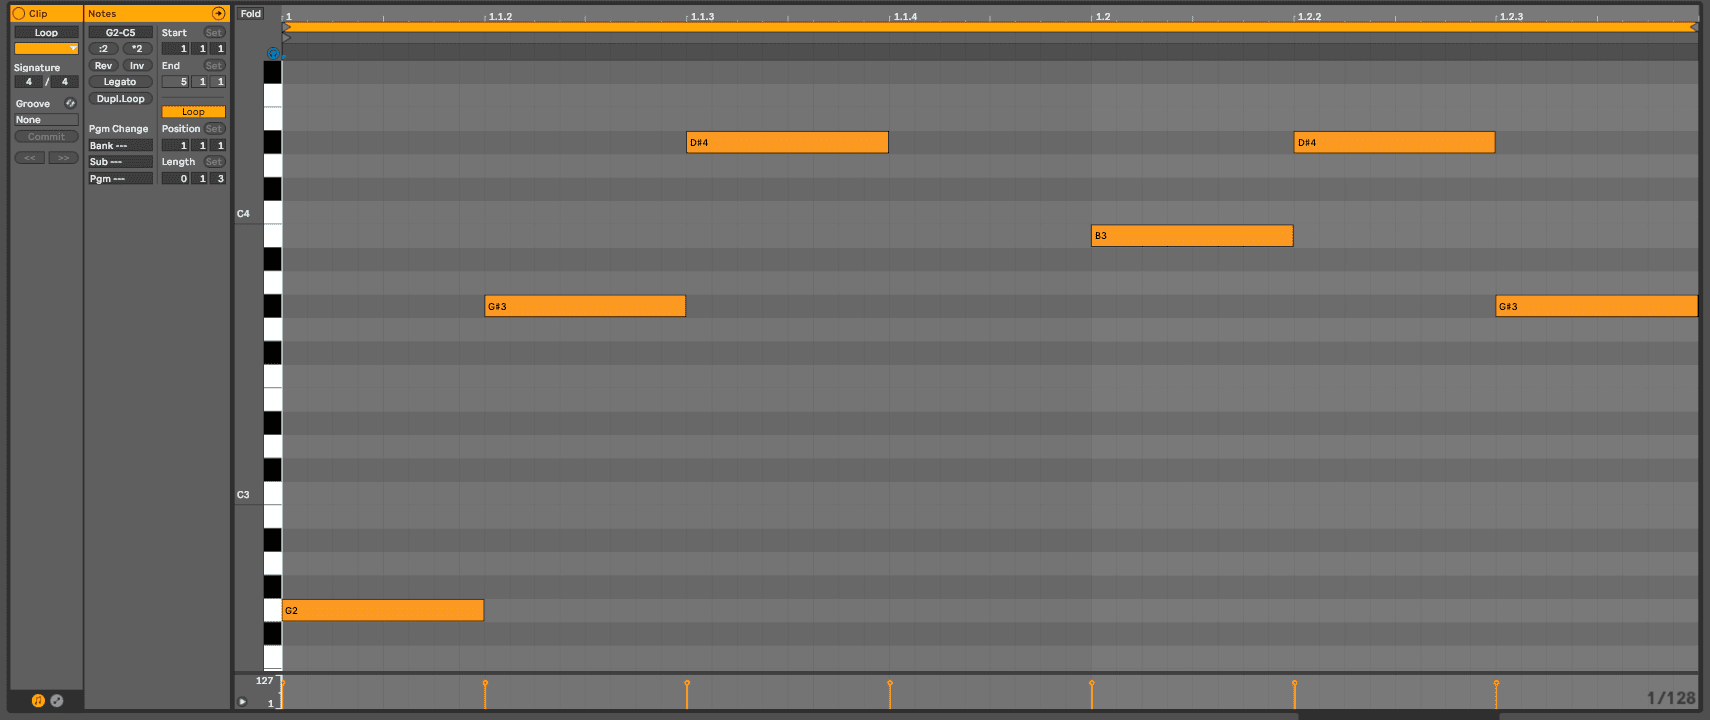
Using the amended tom sound as your source, create a MIDI clip with an unconventional loop length of “O,1,3”.
Program a hit every 16th note and spread the range over two octaves.
Combined with the kick drum (Step 1), we now have a polyrhythm loop with the tom playing a different loop length to the kick drum which is playing a traditional four-to-the-floor pattern.
Step 4
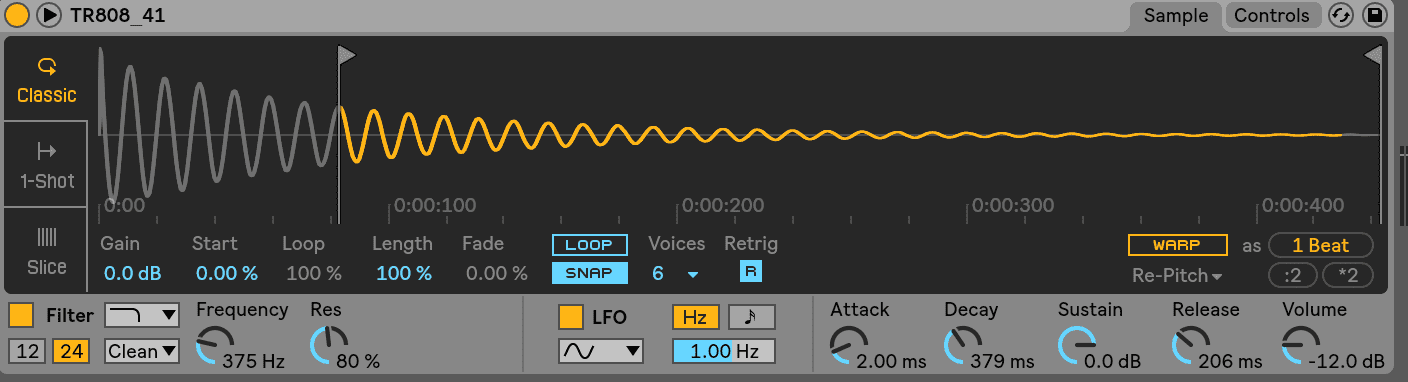
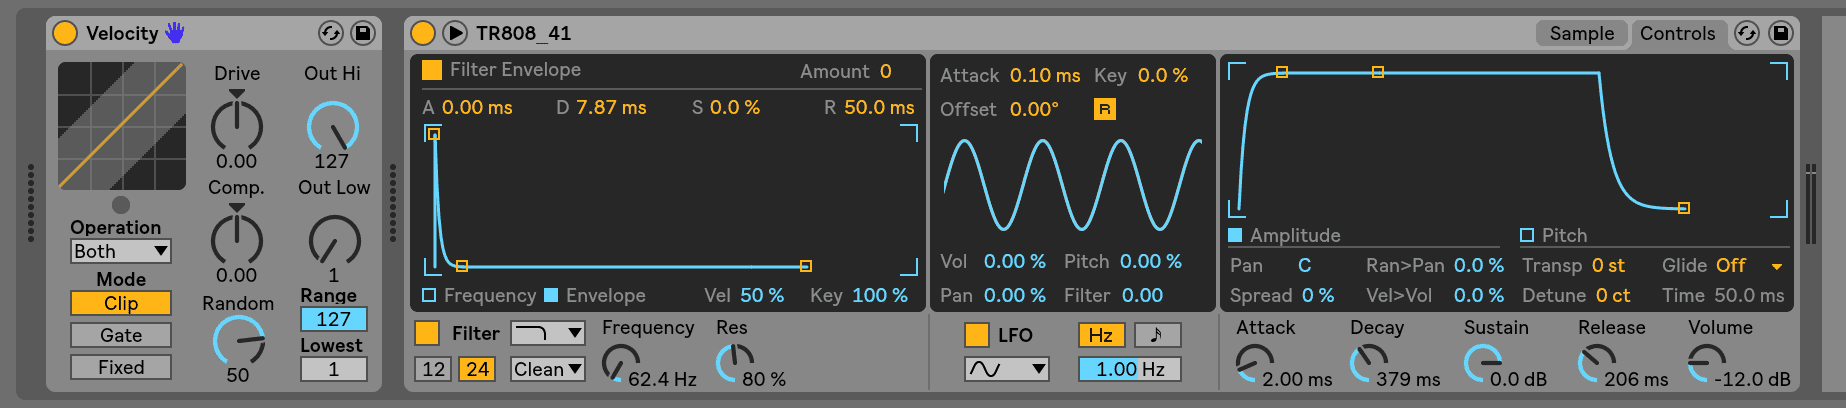
Turning our attention back to the tom, activate Simpler’s low pass filter and increase resonance to 80%.
This sounds interesting but we want to add more movement.
Go to MIDI Effects, load the Velocity plug-in and place it in front of the Simpler in the rack. This should happen automatically but if not, drag it left to be in front of Simpler in the chain. On Velocity set Random to 50 which gives each note a new random velocity and gives the loop a human feel.
Next, head to Controls in the top right window of Simpler and increase VEL to 50% and reduce Vel>Vol to 0%.
You’ll notice the the filter’s self-oscillation is now playing higher in the register. To amend that, pull back on the filter’s frequency to something that suits your taste. We’ve turned it anticlockwise to 62.4Hz.
Step 5
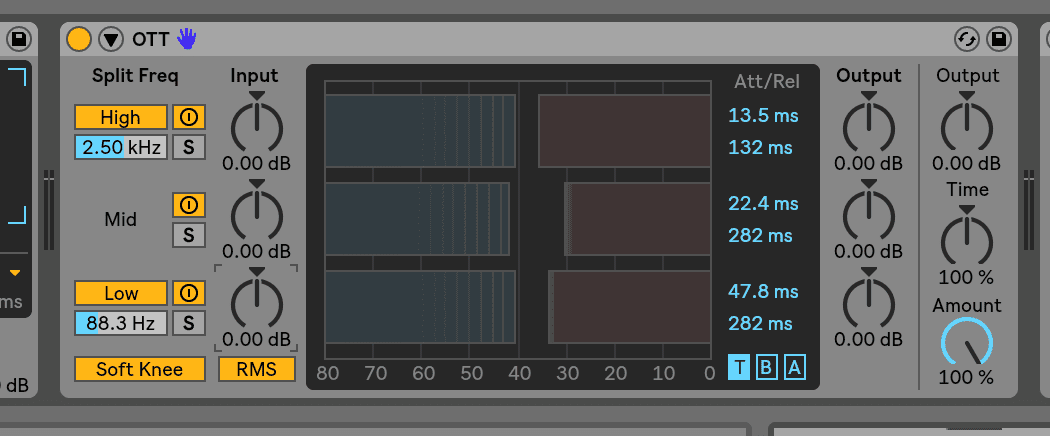
Load a compressor plug-in which we’ll use to control the volume spikes. Ableton’s “Multiband Dynamics” is more than capable
Shoot for the preset labelled ‘OTT’ (presumably it stands for “over the top!”). Copy the settings below to reduce the volume fluctuations and to get the sound under control. This helps with the mix later on.
Step 6
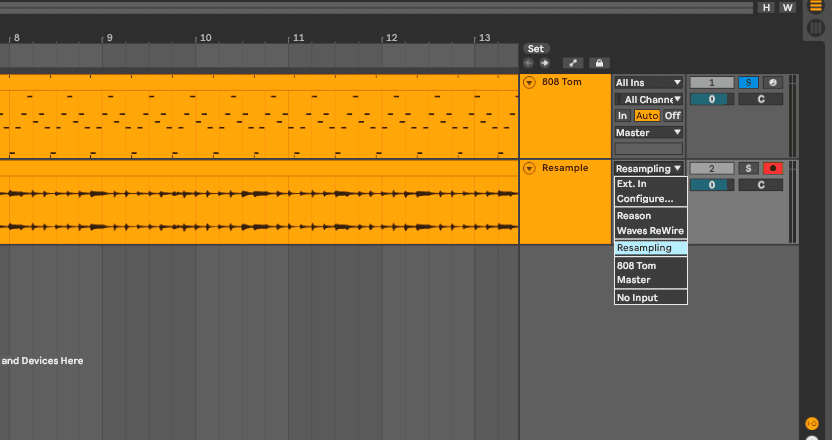
Add a new audio track and set the audio input channel to “Resampling”.
Arm the audio track and record two bars of the tom loop. Once complete, set the resampled track’s Warp Mode to Re-Pitch and click “*2”. This will play back the sample in half-time.

Here’s what that sounds like on it’s own:
And here’s what that sounds like played back with the original bass sound:
The fun has only just begun!
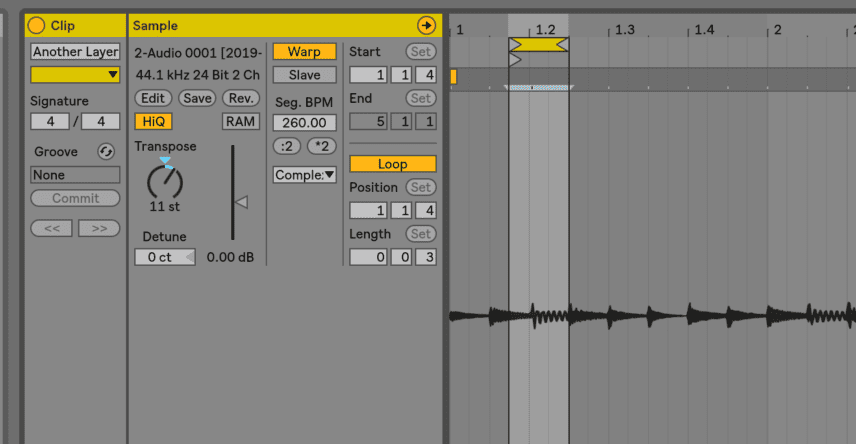
Now duplicate the resampled audio track. On this duplicate track, choose another Warp Mode such as “Complex” and transpose it by turning the dial clockwise to “11 st”. It’s now transposed up by 11 semitones.
Tip: If you transpose down or up by 12 semitones you’ll be changing the register of the sound by an octave either down or up. You would still be in key as it’s an octave. By choosing 11 semitones we achieve the dissonance we’re looking for. Experiment with different intervals!
Now set the loop length to another unconventional length of ‘0, 0, 3’. We now have a hypnotic new pattern to layer over the first two sounds.
Step 7
To finalise, group all the layers together on one track.
Apply delay on a send. We used EchoBoy by SoundToys and selected the preset Transmitter. You can use any delay you wish and the Live 10 Delay has plenty of settings you can try before buying a more expensive plug-in.
Add a compression and select Sidechain compression with your kick drum from Step 1 in Audio From. Adjust the settings to taste but the goal here is to give the kick drum some space and breathing room in the mix. You may wish to use EQ on the bass sounds to remove some low-end. That’s your call!
Lastly, try not to push the compressor’s threshold too hard. Subtle and easy works well. Experiment with different settings.

For further listening we suggest Marc Romboy’s album “Voyage de la Planete” or Phoet’s “Symmetry Breaking”.
09.52 PM
Hi Is there a way of doing this in Logic 9 or anything similar?
Thanks.