In this latest Passing Notes we take inspiration from the Yasuke soundtrack by Flying Lotus and explore ways to incorporate traditional percussive elements into modern productions.
Yasuke is a new anime about a Black samurai in medieval Japan and its soundtrack was produced and composed by none other than Steven Ellison a.k.a. Flying Lotus. Released by Warp Records, the soundtrack contains 26 tracks that blend the Brainfeeder head honcho’s beats with orchestral timbres. Among these are big taiko drums, metallic texture loops, east Asian instruments and styles of percussion that we are used to hearing in both classical and cinematic contexts.
Cinematic percussion is excellent for adding a touch of drama to beats. A large part of the cinematic orchestral sound is recording quality and impact, however, so for a long time, these sounds were inaccessible to most. However, since the rise of sampler instruments, it has become easier and easier to use these instruments in DIY productions. This has led producers (like Flying Lotus!) to incorporate them into modern composition and beat-making workflows.
In this tutorial we will look at numerous techniques that facilitate this such as using Max For Live’s Arp sequencer to program orchestral percussion, creating modulation with effects to add texture, and editing velocity and accents to make parts more dynamic.
Here are the three example beats that we have created using these tricks:
Sequencing Tuned Percussion
The first sound we’ll look at is some tuned metallic percussion from Spitfire Audio’s Originals Cinematic Percussion plugin. This isn’t necessarily a huge orchestral texture but metallic sequences are used commonly in battle (or pre-battle) scenes to create tension or a sense of urgency.
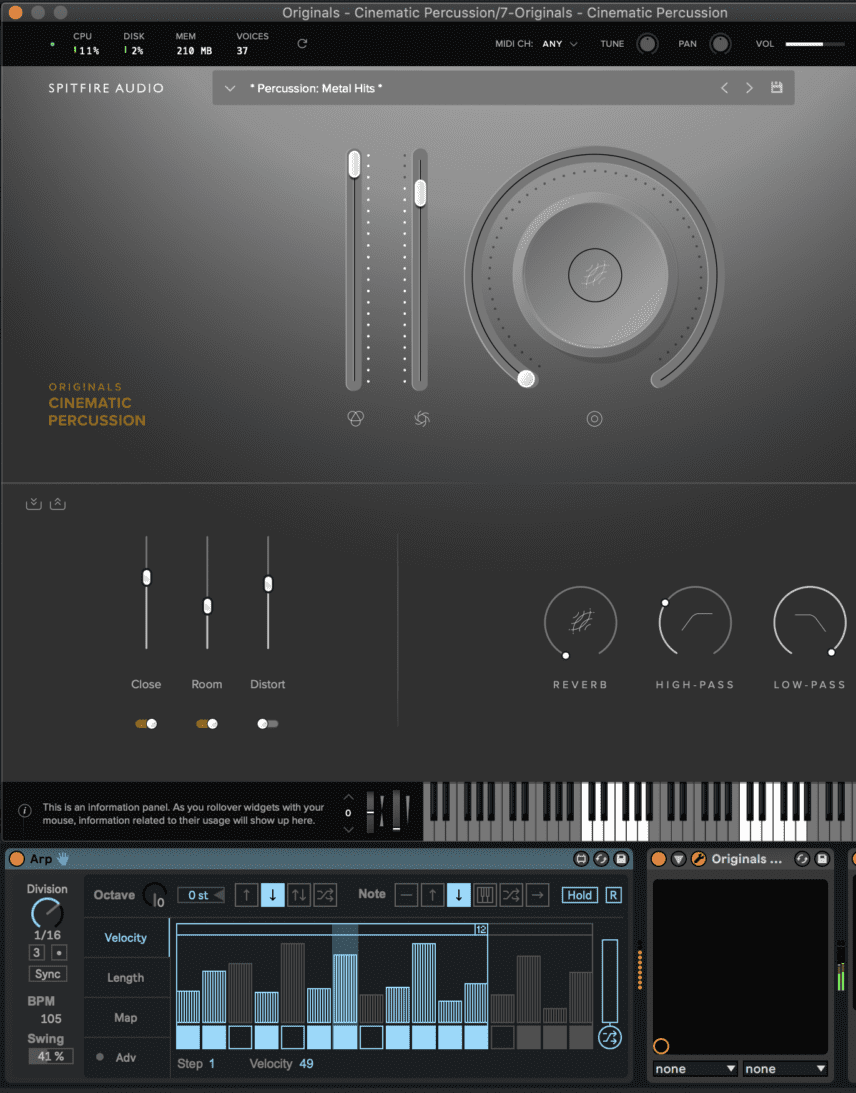
In our first beat example, we use them in lieu of a swung closed hi-hat part. Since this is a patch that has tuned percussion across the keyboard we can use an arpeggiator to sequence the notes. We used the Metal Hits preset from Originals Cinematic Percussion but you can use this technique with any plucky or percussive synth patch or sample.
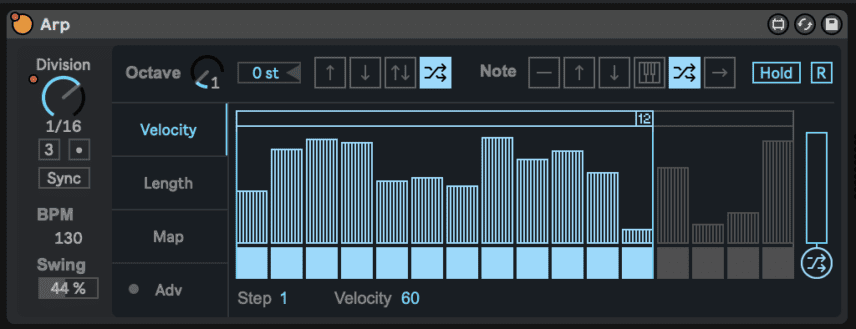
Load up Max For Live’s Arp MIDI device and click on the Velocity tab. In the top section, reduce the Octave knob to zero to avoid octave jumping and set the Note section to up, down, or random. In the velocity window, there is a fader for each division (we have 16th-notes selected) and a square below each division that acts as a ‘mute step’ button. We chose to mute three random steps.
The horizontal bar above the faders allows you to change the loop length. We changed it to twelve, instead of sixteen, so that the loop is never exactly the same for each bar. This is a great shortcut to creating polyrhythms! There is also a swing parameter at the bottom left and a handy randomize button at the very right, which you can use to randomize the value of all velocity faders.
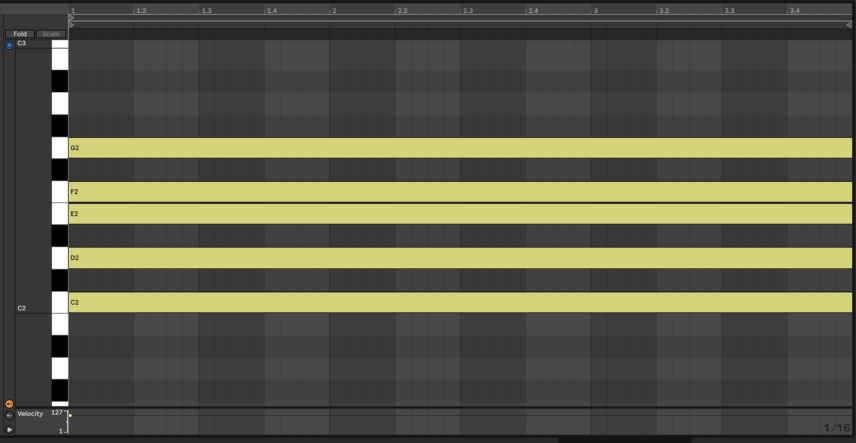
In the piano roll of your clip, make sure to program sustained notes for all of the notes you want to hear. After all, without sustained notes the arpeggiator won’t work! We used C, D, E, F and G notes and set the swing to 41%. Here’s how the part sounds in solo:
The fact that the velocities, accents and mute timings are constantly changing makes the loop sound like it was played instead of programmed.
Automation For Character
One of the techniques Flying Lotus uses frequently throughout Yasuke is running more traditional sounding percussion through effects like reverb, flangers, phasers, bitcrushers and more. This in itself is a shortcut to adding modern twists to sounds that people have become accustomed to for centuries.
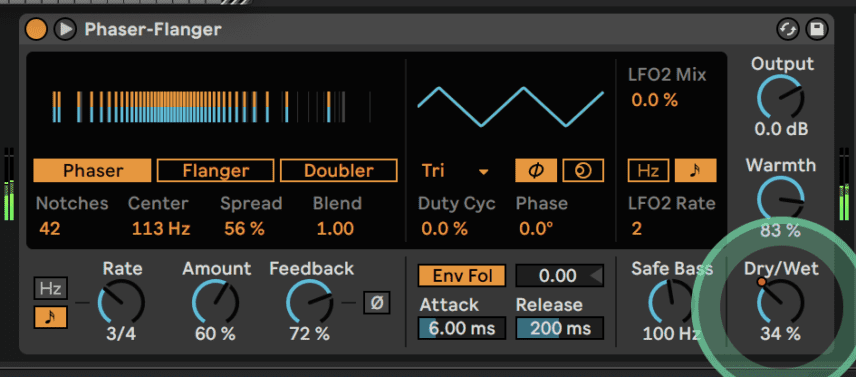
For example, we can take our metallic sequence and add Live 11’s new Phaser-Flanger device. We’ve used the Phaser mode with pretty extreme settings and we simply automated the Dry/Wet while using the sequence over a beat. Here’s how the modulation sounds in solo, followed by the full beat:
Programming Tuned Drums
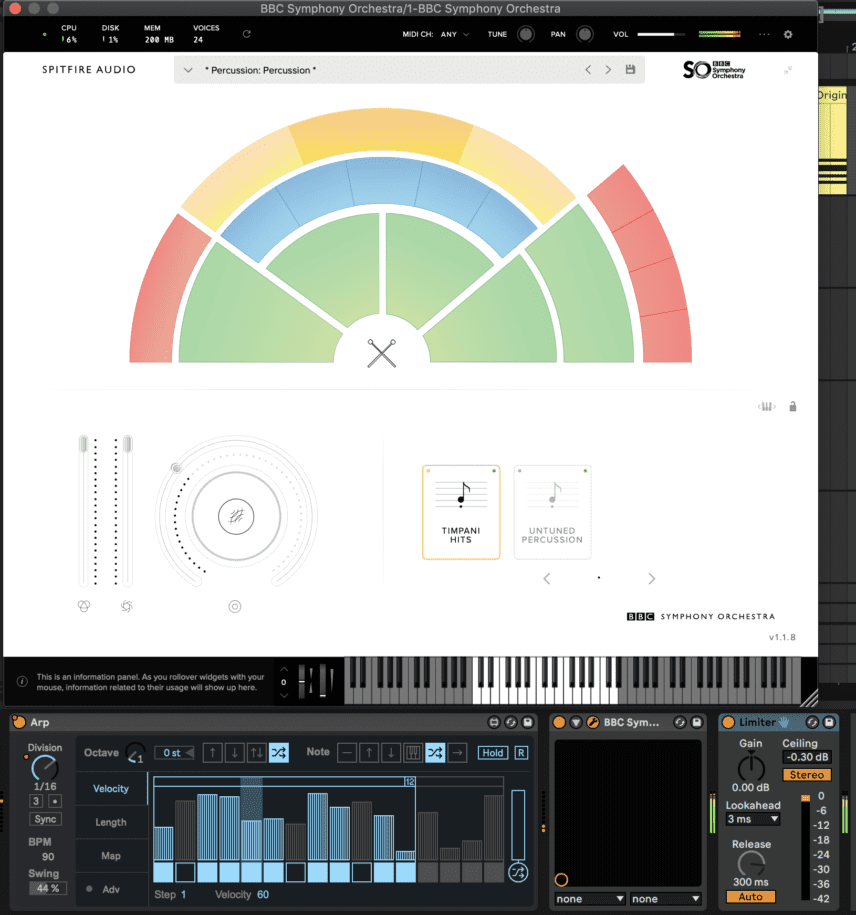
The Arp device also works wonders for sequencing parts for larger drums like timpani or taiko drums. Spitfire Audio’s free BBC Symphony Orchestra Discover has a great Timpani Hits patch that we can use for this. Copy over the Arp device and its settings from the first step, as well as the sustained five-note MIDI clip.
Here’s how the 16th-note taiko drums sound:
Rests or muted notes don’t always have to be used and we can also have a part that plays every single 16th-note:
The changes in velocity and the fact that each hit is a different note bring us closer and closer to ‘live played and recorded’ territory. We can also try different time divisions, for example setting the Arp to 1/8 instead of 1/16:
When these types of drums aren’t the main driving force of the beat (think Hans Zimmer’s loud Dark Knight or Inception drums) they can be good as fills.
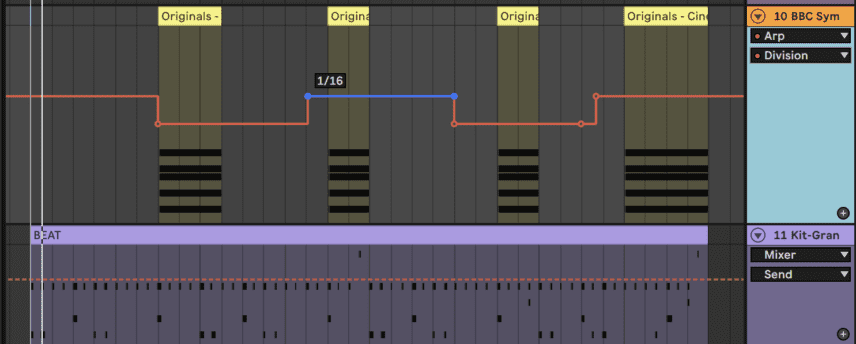
In the following example, we sprinkle the taiko sequences throughout the beat while also automating the Arp’s time division between 1/16 and 1/8:
Here are the taiko fills in solo:
The drum hits really fade into the distance so even after the fill plays the listener will continue to feel the ambience they create. Keep in mind that drum tuning is important here because there will be harsh dissonance if the drum notes clash with any other harmonic part.
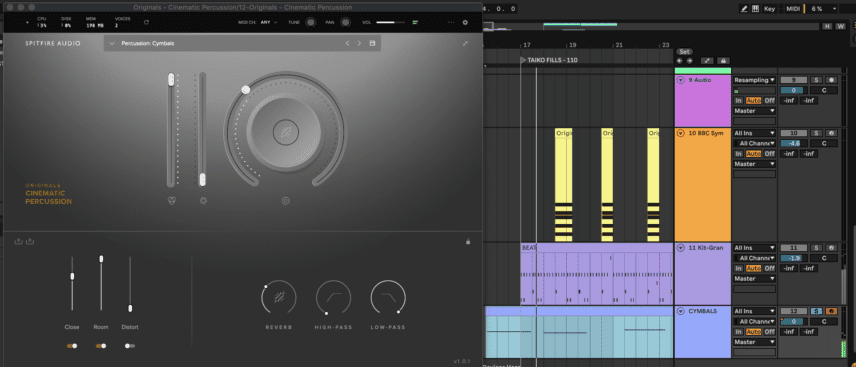
In this beat we also used reverse cymbal samples from the Cymbals preset of Originals Cinematic Percussion. Here’s how they sound in solo:
Layered Percussion with Accents
For our third and final beat we get into some more intricate MIDI programming in the piano roll. Here’s the beat without any orchestral elements:
The goal is to bring this into more cinematic territory by adding a busy but driving percussion part. The High Percussion preset of Originals Cinematic Percussion has a variety of quality samples ranging from metallic hits to bongos.
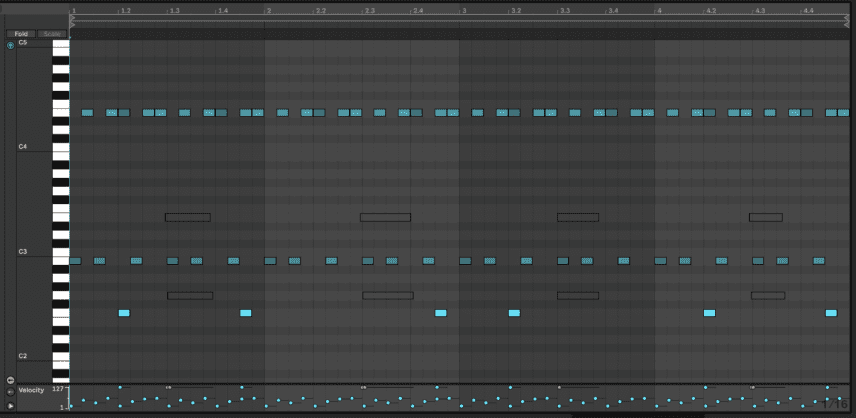
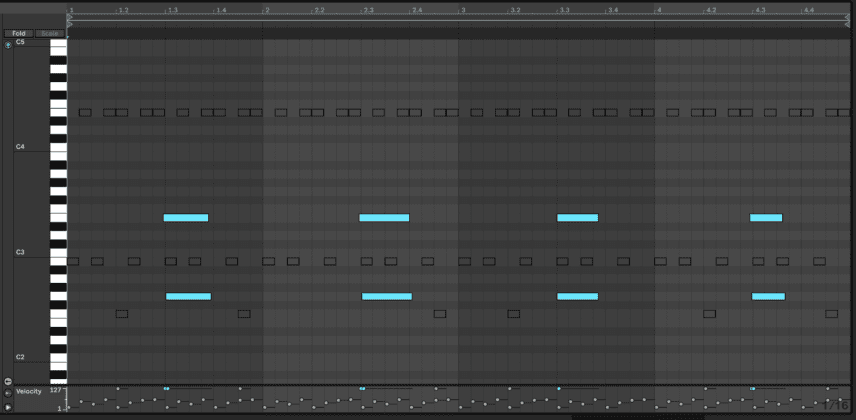
Using one metallic sound and two bongo-style sounds we programmed the following sequence:
As with previous examples, the fact that every single hit has a different velocity plays a huge rhythmic role. Also, note that these parts are actually occupying every single 16th-note in the clip.
The second bongo sound, which plays less often than the first, has the job of creating accents that add interest and syncopation.
To add a more cinematic texture we can also add two snare-style hits that will layer the beat’s hand claps. Here’s how our percussion sounds in solo with these hits added:
Here’s the full beat with all of the percussion and a bass part:
We can also remove the 16th-note metallic hits and bongos and only keep the snare hits, which make the beat sound more dramatic:

