u-he are makers of award-winning software synthesisers and effects including Diva, Repro-1, Zebra2, Hive, Bazille, Presswerk and Satin.
Visit U-he

u-he are makers of award-winning software synthesisers and effects including Diva, Repro-1, Zebra2, Hive, Bazille, Presswerk and Satin.
Visit U-heSynth Secrets is a series of programming tutorials in which we show how to make a range of classic and new synth sounds using plugins such as Massive, Sylenth and Diva.
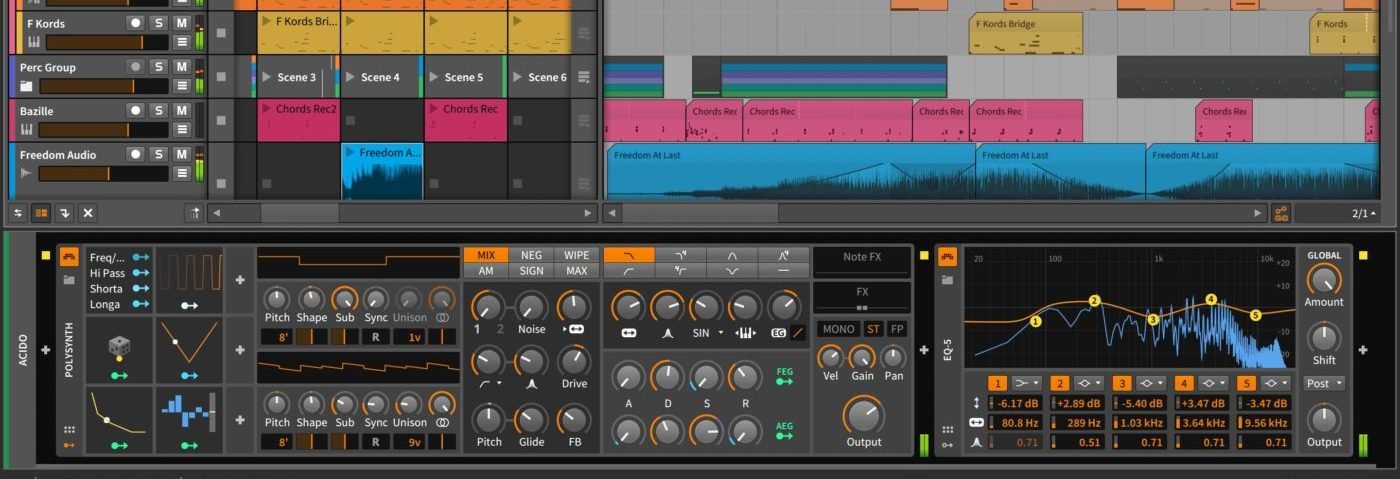
In this Synth Secrets we’ll be recreating this synth sound using Bitwig 2‘s Polysynth:
Audio PlayerWe’ve also used the MIDI pattern blow for our synth part. When you play or program your riff, make sure you add plenty of variation in the velocities, as we have with our hook. Having a mixture of overlapping legato notes and non-overlapping notes will also help to create a more involved and dynamic hook.
We begin by loading up an instance of the Polysynth device. In the oscillator section, we take down the first oscillator two octaves to 8′, then activate the R button to make the oscillator retrigger (for a more consistent tone) and also reduce the oscillator width.
In the right-hand section, we turn the oscillator mix control all the way anti-clockwise to 1 so that we’re only hearing Oscillator 1, then push up the drive slightly and take the glide up to a third of the way.
Audio PlayerNext we apply the filter envelope to the filter by turning up the EG control to three quarters of the way. For the filter envelope generator itself (FEG), we take the decay (D) down slightly. For the amplitude envelope generator (AEG), we bring the attack and sustain down to zero, and also bring down the release slightly.
On the right-hand side, we make the synth mono and activate FP to make the synth glide only on the legato notes that overlap.
Audio PlayerNext, we add a filter by clicking on the + icon you see to the right of Polysynth and navigating to Filter.
We select the low-pass setting, bringing the cutoff right down and setting the resonance to about halfway. In the left section of the Filter device you’ll see three + icons. Clicking in one of these slots allows us to add modulation. We choose Expressions, which allows us to modulate parameters on the filter according to note velocity, release velocity, timbre and pressure.
Clicking on the VEL arrow will cause it to flash; we can then select our modulation destination and click and drag up or down on the parameter to add such modulation (either positively or negatively). We direct velocity to the filter cutoff, adding quite a bit of velocity sensitivity. With the resonance set very high and our riff playing a variety of different velocity values, we get a very dynamic response from the filter and a great bubbly tone, with each not slightly different.
Audio PlayerNext we add another modulator, this time opting for Bitwig’s new sample and hold device. We click on the arrow and direct it to the sample and hold input, then route it to the resonance of the filter, applying medium modulation amounts in both cases.
We set the mode to Free and the Smooth and Input controls to halfway. This add lots of variety to the resonance of the filter, creating a more modulated and evolving feel.
Audio PlayerFinally we add a couple of effects. We begin with a Bit-8 device, bringing the jitter and mix controls down a bit from the default setting. This adds a really nice touch of bit-crushed crunch to the top end of the synth sound.
Next we add Delay-1, setting the delay time to 16ths by using the 2 setting. We take the mix and feedback down for a more subtle effect, adding a really nice rhythmic feel to the bass, with very fast delays sounding in between notes.
Audio Player22nd December, 2017

u-he are makers of award-winning software synthesisers and effects including Diva, Repro-1, Zebra2, Hive, Bazille, Presswerk and Satin.
Download the demos and try them for yourself at www.u-he.com