
u-he are makers of award-winning software synthesisers and effects including Diva, Repro-1, Zebra2, Hive, Bazille, Presswerk and Satin.
Visit U-he

u-he are makers of award-winning software synthesisers and effects including Diva, Repro-1, Zebra2, Hive, Bazille, Presswerk and Satin.
Visit U-heOne of the standout tracks from Daft Punk’s iconic 2001 album, Discovery, ‘Something About Us’ features subtle yet unforgettable synths. Here, we recreate their magic using u-he’s Hive.
In today’s Synth Secrets, we’re doing a rare two-for-one. We’re highlighting the masterful, minimal touch of French pioneers Daft Punk by building the iconic tones of Something About Us from Discovery using u-he’s suite of synthesizers. Part of the allure of the Daft Punk sound is that their sounds are straightforward, allowing the music to take centre stage.
Some of the nuances of the Discovery sound come from the specific gear they used, their well-curated drum samples, and the recorded electric guitar and bass, to be sure, but the rich and versatile engines in u-he’s Hive and Zebra are uniquely capable of getting extremely close to those sounds with a minimum of programming. Here are the two synth sounds we’re building.
So set your DAW to about 102 BPM, and let’s get started. If you want to follow along, you can get free trials for Hive or Zebra.
Arguably the most recognizable sound in this track is the quacky, resonant lead. Let’s build that first. Here’s where we’ll land in a few short steps:
We can make quick work of this using u-he’s Hive. If you don’t already have it, you can grab the demo here.
Plug in the MIDI info you see pictured.
Open Hive and select Init from the preset menu to initialize the patch. Leave the oscillator waveform as-is. The first change we’ll make is to the amp envelope. Lengthen the Attack a touch, reduce the Sustain to zero, and pull Release down a little until you’ve matched the settings pictured below.

Most of this sound’s character comes from the filter. Change Filter 1 from its default Lowpass 24 setting to Bandpass. Pull the cutoff down to about 11 o’clock while boosting the resonance up to about 2 o’clock. Then turn the Mod Env knob up to 2 o’clock as well to get some good filter motion. Move over to the MOD1 section to change the shape of the modulation envelope – we want a long attack, no sustain, and a bit of release. We’re already getting close.

The only thing left is to polish the sound off with some effects. A touch of reverb, a subtle delay, and an EQ with an aggressive push in the high mids get us where we need to be.
That’s literally it!

Our second sound appears around 0:25 on Daft Punk’s original recording, in the third bar after the drums and bass kick in. This one is more nuanced than the first sound we created, and there’s a certain je ne sais quois that’s very tough to pin down, but if we’ve done our homework and know what we’re doing, Hive’s versatile oscillators and responsive filters give us something that we can be quite satisfied with. The MIDI we’re working with for this part is below.
Again, pull up an instance of Hive and initialize the patch. This time we’ll stray from the default sawtooth waveform and use Hive’s rich but approachable wavetable engine to get what we need. In the OSC1 section, select the Wavetable option. Then click on the little carrot that appears just underneath the word Wavetable, on the right side of the section, to open up the Wavetable menu.
Navigate to the section called Simple, and select the Allsorts table. Once set, you can click anywhere on the waveform display and drag up and down to change the wavetable position. As you drag up, you’ll see a small indicator that moves rightward until you hit the last wavetable. Click and drag until that indicator is about 80% of the way across and your waveform looks like a flattened-out letter M.
We still have a long way to go, but here’s the raw material we’re working with.

Moving along to the amp envelope. In the AMP1 section, boost the decay, remove sustain entirely, and nudge the release up the tiniest touch until you’ve got what you see below.
But we’re going to have a duo of envelopes working on amplitude on this patch. Click and drag the crosshairs from MOD1 to the Volume knob in the OSC1 section. This routes modulation envelope 1 to the output level of oscillator 1, of course, and you’ll see that assignment appear automatically in the mod matrix when you click and drag. When the mod matrix appears, grab the first knob on the matrix that corresponds with this new assignment, and turn it all the way to the left. That makes the envelope affect the oscillator’s volume inversely, actually turning it down over time rather than up.
This won’t achieve its intended effect until you set the shape of the envelope as pictured below. Once you’ve done that, you’ll find that you get two hits for the price of one every time you hit a note on your MIDI controller. The mod envelope quickly clamps down on the sound on each note, but opens back up rapidly when you release the note, allowing a tail to sneak through, and this is exactly what we want.

Now we use the filters to get a narrow, focused tone that works just right in context. Change FILTER1 to Bandpass and again we will pull the cutoff down, this time to about 2 o’clock, and boost the resonance to 12 o’clock. Let’s also pull the Mod Env knob down a touch which will do the same thing to the filter cutoff frequency that we did to the volume. It’s almost like an auto-wah effect that you would use on a guitar, which is precisely the vibe we need.
One small but important note here is that you want to turn Filter 1’s volume down to about 50%, because we’re going to layer it with sound routed through Filter 2 in the next step and want to get the mix just right.
Head over to the section labeled FILTER2. There’s an input selector that allows you to choose a variety of signals you can pass through the filter. By default, none are selected and Filter 2 isn’t doing anything at all. We’ll select FILT1 which routes the output of the first filter to the input of Filter 2.
It’s important to note that it’s a parallel mix, meaning that some signal goes directly from the output of Filter 1 to the master; that dry signal is what we turned down at the end of the last step.
Back to Filter 2 – select the Bandpass setting and boost the cutoff and resonance as pictured. We’re getting close.

The sound we’re after has a lot in common with the sound of a palm-muted guitar. It’s a percussive sound so adding some noise can help.
So head to the OSC2 section, change the waveform to White, turn the volume almost all the way down, then head back over to the input selector on Filter 1 and activate OSC2. Now we have a bit of noise moving through the filters too.

Much like our first patch, we’ll give the sound a touch of reverb and delay, some soft clipping distortion, some compression to emphasize the front edge of the sound, and an aggressive mid-boosting EQ that makes it sit just right. Set your FX engine as pictured, and this is where we should land.

Let’s hear the sounds in context with a simple 808 kit from Ableton’s Core Library and a few more patches built from u-he synths.
We’ve definitely captured the spirit. Get the full session to get access to the guitar and Rhodes patches. You’ll be off on a journey of discovery.
If you liked this Synth Secrets you might like our tutorials on Daft Punk Basslines.


Get 3 best-selling music production books. Buy more, spend less.


Get 2 best-selling music production books. Buy more, spend less.


The definitive guide to making techno.


The world-leading book on dance music production. Comes with samples too.


Everything you need to take a mix, from initial recording to final master.


A hilarious tribute to our never-ending battle with file naming chaos.


La guía definitiva para producir música electrónica de vanguardia.


Add texture simple to any sound. Simple an effective.
.


Add controlled yet random fluctuations to your most important parameters


The sound of house music as a big back print now!


Big back print techno inspired t-shirt.


Anti corporate, political, powerful and progressive the power house of Jeff Mills, Robert Hood and "Mad" Mike Banks needs little introduction.
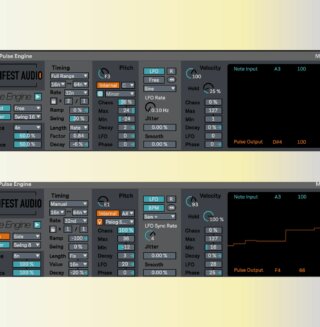


A unique generative MIDI device from Manifest Audio.
5th December, 2024


u-he are makers of award-winning software synthesisers and effects including Diva, Repro-1, Zebra2, Hive, Bazille, Presswerk and Satin.
Download the demos and try them for yourself at www.u-he.com