
u-he are makers of award-winning software synthesisers and effects including Diva, Repro-1, Zebra2, Hive, Bazille, Presswerk and Satin.
Visit U-he

u-he are makers of award-winning software synthesisers and effects including Diva, Repro-1, Zebra2, Hive, Bazille, Presswerk and Satin.
Visit U-heSynth Secrets is a series of programming tutorials in which we show how to make a range of classic and new synth sounds using plugins such as Massive, Sylenth and Diva.
In this Synth Secrets, we’re exploring Serum, the popular wavetable synthesiser. At first glance, a modulation matrix might appear complicated but we’re going to break it down step by step to create a modulating pluck sound suitable for various forms of dance music.
Here’s what we’ll be creating:
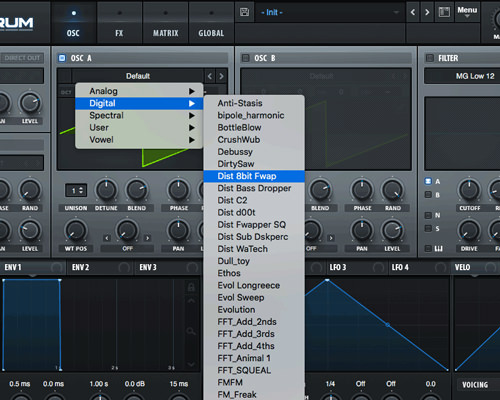
Audio PlayerLet’s begin by opening the synthesiser and loading a new waveform into OSC A. We’ve chosen the Dist 8Bit Fwap wavetable which is found under the Digital subfolder.
In the OSC A section, change the Unison to 4 and reduce the detune to 0.10.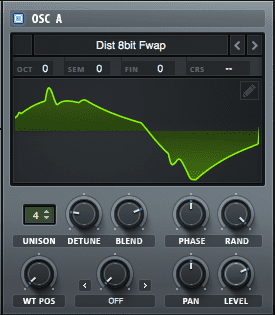
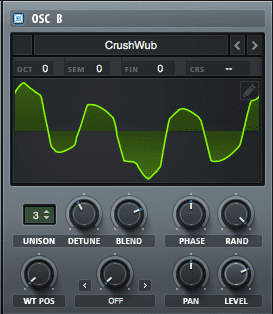
Now move over to OSC B and select the CrushWub wavetable from the Digital subfolder.
Change the Unison to 3 and the Detune to 0.16.
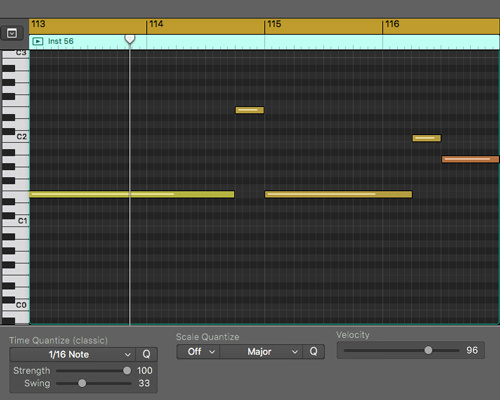
Record a 4 bar sequence so that you can have a repeated loop playing whilst editing the upcoming parameters. This will save you from having to continuously plonk a midi keyboard. We recommend a sustained/legato melody in order for the next step to be effective.
It should now sound like this:
We can now start shaping our sound using the LFO. Click on LFO 1 and start by changing the shape of the blue outline in the dark grid. You can create any shape you would like. We’ve chosen the below.
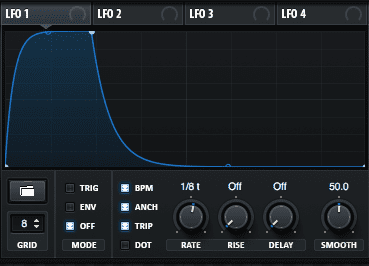
Take note of the new value for the following parameters:
Having a setting of 50 on the SMOOTH parameters ensures there are no clicks when the LFO modulates.
Link the LFO to the Cutoff parameter located in the Filter section by clicking and dragging the cross hairs (located to the left of the LFO 1 text) and letting go once you have reached the Cutoff parameter. You will notice a small light blue outline appears around the Cutoff.
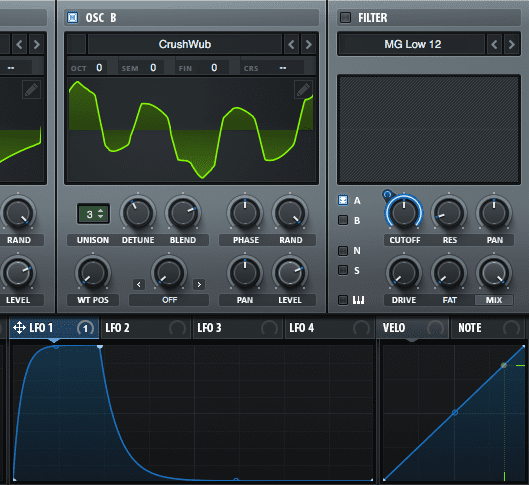
Turn the Filter on and make sure that both A and B are selected. Increase or decrease the amount of modulation by clicking, holding and dragging up or down on the very small blue circle that appears top left to the Cutoff parameter. You will notice the larger light blue line that is surrounding the dial, increase or decrease.
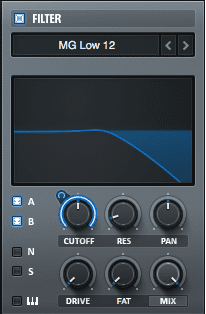
Your sequence should now pulse as LFO. Spend some time editing the LFO shape to your taste and listen to how it affects the modulation of the Cutoff.
Audio Player
Come back to the LFO section and select LFO 2. We are going to keep this simple and leave the shape as is but change the RATE to 1/2.
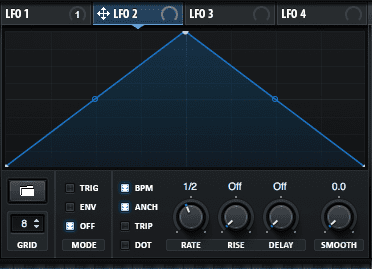
By doing the same as before we are going to route this LFO by clicking, holding and dragging it to the WT POS of both OSC A and B. Notice the light blue circle that appears around the WT POS dials.
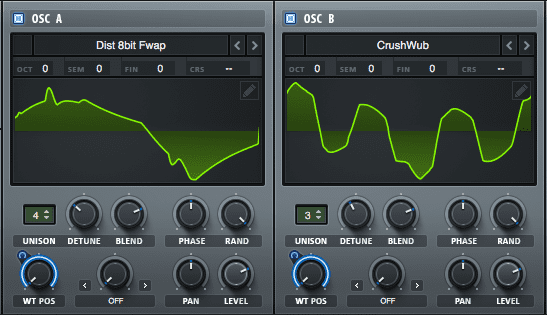
Play back your sequence and listen for a big change that occurs every 1/2 bar (due to the rate we previously set for this LFO). You can also refine the amount of modulation by clicking on the small blue circle located at the top left of the WT POST parameter and dragging up or down.
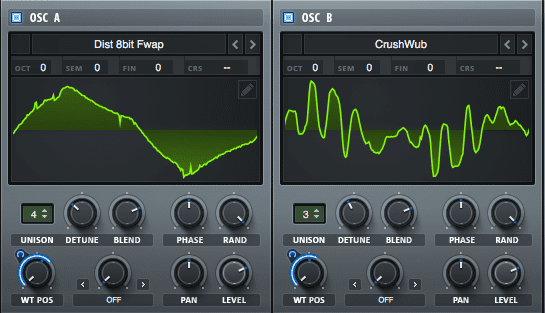
This next LFO modulation is going to be the simplest of them all. We are going to apply a side chain effect internally without the need of any other plugins.
Head over to LFO 3 and set it like the below:
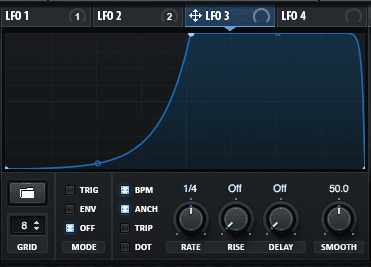
Shape the blue line so that it’s sloping up towards the back of the grid and set Smooth to 50. All other parameters can remain the same.
Click and drag the LFO crosshairs of LF03 to each Level parameter of OSC A and OSC B. Turn the Level dial down to about 26% and the modulation (light blue outline) to 100. Is should now look like this:
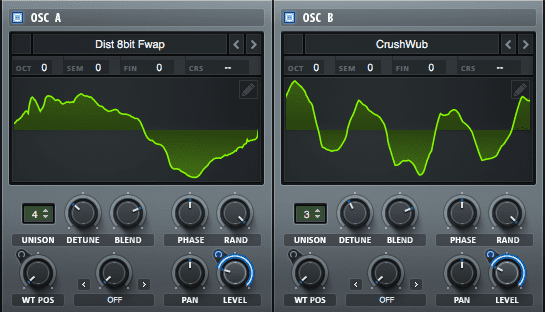
Your LFO 3 should now be giving you a side chain like pumping feel. This will add more dynamic to the pulse.
Audio PlayerAt the top of the Serum window select Matrix.
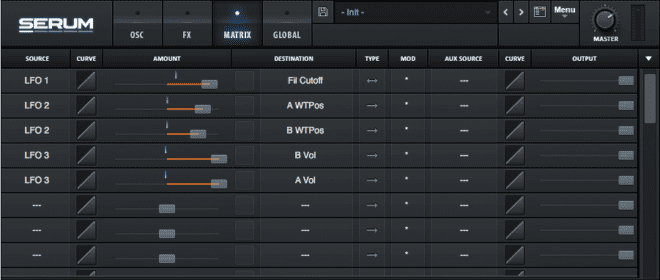
Here we can see our routing from the previous steps, In order to assign an envelope to a specific task it will need to be done in this Matrix menu.
In the Source column underneath LFO 3 click in the empty box and select Env 2. In the Destination column on the same row select FX > Verb Wet. Push the slider between these two selections to the right.
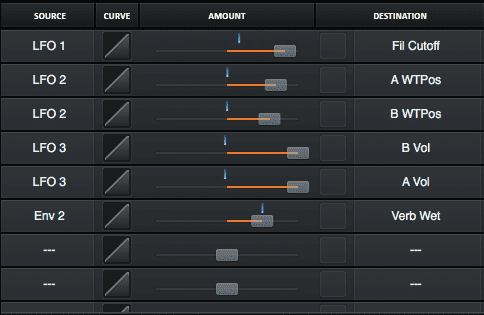
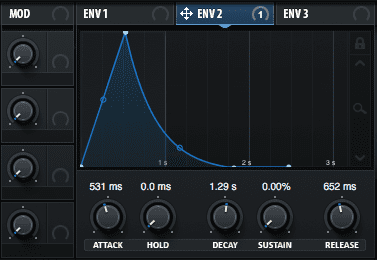
Flick back to the OSC menu at the top of the window. To the left of the LFO section of Serum is the Envelope menu. Envelope 1 controls the amplitude and Envelope 2 has been assigned by us to control the Wet parameter of the reverb which we will be looking at shortly. Go ahead and copy the Env 2 parameters shown below.
Switch to the FX menu at the top and select the Reverb effect on the left-hand side.
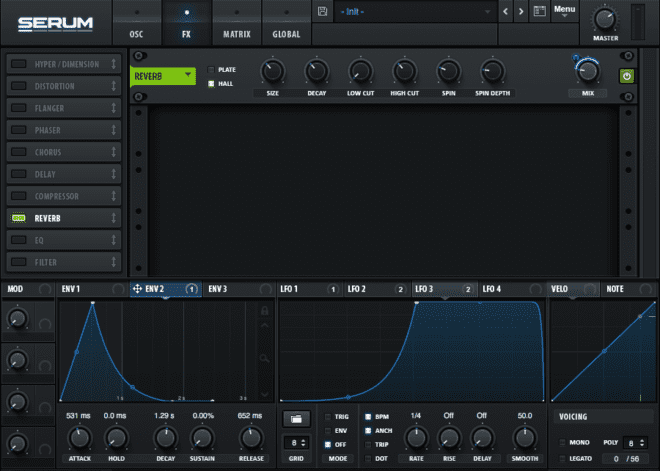
The Reverb effect unit will already have a small blue circle around the Wet dial indicating that the modulation we have set up in the matrix is active. The envelope will now trigger the amount of reverb every time a new note is played in the sequence. We can control how long or how quickly the reverb appears/disappears with the Attack, Decay, Sustain and Release controls in Env 2.
Just like previous steps, adjust the dial itself and the amount of modulation via the small blue circle. We recommend increasing the low cut on the reverb to avoid any unwanted low end coming through.
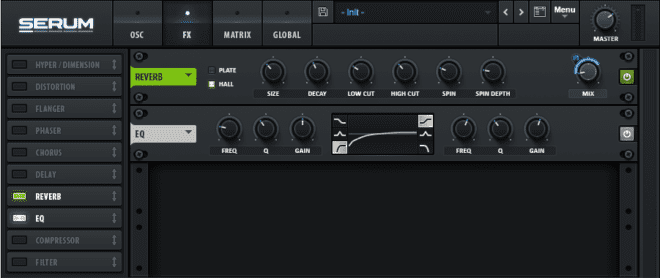
Audio PlayerThe final step is to add an EQ. We’ve added a low cut and a high shelf boost to tame the low frequencies and brighten the highs ever so slightly. Small changes in an EQ are sometimes all you need.
 .
.
It should now sound like this:
Audio Player
5th November, 2018

u-he are makers of award-winning software synthesisers and effects including Diva, Repro-1, Zebra2, Hive, Bazille, Presswerk and Satin.
Download the demos and try them for yourself at www.u-he.com