
u-he are makers of award-winning software synthesisers and effects including Diva, Repro-1, Zebra2, Hive, Bazille, Presswerk and Satin.
Visit U-he

u-he are makers of award-winning software synthesisers and effects including Diva, Repro-1, Zebra2, Hive, Bazille, Presswerk and Satin.
Visit U-heThe sound of the summer. We retrospectively look at the Baddadan horn synth bass that continues to rumble dance floors.
“Baddadan” by Chase & Status is an explosive blend of UK bass and grime, featuring Flowdan, Bou, and IRAH. The track combines intense, gritty beats with hard-hitting lyrics, embodying the raw energy of London’s underground scene. It’s a high-octane anthem that showcases the duo’s signature heavy sound – one that catapulted them to Brit Awards and chart success some 15 years since forming. No mean feat.
Of course, despite enjoying the track as a whole, the synth bass line captures our attention. That fog horn jump-off bass, probably more famous from TikTok these days than anything else, was worth an attempt at replication.
So here we are. We’re using an in house favorite, Zebra 2. You can grab it and follow along for free. But if you’re a Vital or Serum user, you can replicate the process and achieve similar results.
If you like these Synth Secrets, you may enjoy our books The Secrets of Techno Production, The Secrets of Dance Music Production, and The Producer’s Manual.
So set your DAW to 174, draw in this MIDI pattern and Bassline drop, ah tear the whole place down.

Select Init from the very bottom of the preset list to initialize the patch. Then click on the GLOBAL tab and change the MODE setting from poly to retrigger. This is a bass, polyphony has no place here. Now let’s get a simple oscillator stack going.
Leave OSC 1 largely untouched – a simple saw is what we need. The only change to make is to open the MIXER tab on OSC 1 and reduce the volume to 32.
In the main grid, click on an empty cell below OSC1 and add another oscillator – OSC2. Change this oscillator’s Tune value to 7 semitones to pitch it up a perfect fifth. Then, just like we did with the first oscillator, we’ll pull the second oscillator’s volume down to 32.
Our progress so far:

Now let’s add a third oscillator and tune that one up 19 semitones. That’s an octave and a perfect fifth up. This oscillator we’ll crank all the way up – in the MIXER tab turn the volume to max.
And if we’re going to add a third oscillator, it only makes sense to add a fourth oscillator. This one we’ll actually put in the second lane of the main grid, because we want it to remain untouched by the tone shaping and saturation we’ll ultimately put on the first lane. We want a nice, tight fundamental from this one, so add FMO1 to the top cell of lane 2.
Set that oscillator’s volume to 0 – we’ll modulate it with an envelope later to bring it up. And turn the FM knob up to 10 for a subtle edge.

Now it’s time to change the volume contour and make things just a touch more musical. Head over to the ENV 1 module which is hard wired to control the volume of all the oscillators and turn the Release knob to about 40, and you’ll have something like this:
Obviously we have more highs than we would want in a bass. But all those high frequencies give us some rich spectrum to work with. Now we’ll whittle it down and get the thick and tasty bass we want. Add VCF1 to a cell underneath oscillators one through three. Change the mode from LP Xcite to LP Vintage. Then drop the Cutoff down to about 10. Almost close the filter entirely. We’ll open it back up with an envelope generator in a little bit. Turn the Drive knob to about 15. This is what you should hear

Let’s go ahead and add that envelope generator that will control our filter’s cutoff. Add ENV2 to the mix by clicking on the MATRIX tab on the bottom right to access the modulation matrix, and then selecting Env2 from the list of available modulation sources. Like magic, Zebra2 adds another envelope module to the display.
Then click and drag from the Target field to the Cutoff knob on VCF 1 to route the envelope to the filter cutoff.
Then grab the SRC knob in the mod matrix and turn it up to about 70. Then turn ENV 2’s Attack up to about 9 o’clock, a value of around 20. Turn the Sustain knob on envelope 2 down to zero, and pull the Release knob to 12 oclock. Now we’re getting somewhere.

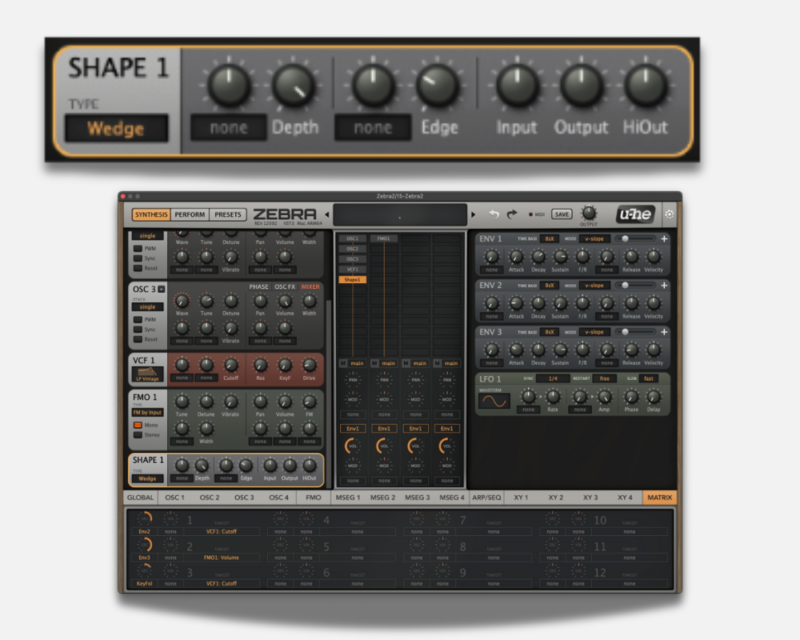
Time to add the dirt. In the main grid, add Shape1 to an empty cell in lane 1. This module is a distortion unit. Change its Type to Wedge, turn the Depth value almost all the way up, and give the Edge knob a value of about 30. Ah, now the bass we’re looking for begins to reveal itself.
Time to do some fine tuning and land this plane. Let’s head back to the mod matrix and use slot 2. We’ll add Env3 as the modulation source, and then we’ll drag the crosshairs to the Volume knob on FMO1, and turn the Src knob to maximum, giving envelope 3 total control over that oscillator’s volume. We want to give that tight FM bass oscillator a bit of a different contour than the rest of the patch – give it a bit of a swell and then a quick dropoff.
Change ENV 3’s Attack value to about 30. Then make sure to turn the Volume knob on FMO 1 down to zero. Otherwise envelope 1 is still in full control of that oscillator’s volume.
For a little more fine tuning, you can use the third slot in the mod matrix. Use KeyFol as the modulation source and have it modulate VCF1’s Cutoff knob. Turn the strength up (using the src knob) to about 35. Now, when you play lower notes, the filter will remain tightly closed, but it will open up as you move to higher notes. Where we stand at this point:
Now let’s hit the GLOBAL tab to make the FX grid visible. By default there’s a ModFX1 in slot 1. Right click on it and remove it. Replace it with EQ1 and give it a slight cut at about 225 Hz and a slight boost at about 3k. That removes some flub and adds some cut.
A little extra from Ableton Drum Bus, saturator, and limiter – and we’re ready for prime time (not the drink).
We’ve got a greasy, mid-rangey Reese bass that coexists nicely with a punchy kick and a constant sub bass element:


If you like this article you may enjoy the whole Synth Secrets series.
You may also enjoy reading our interview with Flowdan from 2023, in which we speak to him about his Rumble success and ‘overnight success’ despite being a mainstay for many years.


Get 3 best-selling music production books. Buy more, spend less.


Get 2 best-selling music production books. Buy more, spend less.



The definitive guide to making techno.



The world-leading book on dance music production. Comes with samples too.


Everything you need to take a mix, from initial recording to final master.


A hilarious tribute to our never-ending battle with file naming chaos.


La guía definitiva para producir música electrónica de vanguardia.
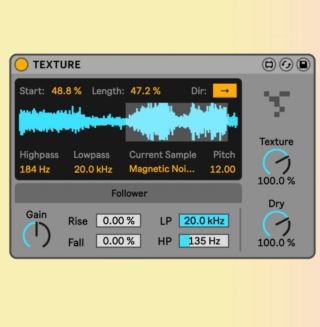


Add texture simple to any sound. Simple an effective.
.


Add controlled yet random fluctuations to your most important parameters


The sound of house music as a big back print now!


Big back print techno inspired t-shirt.


Anti corporate, political, powerful and progressive the power house of Jeff Mills, Robert Hood and "Mad" Mike Banks needs little introduction.


A unique generative MIDI device from Manifest Audio.
5th November, 2024


u-he are makers of award-winning software synthesisers and effects including Diva, Repro-1, Zebra2, Hive, Bazille, Presswerk and Satin.
Download the demos and try them for yourself at www.u-he.com