Our mix expert Bruce Aisher explains how to use this clever compression trick to add serious weight to drums and more.
Dynamic compression comes in all manner of flavours, though it is most commonly associated with the regular broadband (full frequency range) variety of compressor – whether hardware or software. The basic compressors in most DAWs tend to look pretty similar. Here’s Cubase’s example:
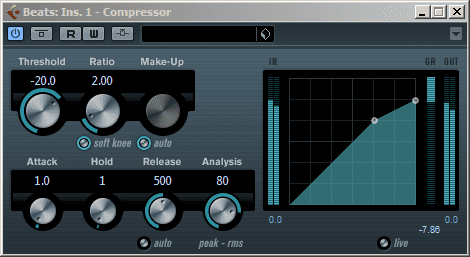
In this guise – and in very basic terms – if the input signal level goes above a given threshold, the output signal will be reduced (attenuated). The speed and amount by which the output is attenuated are determined by the compressor design and adjustable settings such as ratio, attack and release.
Here we can compare the same drum pattern dry:
Audio PlayerAnd then with moderate broadband compression:
Audio PlayerAs you would expect, this is called downward compression, as the resulting signal is pushed down in level – effectively making the louder elements quieter, whilst leaving the quite bits untouched.
New York, New York
There is also such as technique as upward compression, where the opposite happens – the quieter bits are brought up in level, whilst the other elements stay the same. The most common technique is known as parallel compression, due to the way in which it is achieved.
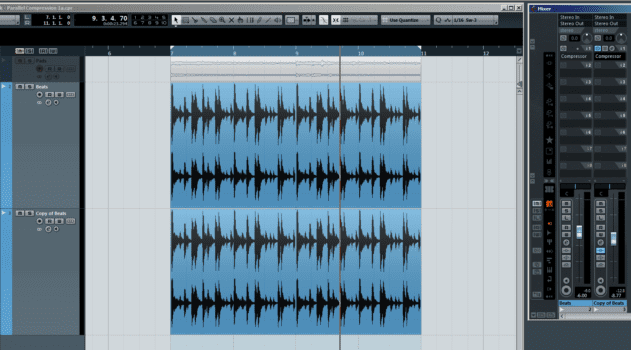
Whilst the term upward compression somehow sounds counter-intuitive it is quite easy to achieve – simply blend a compressed signal with an uncompressed version of the same thing (hence the name ‘parallel’, as the two signals are processed separately and then mixed back together). The easiest way to do this is in a DAW is to duplicate the track in question…
…or to route a track to a bus onto which compression is applied.
Parallel compression (sometimes called New York compression due to its popularity with New York mix engineers), is a great way of achieving a subtle dynamic lift, and is far less noticeable in action when compared to its ‘downward’ cousin. Parallel compression can be used on a variety of sounds, but it’s probably most popular on drums.
Let’s compare the same drum loop using parallel compression. First off, here’s the very heavily compressed copy of the signal:
Audio PlayerAnd here’s how it sounds when mixed back in with the original:
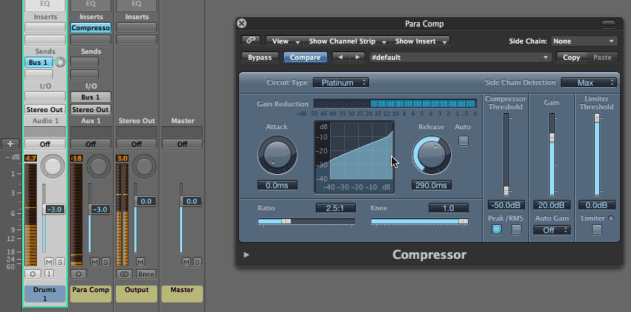
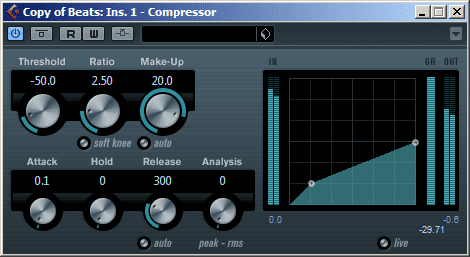
Audio PlayerFor a more transparent effect the compressor element of the signal chain should be set with a very low threshold, to give almost continuous gain reduction. Attack time should be as fast as possible and with a medium release (about 300 ms). Ratios of around 2.5:1 tend to work well, but you can experiment in each direction for a more subtle or dramatic effect. If you have the choice, set the compressor to ‘peak’ mode (as opposed to ‘RMS’). Gain make-up is a matter of taste, as this determines how much of this compressed signal gets mixed with the original version. On its own it will sound very, very squashed!
Here’s Cubase’s compressor set up for heavy parallel compression (note that the compression ratio is just 2.5:1, but the gain reduction is still huge – nearly 30 dB – because of the very low threshold setting).
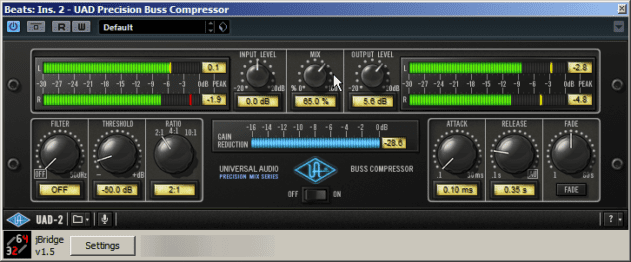
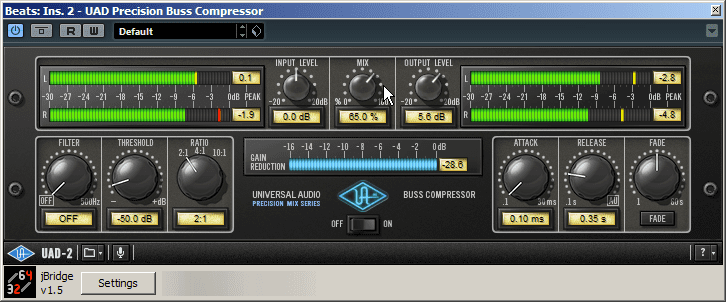
Some plugins even have parallel compression capabilities built-in – in fact, all this requires is an integrated mix amount control, as seen in the UAD Precision Buss Compressor:
