In this tutorial we’re going to explore how we can slice separate drum breaks, program, process and layer them for use in techno.
Over the summer one of our favourite tracks has been Double Slap by ROBPM. Despite having much to admire throughout, it was the use of drum breaks in the breakdown that really caught our attention. We wanted to explore how this can be done.
We all know that using breaks is nothing new. In fact, there’s very little left to say about The Amen Break for example, so we’ll spare you the usual flowery language about how many gazillion times it has been used and how the creators were left incredibly shortchanged that is until Richard Spencer its creator was funded by a GoFundMe campaign many years later. Whilst the techniques of chopping breaks have been around for decades, new software makes it easier than ever to do, while also being able to push the boundaries.
We’ll be utilising Ableton’s Simpler for this walkthrough. If you’re not on Ableton, worry not as your DAW’s native sampler will feature a slice function so you can follow along. Just copy our grid into your own software to recreate the loop. To use the same one shots you can download the samples that we used.Here’s the audio of the loop we’ve created. We’ve added in a four-to-the-floor kick drum for reference:
Audio PlayerSpec
Tempo
130bpmSwing
MPC 8 Swing-53Sounds
Vintage Drum Breaks samplesStep 1
To get going we source the first of two breaks we’ll be using for this walkthrough.
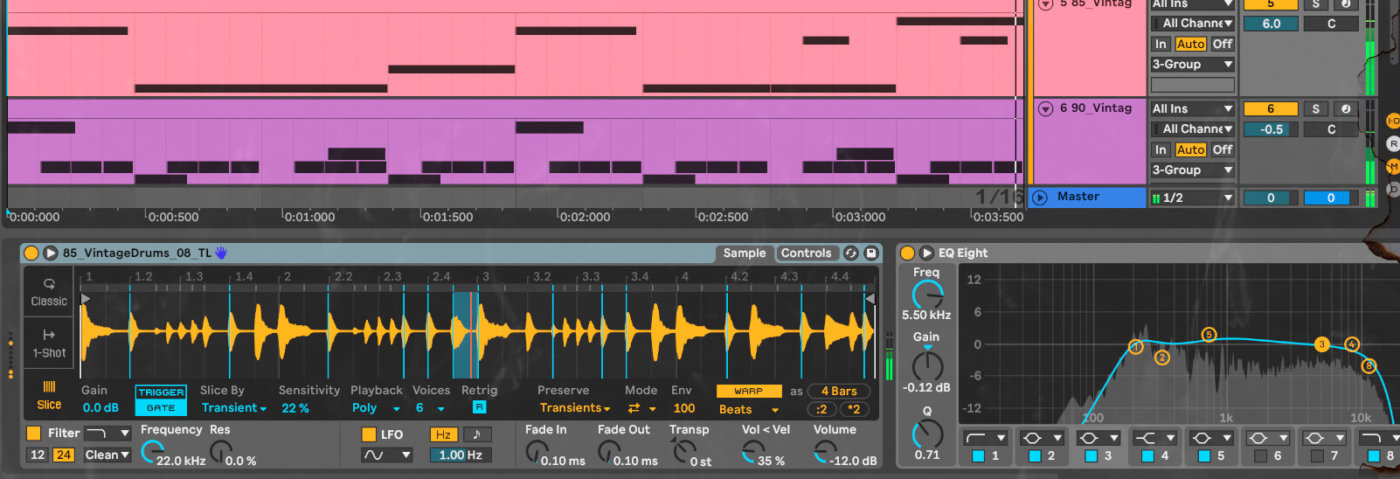
Taking ’85_VintageDrums_08_TL’ from the ‘Vintage Drum Breaks’ sample pack by Touch Loops, we drag this break into a new Simpler device. From there, select the Slicing Playback Mode, which will place slice markers in the sample from which we can then use incoming MIDI notes to trigger those slices.
The default Slicing Mode is Transient, which works perfectly for our needs. However, as the Sensitivity is set to 100%, Simpler has sliced the break at every transient. This would be fine if you wanted to trigger each individual hit, but to retain some of the ‘live’ feel of the original break it will work better to dial down the Sensitivity. We set it to 22%, which slices the break into fourteen new slices. These slices are automatically assigned to MIDI keys C1 upwards.
The original break is at 85bpm tempo (as suggested with the ’85’ in the file name):

Step 2
Simpler will still play the Slices back at the original tempo of 85bpm.
To workaround this, turn on Warp so the sample is time-stretched to playback at our project tempo of 130bpm. We change the Trigger Mode to Gate meaning each slice will only play for the length of the MIDI note which means we can create tighter, neater chops as we have greater control over their duration. We’ve also set the Playback Mode to Poly, so we can trigger multiple slices simultaneously.
The sample Warped to 130bpm will sound like:
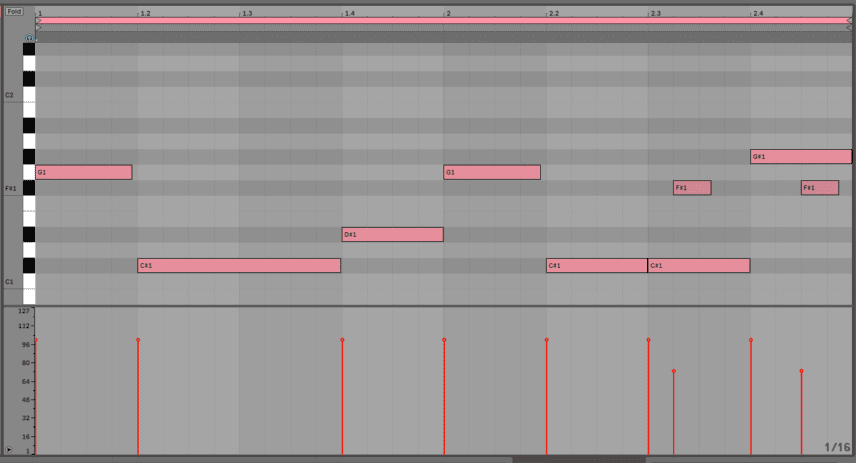
Audio PlayerWe proceed to programme a two bar MIDI clip to trigger the slices and rearrange them as we wish. This is the fun bit.
We leave the first bar untouched but for the second bar we add a double hit on the C#1 slice and use the F#1 slice (which is the drum flam) to add some drum fills. We also drop the velocity of the drum flams, so they don’t pop out of the mix quite so much.x
Audio Player
Step 3
To help the break to sit better alongside our big and boomy techno kick we need to apply some processing.
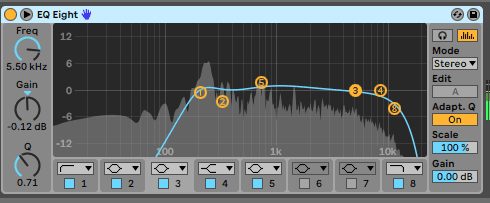
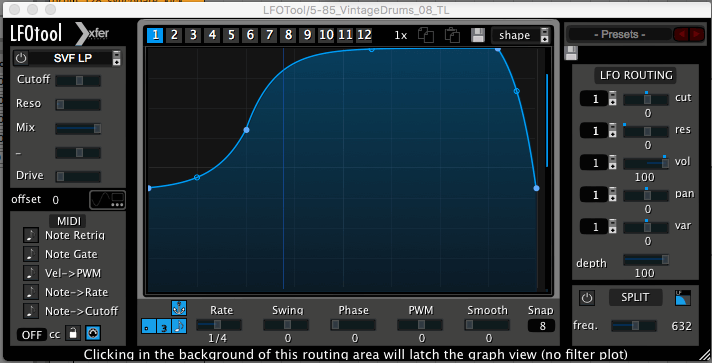
Load up an EQ Eight, sweep away the low frequencies and some of the higher frequencies but push the midrange slightly. Next add in a Transient Master, and reduce the Attack down to -31.0%. Finally insert LFO Tool which helps the break to ducking on the kick drums. This is sidechaining and there’s many ways you can do this.
Audio Player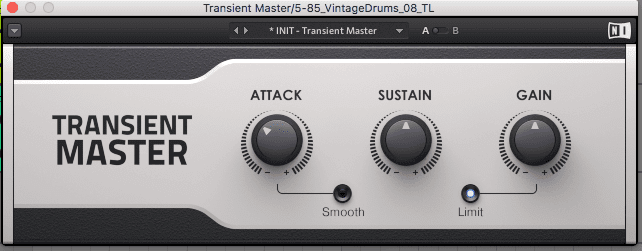
Step 4
We now have the first break as we want it so let’s move on to the second break.
We take ’90_VintageDrums_47_TL’ again from the ‘Vintage Drum Breaks’ pack (free download at the beginning of this tutorial).
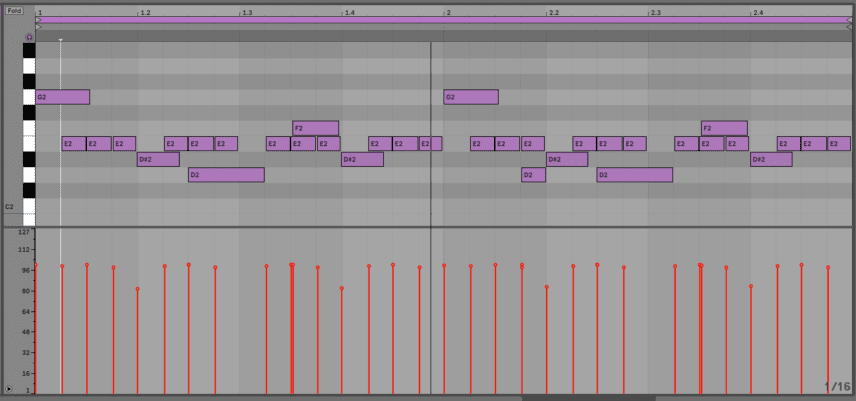
Dropping this new audio file straight into a new Simpler device. All the steps we applied for our previous Simpler we can duplicate here but the only difference this time is we set the Sensitivity to 82%. Adding an open hat to the start of each bar, we programme a 16th pattern (of sorts!), adding snares on the upbeats as well as a few tom hits.
Original Tempo at 90bpm:
Audio PlayerWarped to 130bpm:
Audio PlayerChanging the sequence and played back at the project tempo 130bpm:
Audio Player
Step 5
And so to the processing for the second break!
We add another EQ, once again going for a ‘lo-fi’ feel, by sweeping away the higher and lower frequencies. Then we add a Compressor, applying around -7db of gain reduction, which adds a nice intensity, especially on the hi-hats.
Audio PlayerHere’s how both breaks sound layerd and played back together:
Audio Player
Step 6
And for a final flourish some group processing. We group both breaks together along with our kick drum. Adding Ableton’s Drum Buss plug-in, we increase the Drive for some attitude, add some Crunch for a dirtier vibe and also a touch of Boom and Transients. After the Drum Buss, we add an EQ with a High Shelf adding a little bit of ‘air’ to brighten up the tops.
Audio PlayerAnd here is out final result played back with our kick drum:
Audio Player
