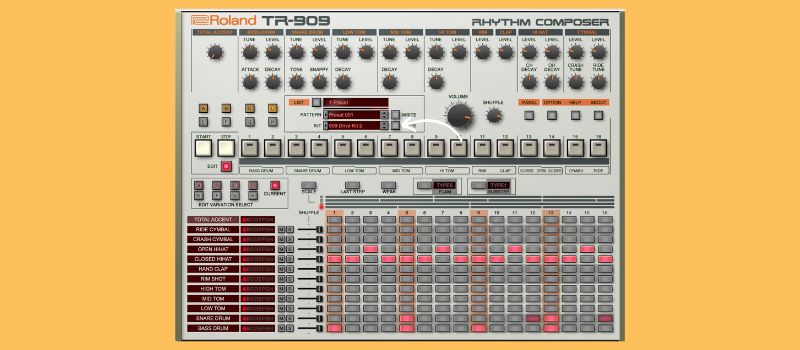
If an original TR-909 unit is out of your price range, Roland’s digital recreation, available through Roland Cloud, offers an impressively accurate alternative. This walkthrough aims to help you get started programming techno drums using the TR-909.
The Briefest of Brief Histories of the TR-909
The TR-909 from Roland, released in 1983, is a seminal drum machine that profoundly influenced techno music. Despite not catching fire immediately with producers, it soon gained prominence in the mid-1980s in particular with Detroit’s techno pioneers and forefathers such as Juan Atkins and Kevin Saunderson. Its punchy bass drum, crisp hi-hats, and versatile sequencer became essential in crafting the driving beats of techno. Only a few pieces of gear become icons, but there is no doubt the TR-909 has had as big an impact on electronic music as the Fender Strat or Gibson Les Paul in rock music.
Fast forward to 2024, and Roland provides a digital emulation in Roland Cloud. You no longer need a physical unit. While there have been many emulations of the 909, the one available in Roland Cloud is the only one from the original makers themselves.
If using sequencers is daunting and you’re just starting out, then this tutorial is for you. We’ll cover some of the most common questions that a new producer faces and help you get your first four-bar loop out of the device.
Skill level: Beginners
Note: This tutorial uses key commands for Mac OS. Sorry to any Windows users!
Step 1: It pays to set up right
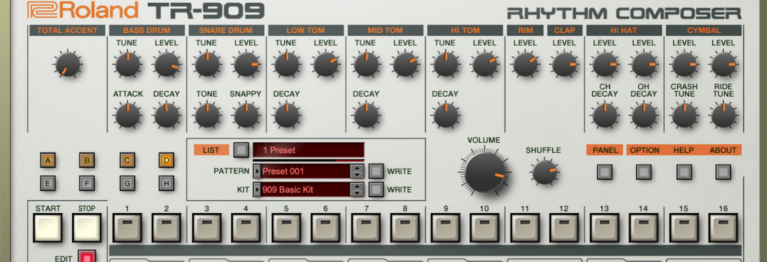
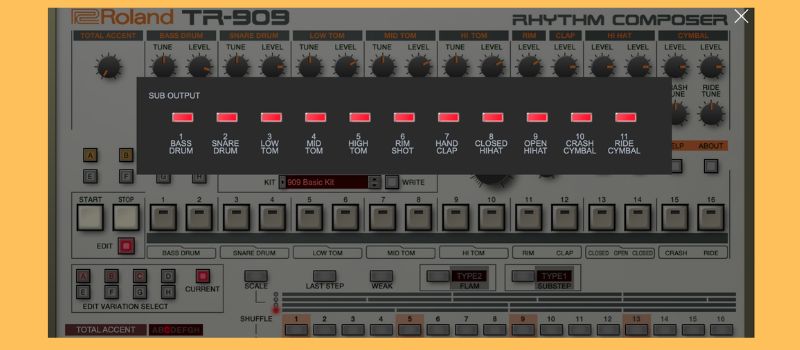
Open the TR-909, and before we do anything, we want to set ourselves up for success. Click OPTION, and in the dropdown menu, click Sub Output. A floating window will appear showing all the different instruments, from BASS DRUM to CYMBAL. Toggle them all on.
At this point, different DAWs will handle things slightly differently. For our purposes, we’re working with Ableton Live. Create a new audio track, and under Audio From, select the TR-909. In the dropdown window below Audio From, where it says All Outputs, select Sub Output 1 – TR-909. That’s your bass drum. Repeat this process until the cymbal.
What we’re doing is making the instrument a multi-out which allows us to treat each sound individually. This matters as it gives us greater control when mixing. You don’t have to do this; hell, you don’t have to do anything, but it really helps later when you come to mix your track.
Now group all these tracks together by highlighting them and hitting command G. Also, save the group by dragging them into your user library. When you next want a TR-909, just load this up, and all your settings will be saved. Great workflow flex.

In the device’s default setting, you should now hear this two-bar pattern when you hit play. It’s variation A (one-bar) followed by B (one-bar):
Step 2: First Steps In Programming The TR-909 & Adding Variations
We’ll avoid getting too involved with the instrument at this stage and instead lead you to a place where you feel more in control. Learning how to get it to conform to your wishes can be a little complicated your first time using it, so we’ll address the usual common concerns.
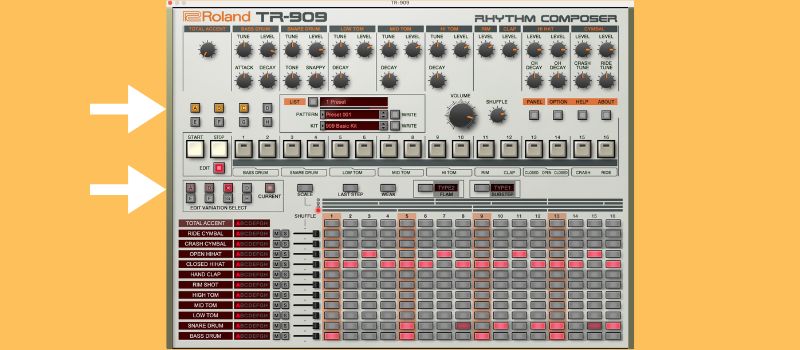
You’ll notice that A and B are illuminated yellow and that A is flashing/blinking. What that tells us is variation A is playing, and when it’s finished, variation B will play. Hit play and notice when B plays, it flashes, and A stays illuminated. In other words, whichever is flashing is the one playing. Both variations, A and B, are playing a one-bar loop, and the difference between them is extra snare hits in B. Combining A and B to play consecutively gives us a two-bar pattern.
But what if we want to add a new variation? Let’s say we want to add a variation to C? Easy. Hold shift and hit the C button, and the plugin window will show an empty sequencer. There are no sounds, and nothing is programmed (yet). Let’s, therefore, make life easy. Where you see on the left, EDIT VARIATION SELECT, right-click on B, select Copy, click on C, and right-click Paste. We’ve now duplicated the variation in B onto C.
Now, our drum loop is three bars long—it’s variation A (one bar), followed by variation B (one bar) and variation C (one bar).
Step 3: Editing Variation C
We know what you’re thinking – B and C are the same. So, let’s make C different with some programming.
We only want to work on C, so head to the variation selector (not the EDIT VARIATION SELECT) and while holding shift, hit A and B. They should turn a dark yellow. This tells us if there are notes in the variation but they won’t play – that variation is not in our pattern until we turn it back on.
Now, only C should be flashing, and if you hit play variation C, a one-bar sequence, will loop. In EDIT VARIATION SELECT, select C so we can see the notes and sequence in front of us.
Now for the fun part. We have edited C, and in this audio clip below, we’ve looped it for two bars for reference purposes:
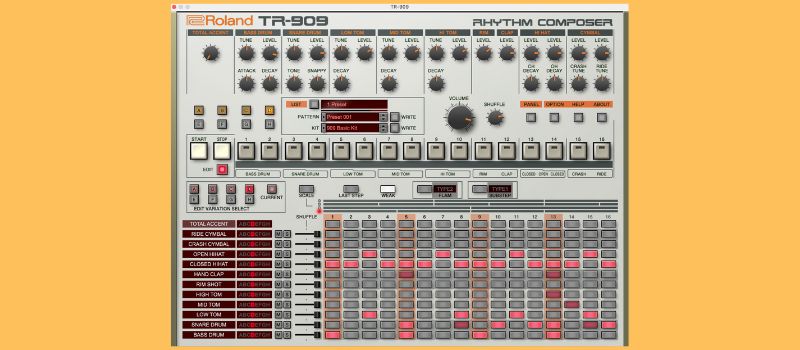
Here’s how the pattern looks on the interface:
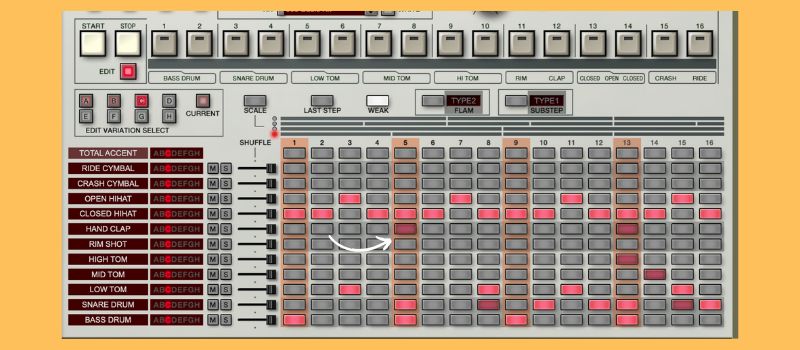
So what did we do, and why are some steps/cells lighter than others?
For the HAND CLAP, we programmed it to play on steps 5 and 13, the 2nd and 4th beats of the bar. But we felt it was too prominent, so we clicked WEAK, which programs the cell at less velocity. Steps with WEAK notes are darker/dimmer than those without.
We kept the WEAK setting toggled on and programmed a HIGH TOM, a MID TOM at the end of the bar. To emphasize the difference, we’ve also programmed a LOW TOM but notice that the steps are at their brightest. We turned off WEAK for that as we wanted the LOW TOM to be powerful.
It’s all very simple once you grasp what you’re looking at and ‘what does what.’
💡Velocity. In music programming, velocity refers to the speed or force with which a note is played. It is a measure of how hard or softly a key on a keyboard is pressed or how forcefully a drum pad is hit. Higher velocity values generally result in louder sounds, while lower values produce quieter sounds. Velocity is incredibly important for programming drum patterns that have a human or organic feel to them.
Step 4: Adding Pattern D, Hi-Hat Rolls & Snare Flam
Electronic music is loop-based, but three-bar loops are fairly uncommon. We ideally want a four-bar loop, so let’s bring variation D into play. Follow the steps above to turn on D and copy C to D. It should look like this below, D should be flashing while A, B, and C should be dark yellow (or turned off).
After some programming, here’s variation D looped over two bars, as in the previous step, for reference purposes:
And here is how D now looks in the interface.
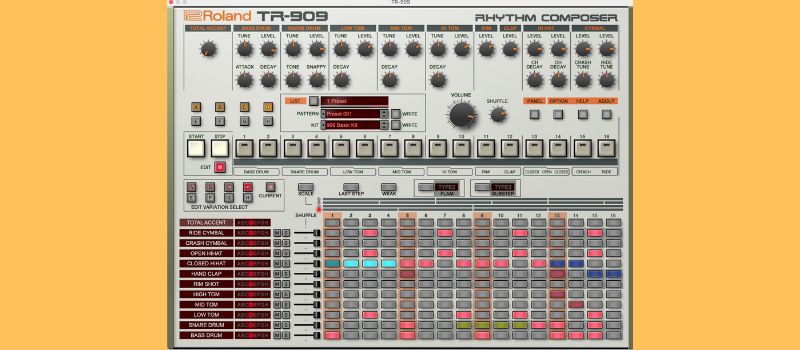
So what did we change, and what do all the colours mean?
Let’s begin with the CLOSED-HI HAT. The first four steps are light blue. This shows that we have programmed using substeps. In other words, instead of programming in 1/16th notes, we are programming in 1/32, 1/64, or more.
This lighter turquoise blue is Type 1 SUBSTEP. To replicate it, click the button next to SUBSTEP above the sequencer and select TYPE 1. Now, program your steps. Also, notice that the first step is the same lighter turquoise blue but a shade darker. That’s because that step was also inputted with WEAK enabled which was covered earlier with the HAND CLAP.
At the end of the bar, the CLOSED HIHAT is a darker blue. This is a different type of substep. Head back to substep, change the type to Type 3, and input your steps. You should also notice we programmed substeps on the clap for the last two steps. This is classic techno, classic Jeff Mills, and Kink techniques.
Next up, we wanted to show the flam feature. A snare flam is a drumming technique where two nearly simultaneous hits are played on the snare drum, creating a distinctive “flam” sound. This is achieved by striking the drum with both drumsticks, with one stick hitting just slightly before the other. The result is a quick, double-hit that is perceived as a single, fuller sound with a brief, barely discernible delay between the two strikes. Like hi-hat rolls and velocity (WEAK) settings, using flam can make a big difference between a static beat and a human-sounding beat.
There are nine different flam settings. Choose one and program it on your snare. We’ve also used SHIFT to program them in as WEAK to lower them in the mix and blend them into our pattern. Don’t be afraid to try flam on other instruments and sounds, but the snare is a great place and the most common starting point.
We have added flam to the SNARE DRUM on beats 8, 9, 10, 12. Flam is usually yellow, but as we have programmed them with WEAK enabled, they are a mustard green.
Lastly, we added a ride cymbal on every off-beat.
💡Top tip: To speed up inputting WEAK steps, simply hold SHIFT while selecting the step and it will automatically switch to programming in a WEAK velocity setting.
Step 5: Using your four-bar pattern
Now that we have A, B, C, and D where we want them, you have two options. You can head back to your variation selector and click shift on each, and the instrument will play through the pattern in variation sequence A-B-C-D. If you want to hear what it might sound like jumping between variations, use shift to turn off a variation. For example, hit shift on B and D, and your pattern will only play A and C in sequence.
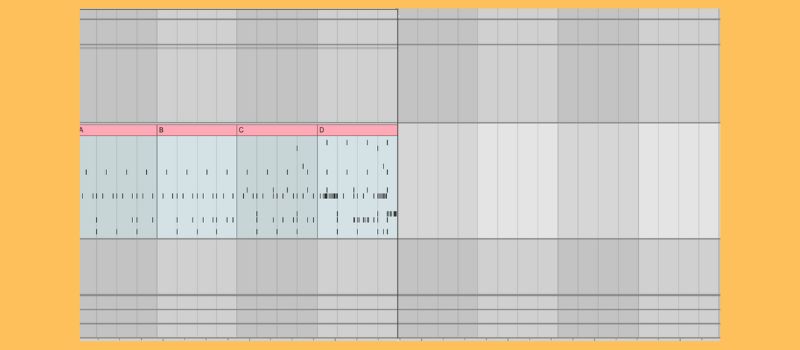
But you can also hover over a variation, for example, A, and drag it to your DAW timeline. In the clip below, we’ve done it in order A, B, C, and D to show our new four-bar loop.
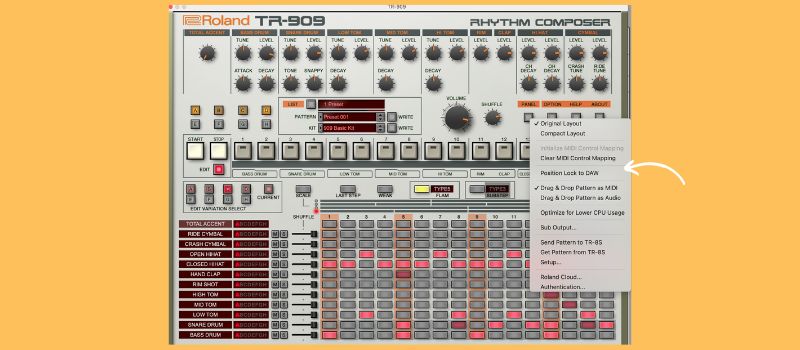
Now make sure to select OPTION and turn off Position Lock to DAW. This means it will only play back the MIDI in your timeline and not the sequencer on the TR-909. You don’t need two of the same thing playing!
And here’s our full four-bar pattern. You should be able to hear the programming we did in variations C and D.
STEP 6: Choose a Kit Sound
Now change the KIT to get a different sound. We like 909 Drive Kit 3. This toggles between saved settings for the mixer controls on the instrument. Going through them gives you an indication of how sounds can be tweaked before applying anything else, like reverbs, compressors, or EQs. You can used saved settings or tweak the individual sounds yourself.
And here’s the final pattern with a TB-303 line, also from Roland Cloud, programmed in for some context.
If you have any questions about using the TR-909 or if you find yourself stuck, use the contact form to get in touch.
If this helped you get started, you may enjoy watching Kink’s drum programming masterclass from ADE 2022.
Follow Attack Magazine
Attack Store


